PhotoshopCS5教程:使用通道抠出飞扬的美女头发(3)
文章来源于 Tlvi.net,感谢作者 腾龙视觉 给我们带来经精彩的文章!设计教程/PS教程/抠图教程2010-05-28
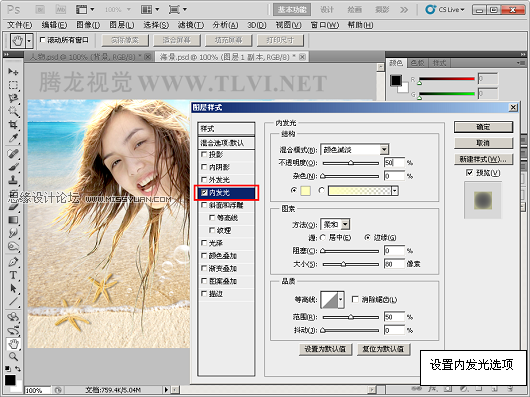
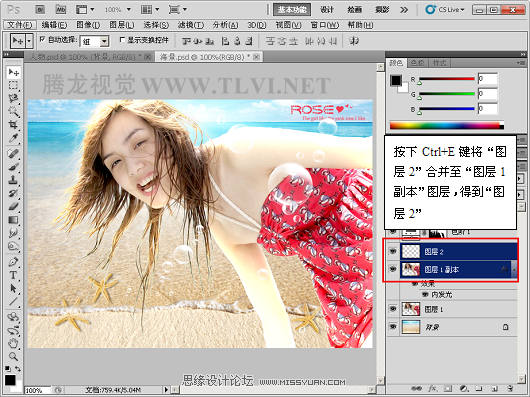
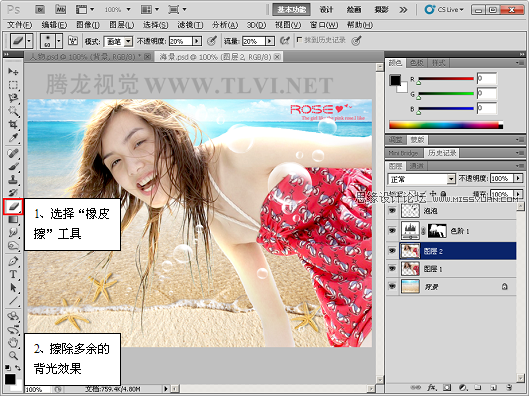
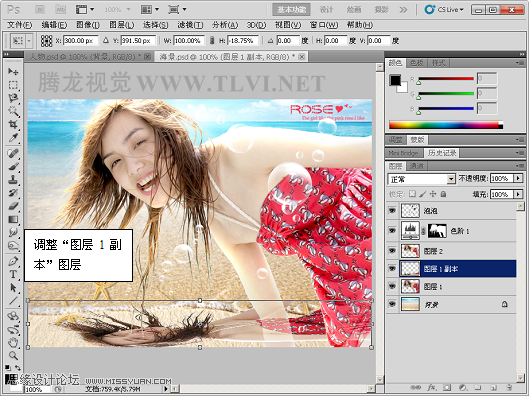
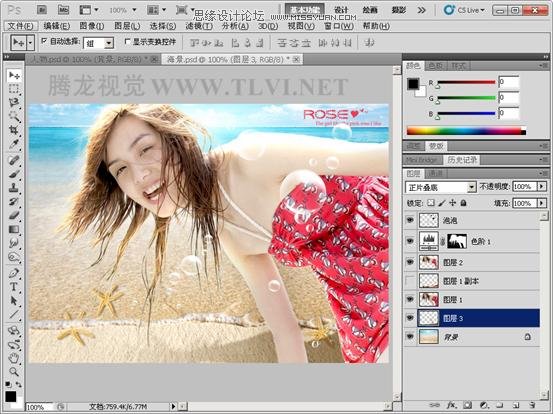
(11)将图层1复制,执行图层图层样式内发光命令,添加内发光效果。制作出强烈的背光效果。 (12)在图层调板中新建图层2,与图层1副本合并。 (13)选择橡皮擦工具,擦除多余的背光效果。 (14)复制图层1图层,执行编辑自
 情非得已
情非得已
推荐文章
-
 Photoshop使用通道工具抠出可爱的狗狗2020-03-15
-
 Photoshop使用通道工具抠出逆光美女2020-03-08
-
 抠图教程:详解5种PS经典的抠图方法2019-08-29
-
 Photoshop巧用通道超精细的抠儿童头发丝教程2015-05-20
-
 Photoshop完美抠出穿婚纱的新娘照片2013-11-07
-
 Photoshop使用通道混合器给狗狗抠图2012-10-25
-
 Photoshop给头发蓬松的孩子抠图并合成2012-06-19
-
 Photoshop给白色婚纱抠图并合成到风景照中2012-06-14
-
 Photoshop详细讲解钢笔工具在抠图中的使用2011-08-30
-
 Photoshop抠图教程:抠出飘逸长发美女2011-03-30
热门文章
-
 Photoshop快速抠出卷发的美女人像2021-03-04
-
Photoshop快速抠出卷发的美女人像
相关文章1722021-03-04
-
 Photoshop使用通道工具给美女抠图
相关文章47892020-03-19
Photoshop使用通道工具给美女抠图
相关文章47892020-03-19
-
 Photoshop使用钢笔工具抠出母子人像
相关文章10852020-03-10
Photoshop使用钢笔工具抠出母子人像
相关文章10852020-03-10
-
Photoshop使用通道工具抠出逆光美女
相关文章9512020-03-08
-
 Photoshop抠出带着草帽喝水的美女
相关文章10682020-03-06
Photoshop抠出带着草帽喝水的美女
相关文章10682020-03-06
-
 头发抠图:用PS快速的抠出人像头发
相关文章15692019-12-26
头发抠图:用PS快速的抠出人像头发
相关文章15692019-12-26
-
 通道抠图:用PS通道抠出多卷发的美女
相关文章13042019-12-24
通道抠图:用PS通道抠出多卷发的美女
相关文章13042019-12-24
-
 抠图教程:用PS抠出复杂环境中的头发丝
相关文章24862019-07-16
抠图教程:用PS抠出复杂环境中的头发丝
相关文章24862019-07-16
