Photoshop磨皮教程:计算通道法给人物磨皮(3)
文章来源于 红动中国,感谢作者 引号 给我们带来经精彩的文章!设计教程/PS教程/照片处理2010-07-05
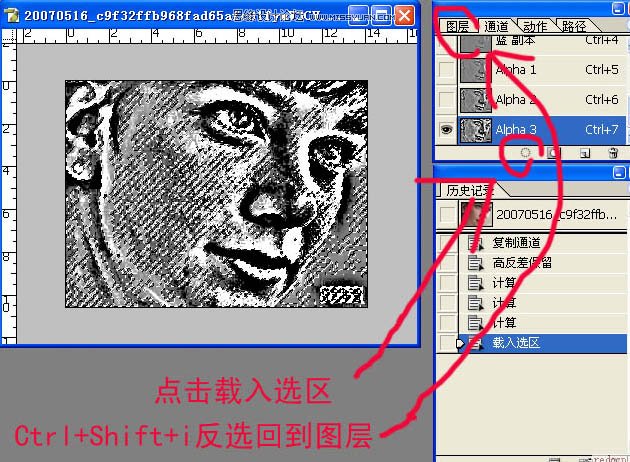
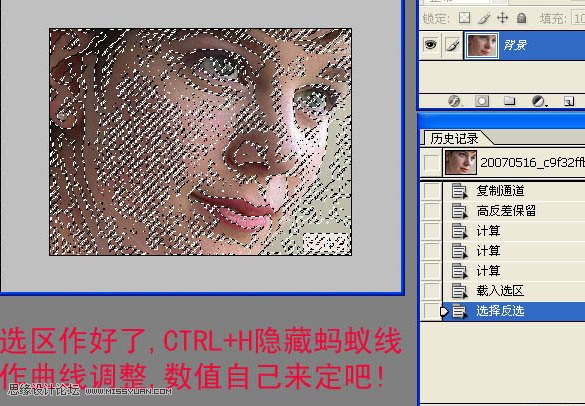
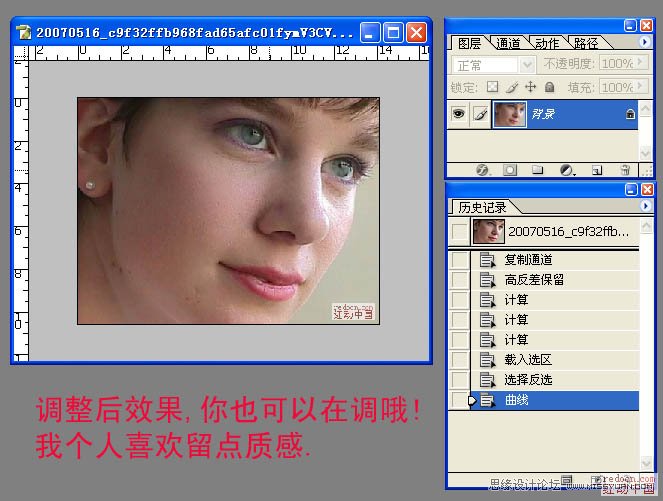
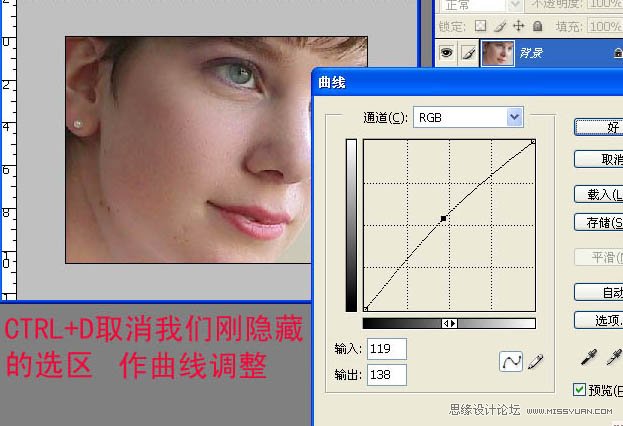
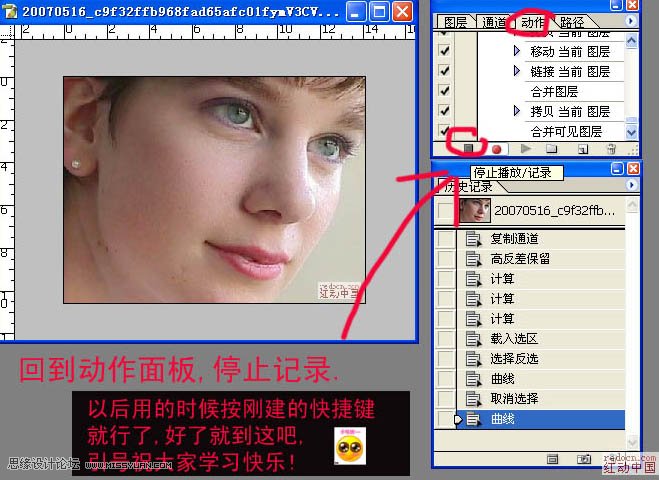
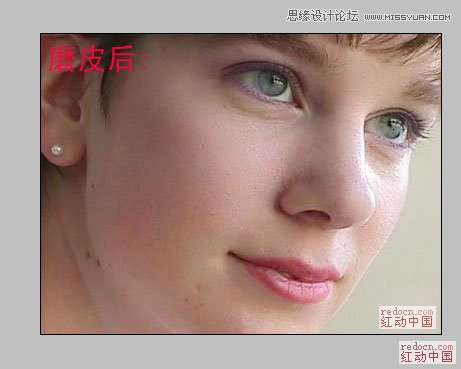
10、点面板下面的小圆圈载入选区,按Ctrl + Shift + I 反选选区。 11、回到图层面板,按Ctrl + H 隐藏选区,按Ctrl + M 调整曲线,稍微调白一点,可以多调几次,自己满意为止。 12、按Ctrl + D 取消隐藏的选区,按C
 情非得已
情非得已
推荐文章
-
 Photoshop制作唯美可爱的女生头像照片2020-03-17
-
 Photoshop快速给人物添加火焰燃烧效果2020-03-12
-
 Photoshop调出人物写真甜美通透艺术效果2020-03-06
-
 Photoshop保留质感修出古铜色人像皮肤2020-03-06
-
 Photoshop制作模特人像柔润的头发效果2020-03-04
-
 古风效果:用PS调出外景人像中国风意境效果2019-11-08
-
 插画效果:用PS把风景照片转插画效果2019-10-21
-
 胶片效果:用PS调出人像复古胶片效果2019-08-02
-
 素描效果:用PS制作人像彩色铅笔画效果2019-07-12
-
 后期精修:用PS给人物皮肤均匀的磨皮2019-05-10
热门文章
-
 Photoshop利用素材制作炫丽的科技背景2021-03-11
-
 Photoshop使用中性灰磨皮法给人像精修2021-02-23
-
 Photoshop制作水彩风格的风景图2021-03-10
-
 Photoshop制作创意的文字排版人像效果2021-03-09
-
 Photoshop制作逼真的投影效果2021-03-11
-
 Photoshop制作故障干扰艺术效果2021-03-09
-
 Photoshop制作被切割的易拉罐效果图2021-03-10
-
 Photoshop制作人物支离破碎的打散效果2021-03-10
-
 Photoshop制作人物支离破碎的打散效果
相关文章752021-03-10
-
 Photoshop制作编织效果的人物
相关文章9832020-04-01
-
 Photoshop快速给人物添加火焰燃烧效果
相关文章8632020-03-12
-
 骷髅头像:PS制作人像X光影像效果
相关文章8862020-03-11
-
 Photoshop调出人物写真甜美通透艺术效果
相关文章5952020-03-06
-
 古风效果:用PS调出外景人像中国风意境效果
相关文章27742019-11-08
-
 粉色效果:用PS调出外景人像粉色效果
相关文章8652019-08-15
-
 蓝色效果:用PS调出古风人像唯美仙境效果
相关文章7782019-08-12
