Photoshop简单几步抠出天空中的白云(2)
文章来源于 心灵花,感谢作者 佚名 给我们带来经精彩的文章!设计教程/PS教程/抠图教程2010-10-05
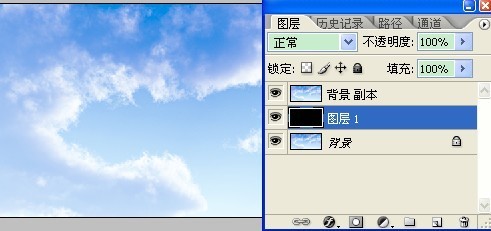
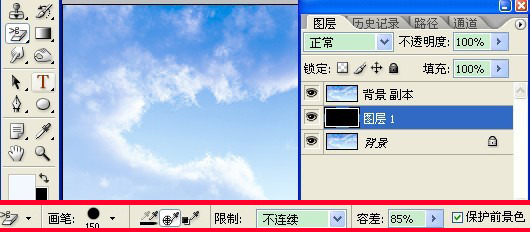
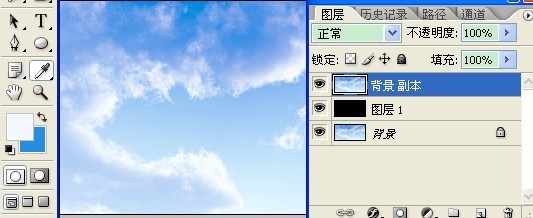
2、新建一层,填充黑色,并置于背景副本的下方,目的是观察效果 3。画笔大小根据自己喜好设置;容差值越小残留的背景色就越多,硬度稍微减小,根据具体情况调整; 一定要注意在保护前景色前打钩;图样选背景色板。这里


 情非得已
情非得已
推荐文章
-
 Photoshop使用通道工具抠出可爱的狗狗2020-03-15
-
 Photoshop使用通道工具抠出逆光美女2020-03-08
-
 抠图教程:详解5种PS经典的抠图方法2019-08-29
-
 Photoshop巧用通道超精细的抠儿童头发丝教程2015-05-20
-
 Photoshop完美抠出穿婚纱的新娘照片2013-11-07
-
 Photoshop使用通道混合器给狗狗抠图2012-10-25
-
 Photoshop给头发蓬松的孩子抠图并合成2012-06-19
-
 Photoshop给白色婚纱抠图并合成到风景照中2012-06-14
-
 Photoshop详细讲解钢笔工具在抠图中的使用2011-08-30
-
 Photoshop抠图教程:抠出飘逸长发美女2011-03-30
热门文章
-
 Photoshop快速抠出卷发的美女人像2021-03-04
-
 头发抠图:用PS快速的抠出人像头发
相关文章15692019-12-26
头发抠图:用PS快速的抠出人像头发
相关文章15692019-12-26
-
 Photoshop简单介绍几种常用的抠图方法
相关文章22382018-07-11
Photoshop简单介绍几种常用的抠图方法
相关文章22382018-07-11
-
 Photoshop巧用通道工具快速抠出白云图片
相关文章9482017-10-09
Photoshop巧用通道工具快速抠出白云图片
相关文章9482017-10-09
-
 Photoshop快速抠出在天空中飞翔的雄鹰
相关文章10652017-09-28
Photoshop快速抠出在天空中飞翔的雄鹰
相关文章10652017-09-28
-
 Photoshop巧用通道简单快速抠出羽毛和水杯
相关文章18082017-06-06
Photoshop巧用通道简单快速抠出羽毛和水杯
相关文章18082017-06-06
-
 Photoshop三种实用方法抠出背景简单的人物
相关文章8332017-05-31
Photoshop三种实用方法抠出背景简单的人物
相关文章8332017-05-31
-
 Photoshop简单的使用色彩范围扣除人像照片
相关文章5652017-05-12
Photoshop简单的使用色彩范围扣除人像照片
相关文章5652017-05-12
-
 Photoshop巧用滤镜工具给美女头发丝抠图
相关文章11722016-12-20
Photoshop巧用滤镜工具给美女头发丝抠图
相关文章11722016-12-20
