Photoshop调出质感的暗色外景照效果(7)
文章来源于 图老大社区,感谢作者 Asswduming 给我们带来经精彩的文章!设计教程/PS教程/调色教程2010-12-09
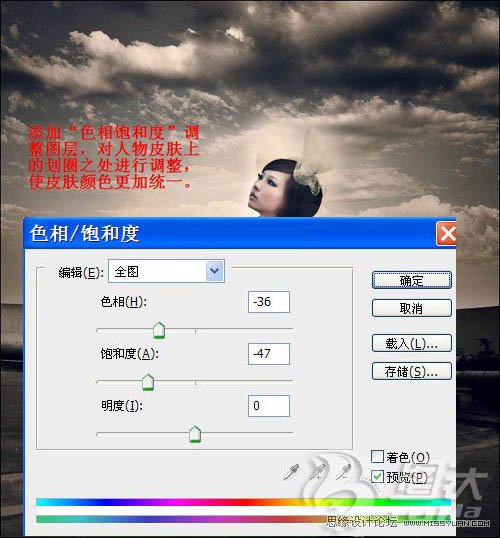
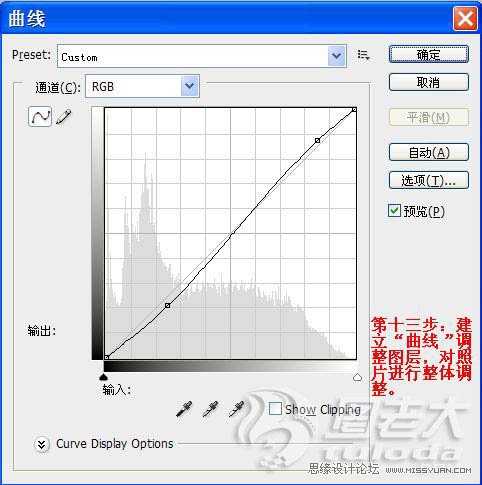
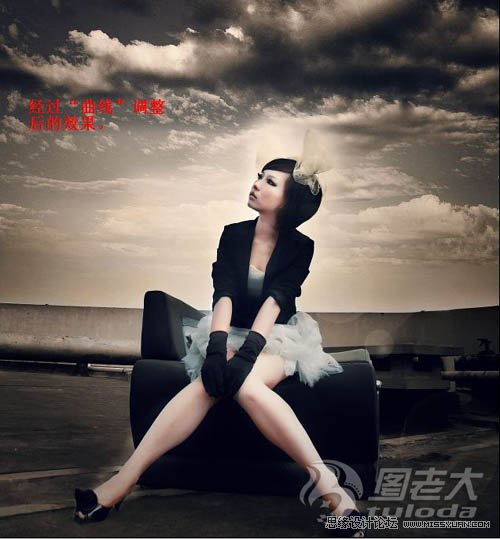
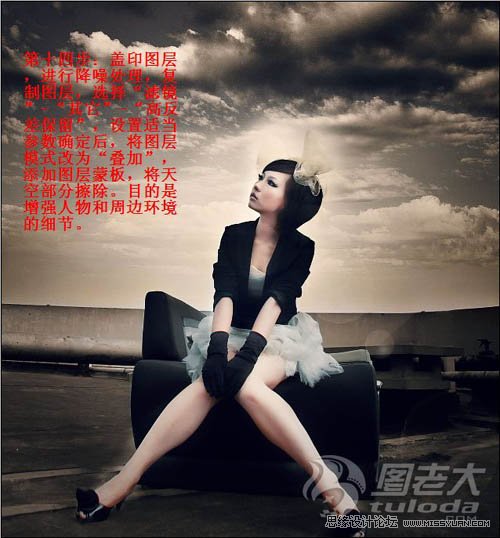
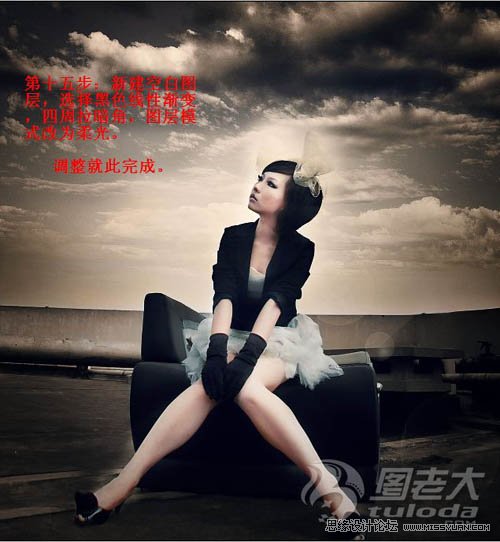
12、创建色相/饱和度调整,对全图进行调整,目的是调整肤色,参数设置如下图。 13、创建曲线调整图层,对RGB进行调整,参数及效果如下图。 14、新建一个图层,盖印图层,进行降噪处理,复制图层,选择滤镜 其他 高
 情非得已
情非得已
推荐文章
-
 复古效果:用PS调出儿童照片复古电影效果2019-08-02
-
 暖色效果:用PS调出外景人像暖黄色效果2019-07-29
-
 清新人像:用PS调出逆光人像小清新效果2019-04-16
-
 电影色调:用PS减法调出电影胶片效果2019-03-29
-
 复古效果:PS调出人像复古电影艺术效果2019-01-17
-
 Photoshop调出外景人像暖色淡雅效果2018-11-29
-
 Photoshop调出梦幻唯美风格的少女照片2018-10-17
-
 Photoshop详细解析夜景风光如何后期修图2018-09-29
-
 Photoshop调出清晨村庄照片暖色效果2018-09-29
-
 Photoshop调出婚纱外景春夏秋冬四季效果2018-09-20
热门文章
-
 Photoshop结合CR修出通透干净的人像肤色2021-03-04
-
 Photoshopo调出外景人像金黄色皮肤效果2021-03-05
-
Photoshopo调出外景人像金黄色皮肤效果
相关文章1692021-03-05
-
 Photoshop调出外景人像暗色艺术效果
相关文章16882020-03-19
Photoshop调出外景人像暗色艺术效果
相关文章16882020-03-19
-
 秋季效果:用PS把外景人像调出秋季效果
相关文章17512019-11-08
秋季效果:用PS把外景人像调出秋季效果
相关文章17512019-11-08
-
 清新效果:用PS调出外景人像小清新效果
相关文章20762019-08-30
清新效果:用PS调出外景人像小清新效果
相关文章20762019-08-30
-
 清新效果:用PS调出干净通透的儿童照片
相关文章12472019-08-15
清新效果:用PS调出干净通透的儿童照片
相关文章12472019-08-15
-
 秋季效果:用PS调出古风人像秋季粉红效果
相关文章10102019-08-06
秋季效果:用PS调出古风人像秋季粉红效果
相关文章10102019-08-06
-
 清新效果:用PS调出校园人像小清新效果
相关文章6332019-08-06
清新效果:用PS调出校园人像小清新效果
相关文章6332019-08-06
-
 冷色效果:用PS调出人像照片时尚冷色调
相关文章10902019-08-05
冷色效果:用PS调出人像照片时尚冷色调
相关文章10902019-08-05
