Photoshop制作转动动画的立方体魔方(3)
文章来源于 中国教程网,感谢作者 大漠游客 给我们带来经精彩的文章!设计教程/PS教程/签名教程2011-09-10
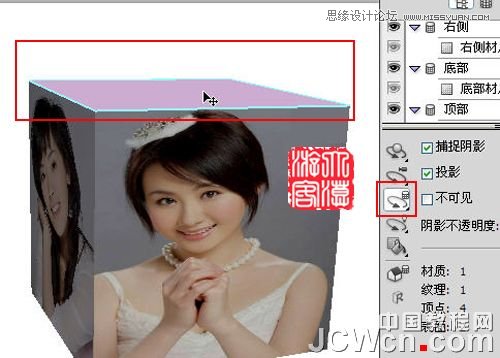
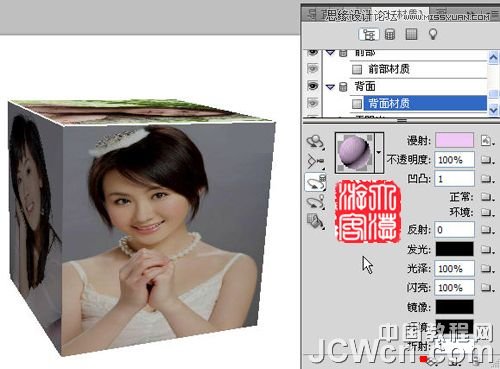
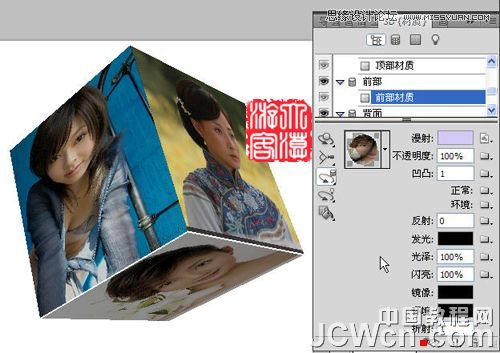
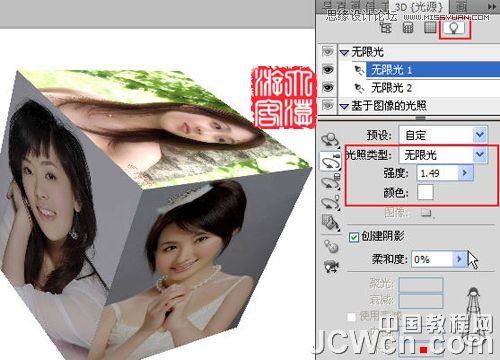
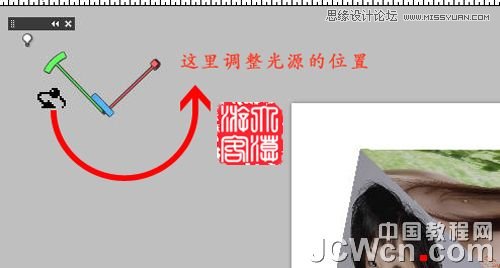
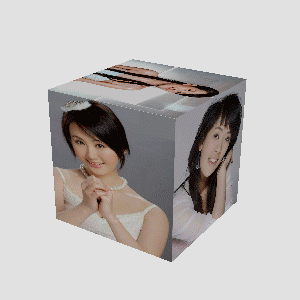
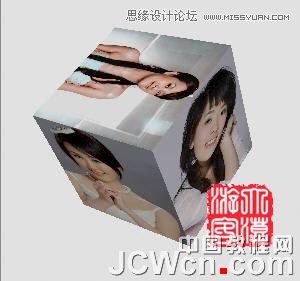
12、取网格工具如图位置点一下,成被选择状态 13、如前法载入图片如图13 14、取3D旋转工具把没有贴图的三面旋转出来,再分别贴图后如图14 15、取光源工具,可调整光的强度、光线颜色、方向等,如图15 16、取光源旋
 情非得已
情非得已
推荐文章
-
 Photoshop详细解析签名作品中排字技巧2014-09-09
-
 Photoshop制作汉服妹子签名教程2013-01-17
-
 Photoshop如何制作签名教程思路全解析2012-07-23
-
 Photoshop制作桃花依旧笑春风古风签名教程2012-07-22
-
 Photoshop制作色彩艳丽的古风签名教程2012-07-13
-
 Photoshop设计剪贴动漫风格的签名教程2012-07-12
-
 Photoshop制作蓝色梦幻动漫签名溶图教程2012-03-16
-
 Photoshop制作超美的动漫签名教程2011-10-28
-
 Photoshop制作可爱的动漫签名教程2011-07-29
-
 Photoshop在排字签名设计的技巧总结2011-07-12
热门文章
-
 Photoshop制作欧美复古风格的拼贴签名效果
相关文章5772020-03-27
Photoshop制作欧美复古风格的拼贴签名效果
相关文章5772020-03-27
-
 Photoshop使用素材制作唯美的动漫签名效果
相关文章6592020-03-12
Photoshop使用素材制作唯美的动漫签名效果
相关文章6592020-03-12
-
 Photoshop制作唯美的双流光GIF动画签名
相关文章27082015-08-04
Photoshop制作唯美的双流光GIF动画签名
相关文章27082015-08-04
-
 Photoshop制作生如夏花真人签名教程
相关文章14502015-07-18
Photoshop制作生如夏花真人签名教程
相关文章14502015-07-18
-
 Photoshop制作烫金字古风签名图效果
相关文章63742015-05-14
Photoshop制作烫金字古风签名图效果
相关文章63742015-05-14
-
 Photoshop简单制作新年个性签名教程
相关文章18822015-02-23
Photoshop简单制作新年个性签名教程
相关文章18822015-02-23
-
 Photoshop制作创意的黄绿色人物签名教程
相关文章16222014-10-07
Photoshop制作创意的黄绿色人物签名教程
相关文章16222014-10-07
-
 Photoshop制作橙色幻想动漫少女成签教程
相关文章10982014-10-06
Photoshop制作橙色幻想动漫少女成签教程
相关文章10982014-10-06
