Photoshop给人物模型加上绚丽的背景(3)
文章来源于 站酷,感谢作者 刘荣焕 给我们带来经精彩的文章!设计教程/PS教程/照片处理2011-10-21
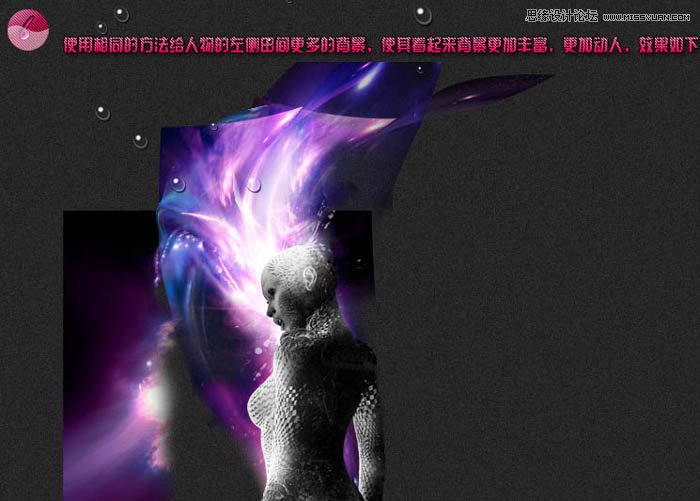
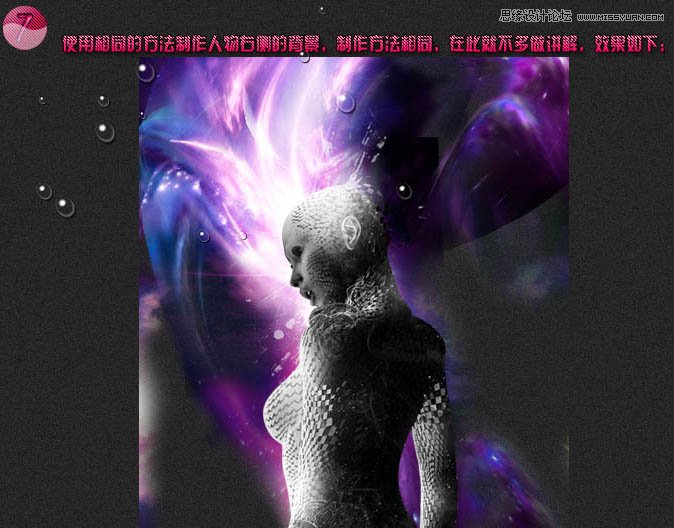
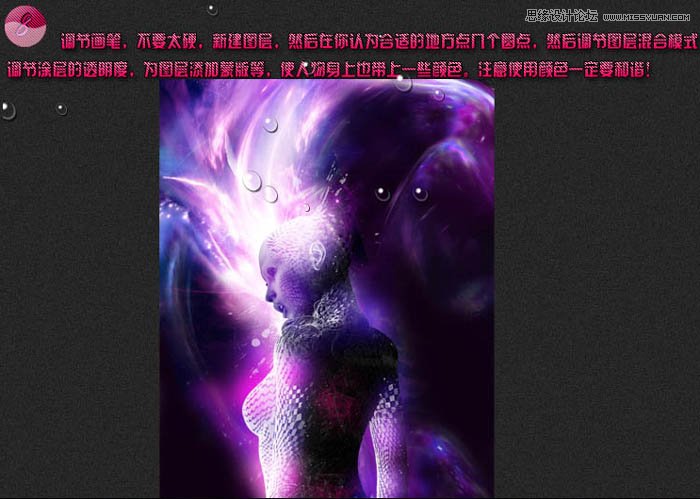
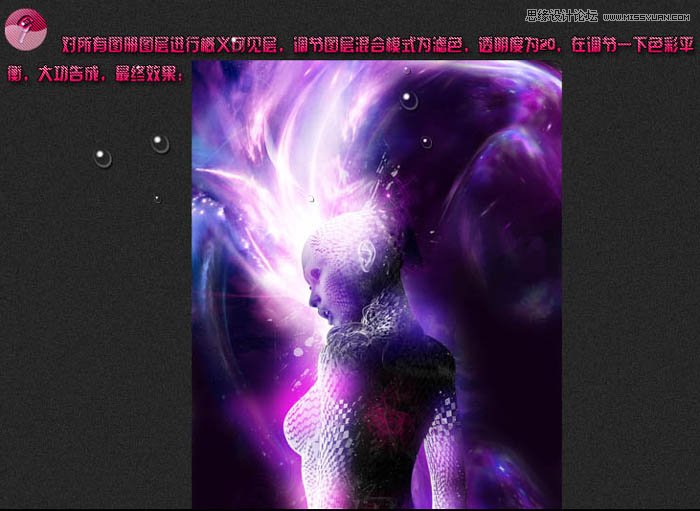
6、使用相同的方法给人物左侧添加更多背景,使其看起来更加丰富。 7、使用相同的方法制作人物右侧的背景,制作方法相同。 8、调节画笔,新建图层,在您认为合适的地方点几个圆点,然后调节图层混合模式,调整涂层的
 情非得已
情非得已
推荐文章
-
 Photoshop制作唯美可爱的女生头像照片2020-03-17
-
 Photoshop快速给人物添加火焰燃烧效果2020-03-12
-
 Photoshop调出人物写真甜美通透艺术效果2020-03-06
-
 Photoshop保留质感修出古铜色人像皮肤2020-03-06
-
 Photoshop制作模特人像柔润的头发效果2020-03-04
-
 古风效果:用PS调出外景人像中国风意境效果2019-11-08
-
 插画效果:用PS把风景照片转插画效果2019-10-21
-
 胶片效果:用PS调出人像复古胶片效果2019-08-02
-
 素描效果:用PS制作人像彩色铅笔画效果2019-07-12
-
 后期精修:用PS给人物皮肤均匀的磨皮2019-05-10
热门文章
-
 Photoshop利用素材制作炫丽的科技背景2021-03-11
-
 Photoshop使用中性灰磨皮法给人像精修2021-02-23
-
 Photoshop制作水彩风格的风景图2021-03-10
-
 Photoshop制作创意的文字排版人像效果2021-03-09
-
 Photoshop制作逼真的投影效果2021-03-11
-
 Photoshop制作故障干扰艺术效果2021-03-09
-
 Photoshop制作被切割的易拉罐效果图2021-03-10
-
 Photoshop制作人物支离破碎的打散效果2021-03-10
-
 Photoshop利用素材制作炫丽的科技背景
相关文章2062021-03-11
-
 Photoshop给金属板上添加上逼真的生锈效果
相关文章5672020-03-03
-
 证件照处理:用PS快速的给证件照换背景
相关文章41952019-11-05
-
 蓝色效果:用PS调出古风人像唯美仙境效果
相关文章7782019-08-12
-
 夜景调色:用PS调出梦幻柔光的夜景人像
相关文章5972019-07-29
-
 二次元漫画:用PS制作日式的动漫效果
相关文章14892019-03-23
-
 漫画效果:用PS制作漫画风格艺术效果
相关文章15112019-03-13
-
 工笔画效果:用PS快速制作工笔画效果
相关文章4002019-03-04


