Photoshop合成女孩与灯忧伤孤独场景效果(5)
文章来源于 一起PS吧,感谢作者 情非得已 给我们带来经精彩的文章!设计教程/PS教程/合成教程2011-12-31
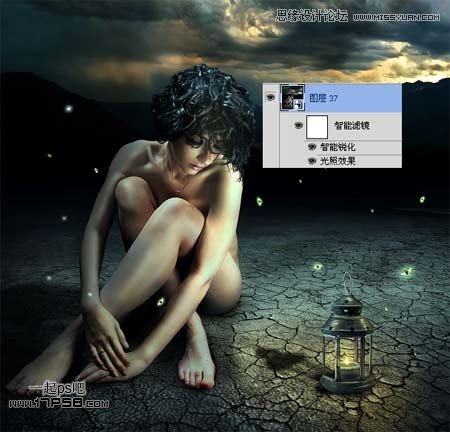
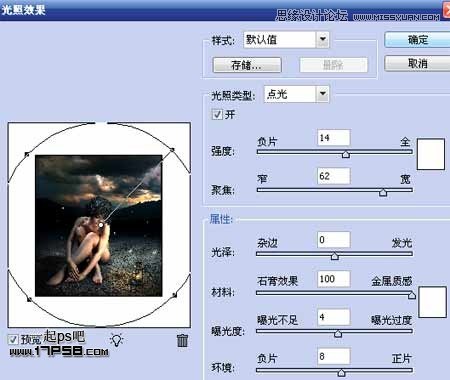
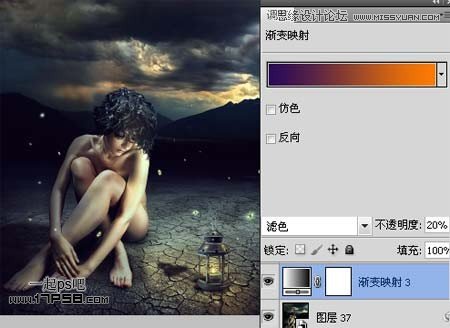
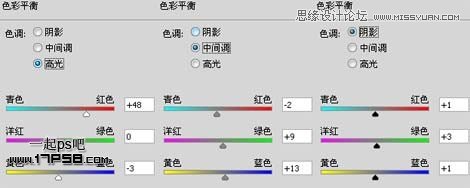
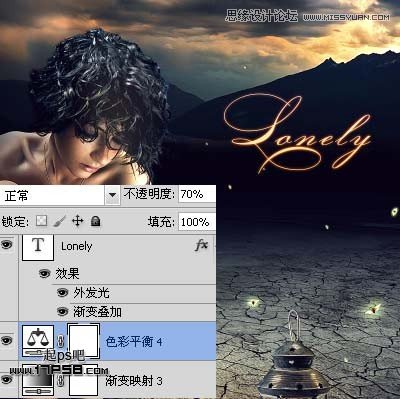
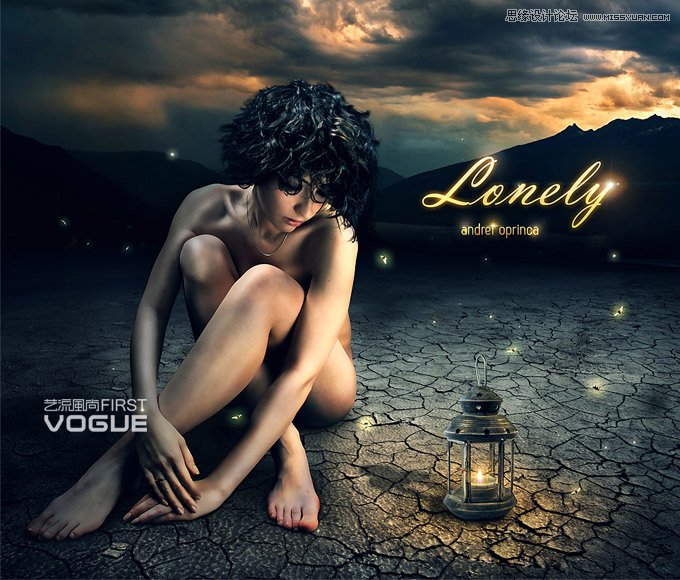
再次盖印层,右击转为智能对象,添加光照和智能锐化滤镜。 智能锐化参数不截图了,自己设置即可,添加渐变映射调整层,图层模式滤色,不透明度20%。 色彩平衡调整层,图层不透明度改为70%。 输入英文单词Lonely,孤
 情非得已
情非得已
推荐文章
-
 Photoshop合成海边海龟和被掀起的海浪场景2021-03-08
-
 Photoshop创意合成森林中的新娘和鸟笼2021-02-23
-
 Photoshop合成森林中马灯下的小动物2020-04-01
-
 Photoshop合成梦幻仙境场景的精灵仙子2020-03-27
-
 Photoshop合成创意头像长出花朵效果2020-03-26
-
 Photoshop合成被蝴蝶和星光打散的头像2020-03-26
-
 Photoshop合成创意的美女和野兽场景2020-03-20
-
 Photoshop合成创意的乌龟背着城堡效果图2020-03-20
-
 Photoshop合成房间里抚摸恐龙头的小男孩2020-03-20
-
 Photoshop快速给建筑照片添加傍晚效果2020-03-19
热门文章
-
 Photoshop创意合成森林中的新娘和鸟笼2021-02-23
-
 Photoshop合成魔幻主题的发光山羊2021-03-04
-
 Photoshop合成海边海龟和被掀起的海浪场景2021-03-08
-
 Photoshop创意合成苹果身体的易拉罐2021-03-10
-
 Photoshop合成闪电下的超级跑车2021-03-04
-
 Photoshop创意合成在脚底下魔法师2021-03-08
-
 Photoshop创意合成被热气球带飞的鲸鱼2021-03-16
-
 Photoshop合成海边海龟和被掀起的海浪场景
相关文章2562021-03-08
-
 Photoshop合成魔幻主题的发光山羊
相关文章2882021-03-04
-
 Photoshop创意合成森林中的新娘和鸟笼
相关文章2982021-02-23
-
 Photoshop创意合成禁烟公益宣传海报
相关文章15762020-09-28
-
 Photoshop合成森林中马灯下的小动物
相关文章21572020-04-01
-
 Photoshop创意合成人像二次曝光效果
相关文章17892020-03-27
-
 Photoshop合成梦幻仙境场景的精灵仙子
相关文章23182020-03-27
-
 Photoshop合成创意头像长出花朵效果
相关文章17482020-03-26
