Photoshop调出国外美女图片朦胧淡蓝色调(4)
文章来源于 PS联盟,感谢作者 Sener 给我们带来经精彩的文章!设计教程/PS教程/照片处理2012-03-06
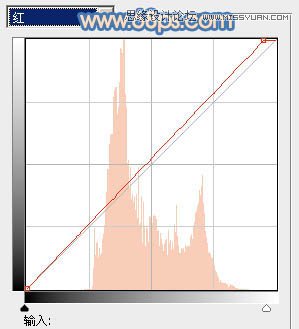
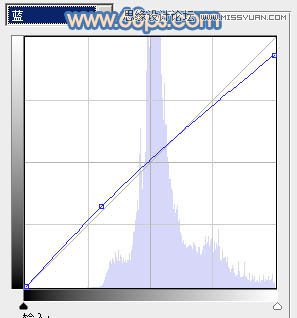
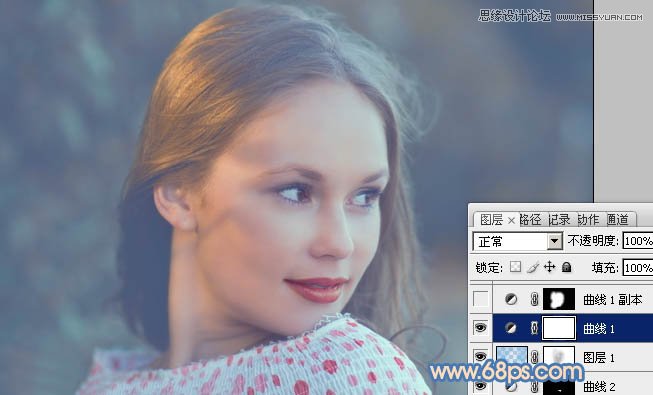
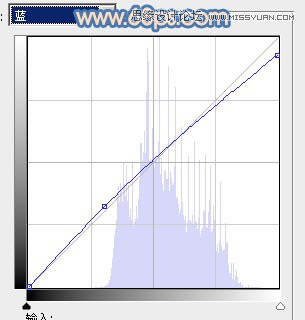
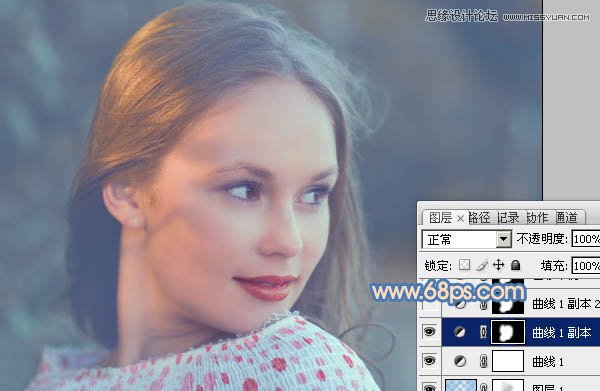
7、创建曲线调整图层,对红,蓝进行调整,参数设置如图15,16,效果如图17。这一步增加肤色部分的橙红色。 8、再创建曲线调整图层,对红,蓝进行调整,参数设置如图18,19,确定后把蒙版填充黑色,用白色画笔把人物脸


 情非得已
情非得已
推荐文章
-
 Photoshop制作唯美可爱的女生头像照片2020-03-17
-
 Photoshop快速给人物添加火焰燃烧效果2020-03-12
-
 Photoshop调出人物写真甜美通透艺术效果2020-03-06
-
 Photoshop保留质感修出古铜色人像皮肤2020-03-06
-
 Photoshop制作模特人像柔润的头发效果2020-03-04
-
 古风效果:用PS调出外景人像中国风意境效果2019-11-08
-
 插画效果:用PS把风景照片转插画效果2019-10-21
-
 胶片效果:用PS调出人像复古胶片效果2019-08-02
-
 素描效果:用PS制作人像彩色铅笔画效果2019-07-12
-
 后期精修:用PS给人物皮肤均匀的磨皮2019-05-10
热门文章
-
 Photoshop利用素材制作炫丽的科技背景2021-03-11
-
 Photoshop使用中性灰磨皮法给人像精修2021-02-23
-
 Photoshop制作水彩风格的风景图2021-03-10
-
 Photoshop制作创意的文字排版人像效果2021-03-09
-
 Photoshop制作逼真的投影效果2021-03-11
-
 Photoshop制作故障干扰艺术效果2021-03-09
-
 Photoshop制作被切割的易拉罐效果图2021-03-10
-
 Photoshop制作人物支离破碎的打散效果2021-03-10
-
 Photoshop快速的增加写实人像的质感
相关文章7502020-10-10
Photoshop快速的增加写实人像的质感
相关文章7502020-10-10
-
 Photoshop设计蓝色荧光效果的皮鞋
相关文章10012020-03-12
Photoshop设计蓝色荧光效果的皮鞋
相关文章10012020-03-12
-
 骷髅头像:PS制作人像X光影像效果
相关文章8862020-03-11
骷髅头像:PS制作人像X光影像效果
相关文章8862020-03-11
-
 Photoshop如何去除照片上的透明水印
相关文章12362020-03-08
Photoshop如何去除照片上的透明水印
相关文章12362020-03-08
-
 人像修图:使用PS中性灰给人像质感修图
相关文章23552019-12-26
人像修图:使用PS中性灰给人像质感修图
相关文章23552019-12-26
-
古风效果:用PS调出外景人像中国风意境效果
相关文章27742019-11-08
-
 人像美白:用PS快速给人像美白处理
相关文章18432019-11-08
人像美白:用PS快速给人像美白处理
相关文章18432019-11-08
-
 美食处理:用PS调出垂涎欲滴的美食照片
相关文章7962019-10-31
美食处理:用PS调出垂涎欲滴的美食照片
相关文章7962019-10-31
