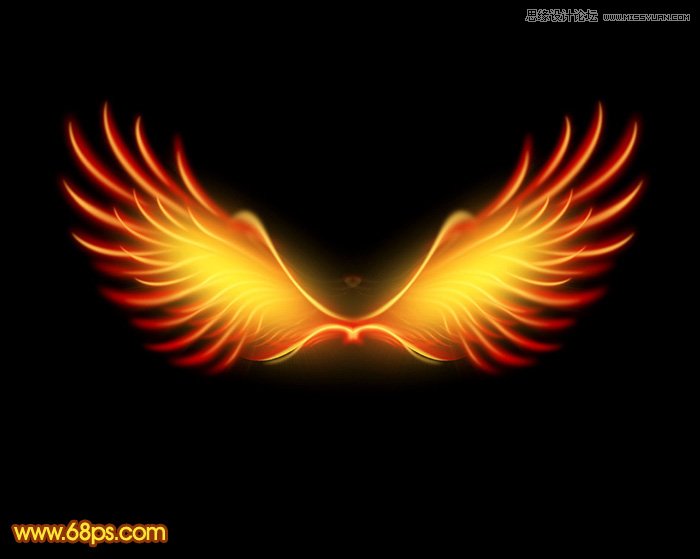
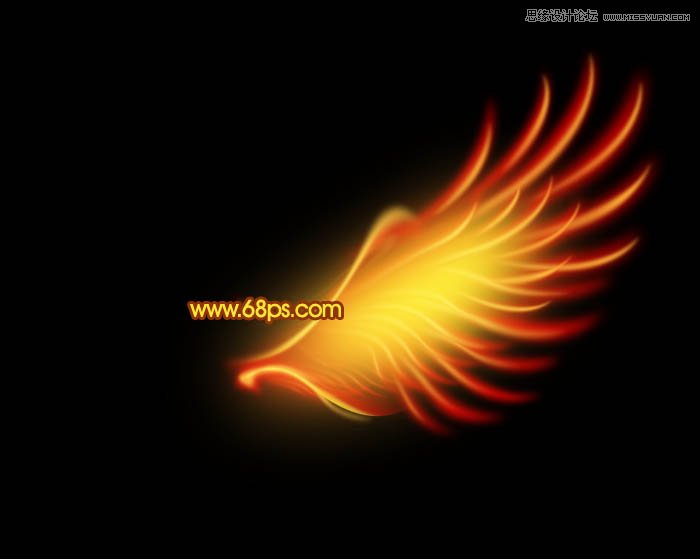
Photoshop设计梦幻光线效果的火焰翅膀
文章来源于 PS联盟,感谢作者 Sener 给我们带来经精彩的文章!设计教程/PS教程/设计教程2013-02-27
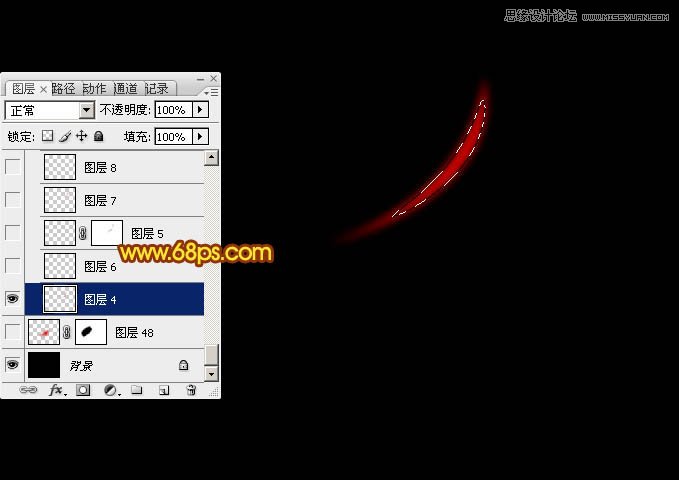
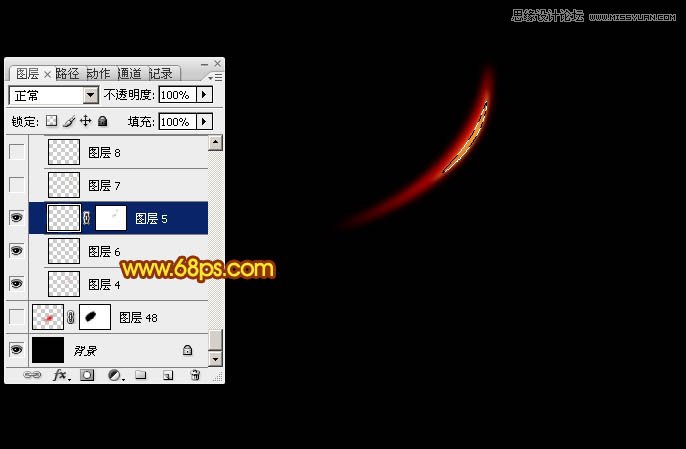
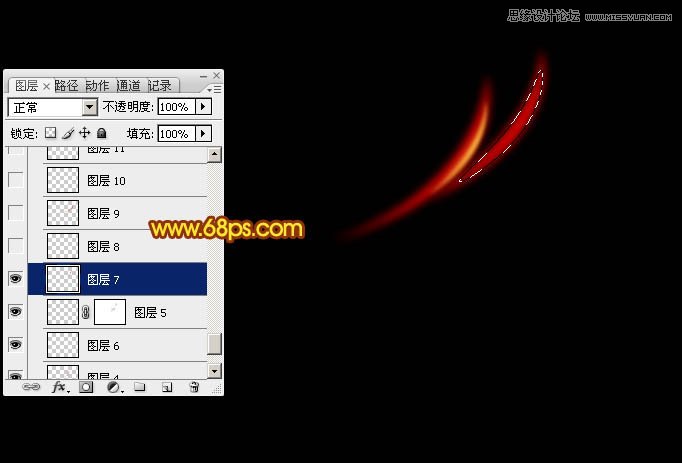
这里介绍一种简单翅膀的制作方法。可以大致把翅膀分为两个部分,边缘的羽毛及中间的火焰。制作过程:先用路径工具逐一做出边缘的羽化及边缘的高光,然后再渲染中间的高光即可。
 情非得已
情非得已
推荐文章
-
 Photoshop设计撕纸特效的人物海报教程2020-10-28
-
 Photoshop制作立体风格的国庆节海报2020-10-10
-
 Photoshop设计撕纸特效的人像海报2020-03-27
-
 图标设计:用PS制作奶油质感手机主题图标2019-11-06
-
 图标设计:用PS制作中国风圆形APP图标2019-11-01
-
 手机图标:用PS设计儿童贴画风格的APP图标2019-08-09
-
 电影海报:用PS制作蜘蛛侠海报效果2019-07-09
-
 创意海报:用PS合成铁轨上的霸王龙2019-07-08
-
 电影海报:用PS设计钢铁侠电影海报2019-07-08
-
 立体海报:用PS制作创意的山川海报2019-05-22
热门文章
-
 Photoshop设计猕猴桃风格的APP图标2021-03-10
-
 Photoshop制作逼真的毛玻璃质感图标2021-03-09
-
 Photoshop结合AI制作抽象动感的丝带2021-03-16
-
 Photoshop结合AI制作炫酷的手机贴纸2021-03-16
-
Photoshop结合AI制作抽象动感的丝带
相关文章1822021-03-16
-
Photoshop设计猕猴桃风格的APP图标
相关文章2212021-03-10
-
Photoshop制作逼真的毛玻璃质感图标
相关文章2102021-03-09
-
Photoshop设计撕纸特效的人物海报教程
相关文章16362020-10-28
-
 Photoshop结合AI制作炫丽的网格效果
相关文章10302020-10-28
Photoshop结合AI制作炫丽的网格效果
相关文章10302020-10-28
-
Photoshop制作立体风格的国庆节海报
相关文章7132020-10-10
-
 Photoshop制作时尚大气的足球比赛海报
相关文章11832020-07-09
Photoshop制作时尚大气的足球比赛海报
相关文章11832020-07-09
-
 Photoshop合成加勒比海盗风格电影海报
相关文章17202020-04-02
Photoshop合成加勒比海盗风格电影海报
相关文章17202020-04-02
