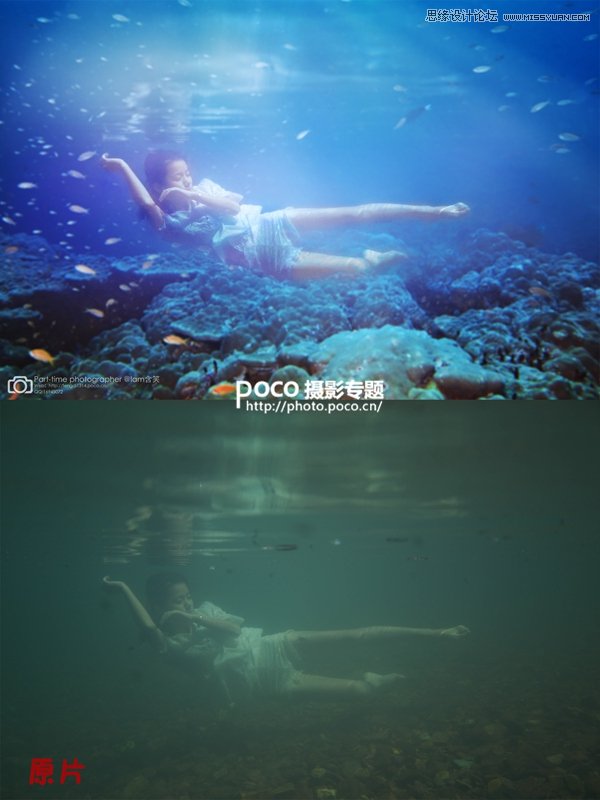
Photoshop调出蓝色绚丽的水下摄影效果图
文章来源于 摄影社区,感谢作者 含笑 给我们带来经精彩的文章!设计教程/PS教程/照片处理2014-09-06
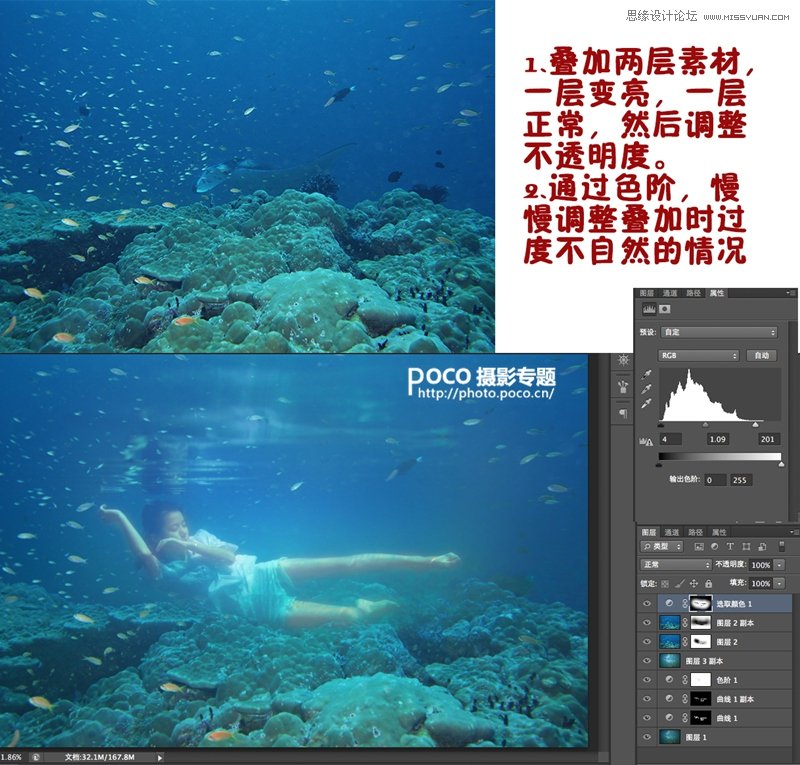
一般来说,水下人像摄影分为实景水下拍摄【模特和摄影师一起下水】和通过玻璃缸拍摄【模特在水中,摄影师在玻璃缸外面】两种,当然,搭个玻璃缸能让拍摄效率更高、出片更多、光线更为可控,但许多人因为条件有限,只能选择到户外进行实景拍摄。
 情非得已
情非得已
推荐文章
-
 Photoshop制作唯美可爱的女生头像照片2020-03-17
-
 Photoshop快速给人物添加火焰燃烧效果2020-03-12
-
 Photoshop调出人物写真甜美通透艺术效果2020-03-06
-
 Photoshop保留质感修出古铜色人像皮肤2020-03-06
-
 Photoshop制作模特人像柔润的头发效果2020-03-04
-
 古风效果:用PS调出外景人像中国风意境效果2019-11-08
-
 插画效果:用PS把风景照片转插画效果2019-10-21
-
 胶片效果:用PS调出人像复古胶片效果2019-08-02
-
 素描效果:用PS制作人像彩色铅笔画效果2019-07-12
-
 后期精修:用PS给人物皮肤均匀的磨皮2019-05-10
热门文章
-
 Photoshop利用素材制作炫丽的科技背景2021-03-11
-
 Photoshop使用中性灰磨皮法给人像精修2021-02-23
-
 Photoshop制作水彩风格的风景图2021-03-10
-
 Photoshop制作创意的文字排版人像效果2021-03-09
-
 Photoshop制作逼真的投影效果2021-03-11
-
 Photoshop制作故障干扰艺术效果2021-03-09
-
 Photoshop制作被切割的易拉罐效果图2021-03-10
-
 Photoshop制作人物支离破碎的打散效果2021-03-10
-
 Photoshop制作被切割的易拉罐效果图
相关文章852021-03-10
-
 Photoshop制作下雨天玻璃后效果图
相关文章4502020-09-26
-
 Photosho合成创意的星轨效果图
相关文章9382020-03-19
-
 Photoshop设计蓝色荧光效果的皮鞋
相关文章10012020-03-12
-
 静物调色:用PS调出暗蓝色静物艺术效果
相关文章6752019-08-26
-
 蓝色效果:用PS调出古风人像唯美仙境效果
相关文章7782019-08-12
-
 蓝色效果:用PS调出人像通透蓝色艺术效果
相关文章10672019-08-12
-
 蓝色效果:用PS调出电影主题蓝色艺术效果
相关文章4612019-08-09
