Photoshop给人像照片添加绚丽的光线装饰(2)
文章来源于 站酷,感谢作者 陌路离伤 给我们带来经精彩的文章!设计教程/PS教程/照片处理2015-06-26
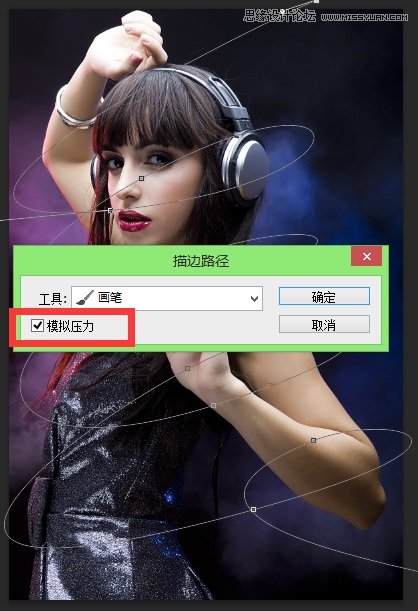
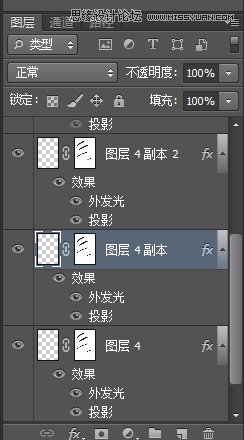
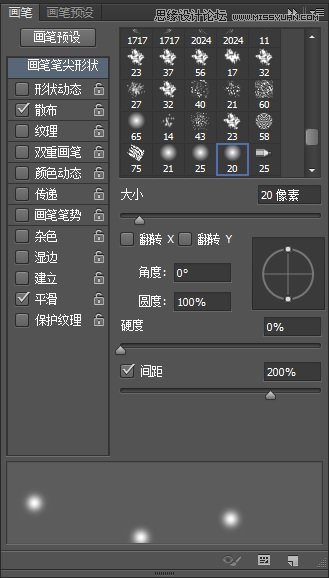
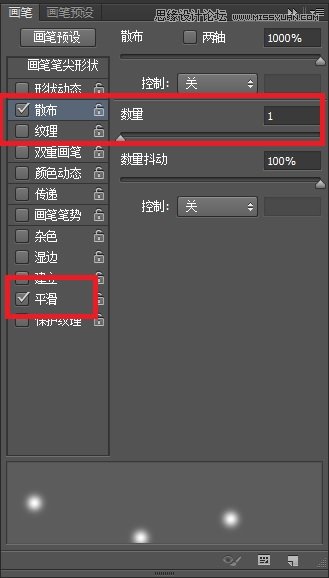
4:单击右键,选择描边路径。 5:选择画笔,勾选模拟压力,确定。添加图层蒙版,擦除身后遮挡部分的炫光,使其有环绕效果。 【设置图层混合选项】 6:选择炫光所在图层,单击右键,选择混合选项,勾选投影,设置混
 情非得已
情非得已
推荐文章
-
 Photoshop制作唯美可爱的女生头像照片2020-03-17
-
 Photoshop快速给人物添加火焰燃烧效果2020-03-12
-
 Photoshop调出人物写真甜美通透艺术效果2020-03-06
-
 Photoshop保留质感修出古铜色人像皮肤2020-03-06
-
 Photoshop制作模特人像柔润的头发效果2020-03-04
-
 古风效果:用PS调出外景人像中国风意境效果2019-11-08
-
 插画效果:用PS把风景照片转插画效果2019-10-21
-
 胶片效果:用PS调出人像复古胶片效果2019-08-02
-
 素描效果:用PS制作人像彩色铅笔画效果2019-07-12
-
 后期精修:用PS给人物皮肤均匀的磨皮2019-05-10
热门文章
-
 Photoshop利用素材制作炫丽的科技背景2021-03-11
-
 Photoshop使用中性灰磨皮法给人像精修2021-02-23
-
 Photoshop制作水彩风格的风景图2021-03-10
-
 Photoshop制作创意的文字排版人像效果2021-03-09
-
 Photoshop制作逼真的投影效果2021-03-11
-
 Photoshop制作故障干扰艺术效果2021-03-09
-
 Photoshop制作被切割的易拉罐效果图2021-03-10
-
 Photoshop制作人物支离破碎的打散效果2021-03-10
-
 Photoshop制作人物支离破碎的打散效果
相关文章752021-03-10
-
 Photoshop制作被切割的易拉罐效果图
相关文章852021-03-10
-
 Photoshop制作创意的文字排版人像效果
相关文章1802021-03-09
-
 Photoshop使用中性灰磨皮法给人像精修
相关文章1932021-02-23
-
 Photoshop快速的增加写实人像的质感
相关文章7502020-10-10
-
 Photoshop制作唯美可爱的女生头像照片
相关文章8162020-03-17
-
 Photoshop快速给黑白人像照片上色
相关文章7582020-03-12
-
 Photoshop快速给人物添加火焰燃烧效果
相关文章8632020-03-12


