Photoshop设计金属质感的ICON图标教程(3)
文章来源于 Pdadians.com,感谢作者 P大点S 给我们带来经精彩的文章!设计教程/PS教程/设计教程2017-03-05
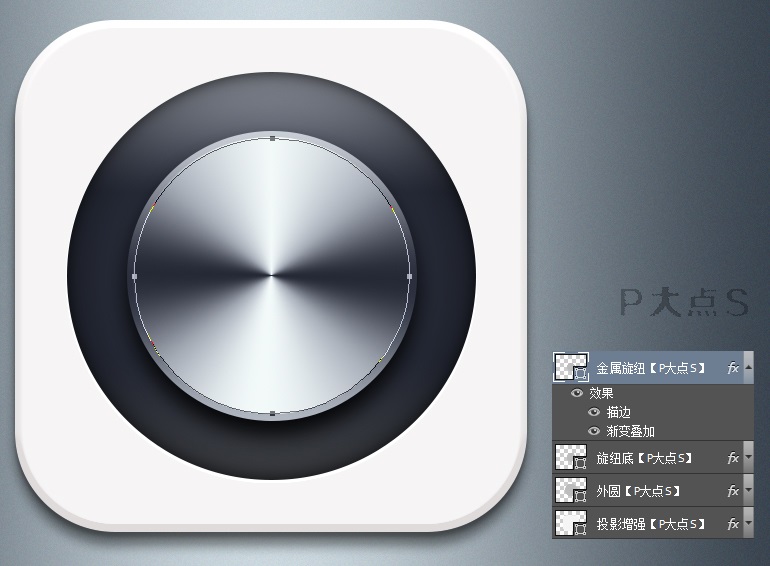
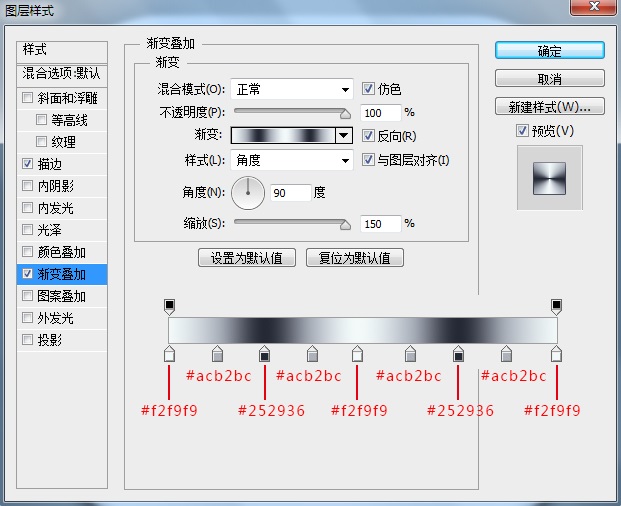
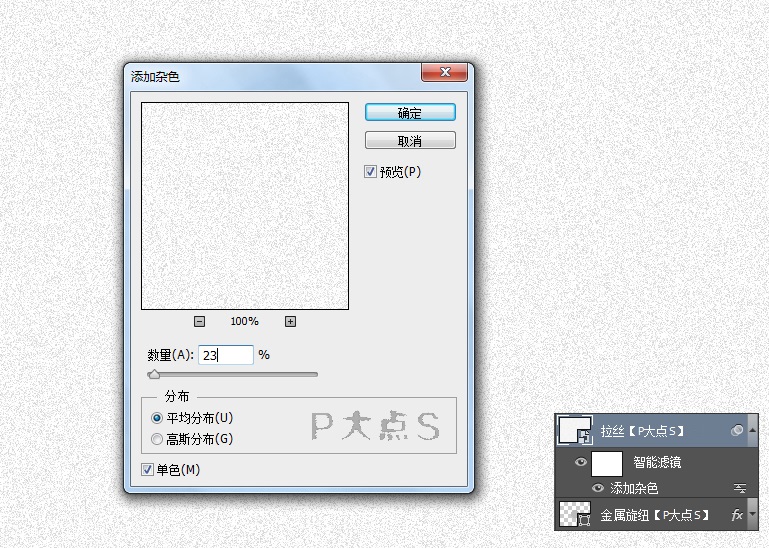
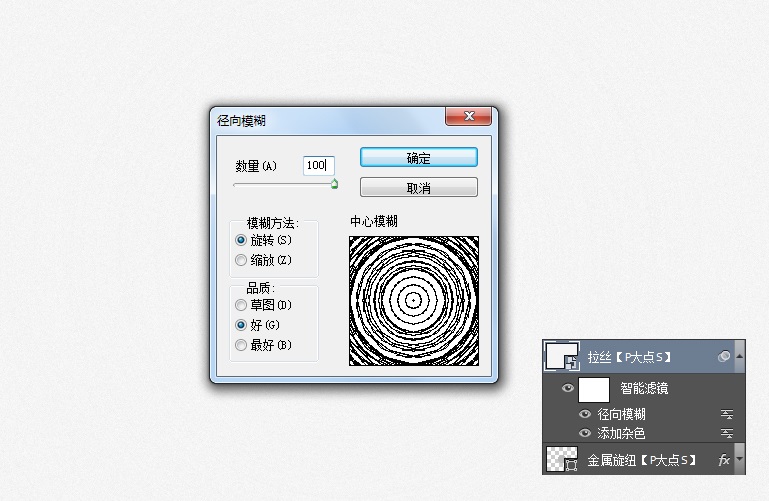
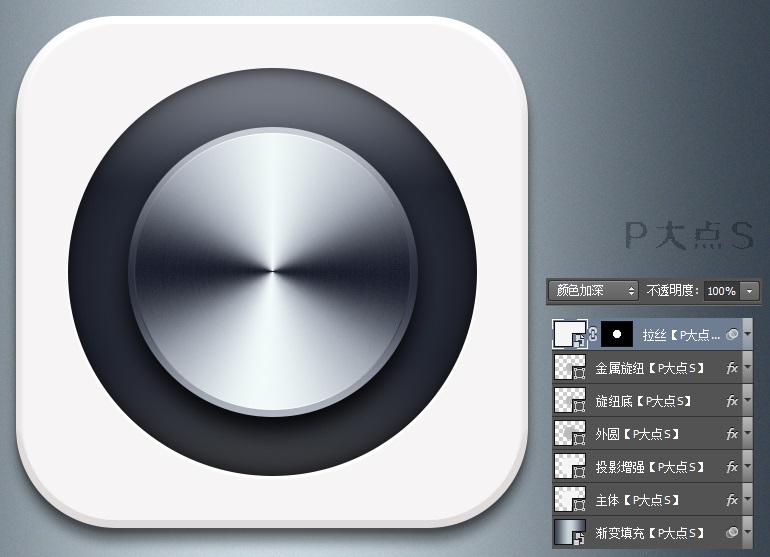
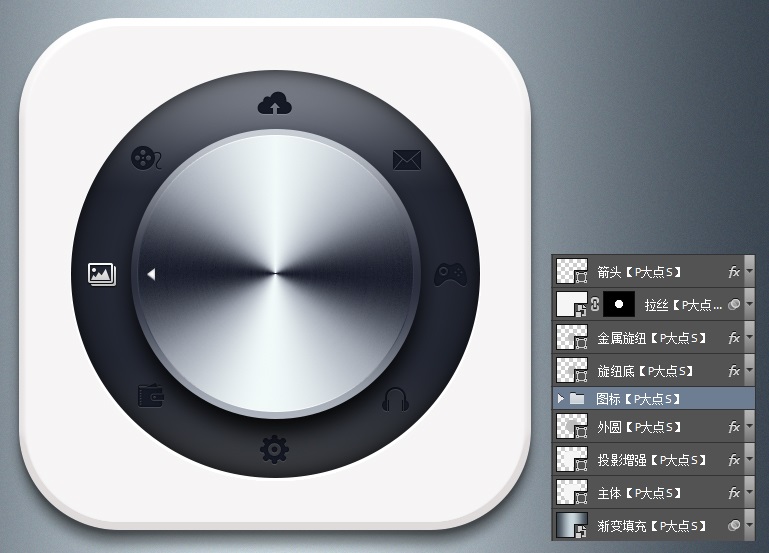
画一个稍微小一点的圆,我们来制作金属旋纽,效果我们通过图层样式实现。 新建一个图层,填充白色,转换为智能对象,添加一个杂色。 执行一个径向模糊滤镜,参数如下: 将这个拉丝图层图层混合模式修改为颜色加深,
 情非得已
情非得已
推荐文章
-
 Photoshop设计撕纸特效的人物海报教程2020-10-28
-
 Photoshop制作立体风格的国庆节海报2020-10-10
-
 Photoshop设计撕纸特效的人像海报2020-03-27
-
 图标设计:用PS制作奶油质感手机主题图标2019-11-06
-
 图标设计:用PS制作中国风圆形APP图标2019-11-01
-
 手机图标:用PS设计儿童贴画风格的APP图标2019-08-09
-
 电影海报:用PS制作蜘蛛侠海报效果2019-07-09
-
 创意海报:用PS合成铁轨上的霸王龙2019-07-08
-
 电影海报:用PS设计钢铁侠电影海报2019-07-08
-
 立体海报:用PS制作创意的山川海报2019-05-22
热门文章
-
 Photoshop设计猕猴桃风格的APP图标2021-03-10
-
 Photoshop制作逼真的毛玻璃质感图标2021-03-09
-
 Photoshop结合AI制作抽象动感的丝带2021-03-16
-
 Photoshop结合AI制作炫酷的手机贴纸2021-03-16
-
Photoshop结合AI制作炫酷的手机贴纸
相关文章652021-03-16
-
Photoshop设计猕猴桃风格的APP图标
相关文章2212021-03-10
-
Photoshop制作逼真的毛玻璃质感图标
相关文章2102021-03-09
-
Photoshop设计撕纸特效的人物海报教程
相关文章16362020-10-28
-
 Photoshop结合AI制作炫丽的网格效果
相关文章10302020-10-28
Photoshop结合AI制作炫丽的网格效果
相关文章10302020-10-28
-
Photoshop制作立体风格的国庆节海报
相关文章7132020-10-10
-
 Photoshop制作时尚大气的足球比赛海报
相关文章11832020-07-09
Photoshop制作时尚大气的足球比赛海报
相关文章11832020-07-09
-
 Photoshop制作花朵穿插文字海报教程
相关文章24942020-04-02
Photoshop制作花朵穿插文字海报教程
相关文章24942020-04-02
