Illustrator CS5教程:设计漂亮的人物插画(3)
文章来源于 腾龙设计,感谢作者 情非得已 给我们带来经精彩的文章!设计教程/矢量教程/Illustrator教程2010-12-17
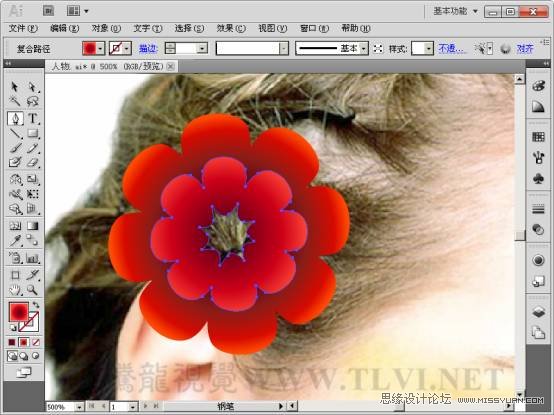
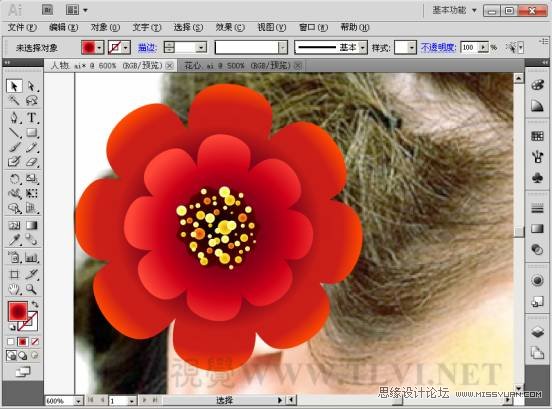
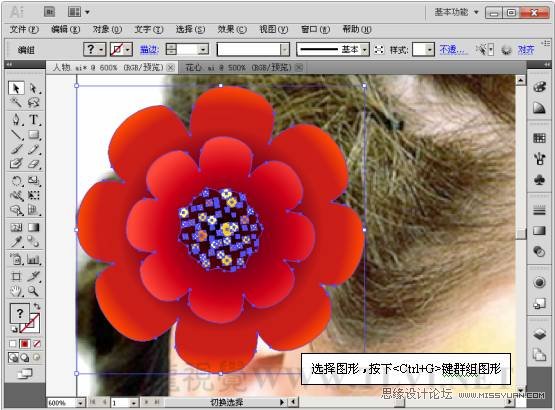
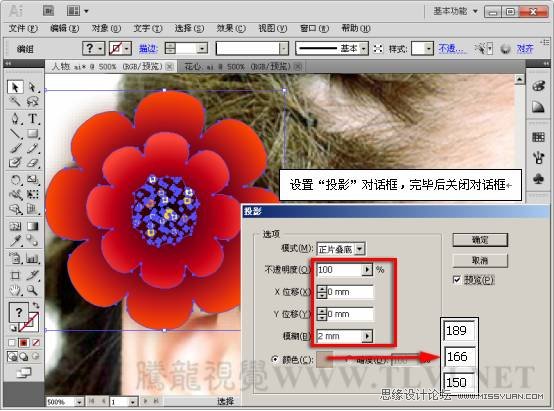
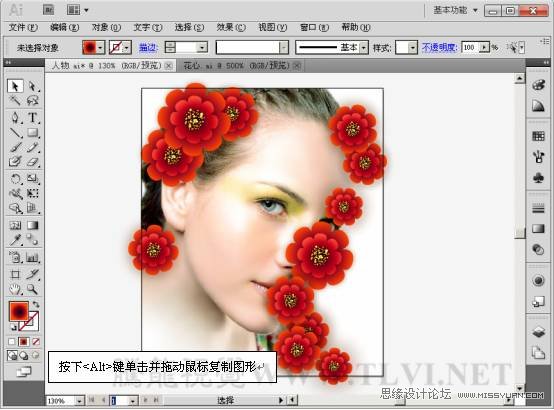
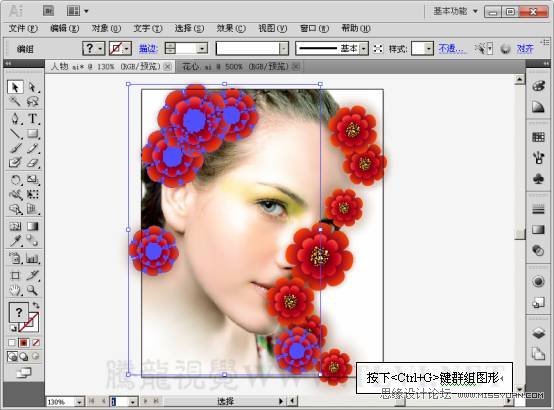
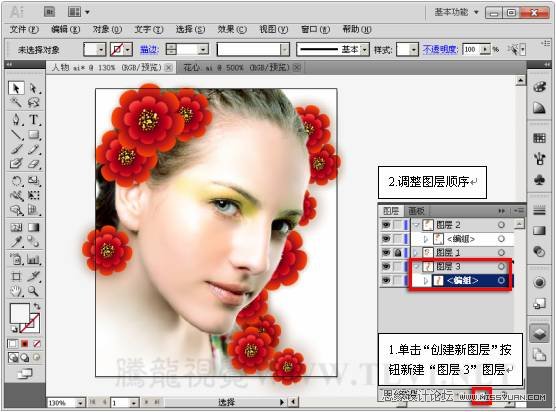
(12)参照以上方法,再制作出其它路径形状。 (13)打开花心.ai素材,将其拖移到本实例文档中。 (14)选择绘制的图形和花心图形将其群组。 (15)执行效果风格化投影命令,为花朵图形添加投影效果。 (16)将花朵图形复制多

 情非得已
情非得已
推荐文章
-
 Illustrator绘制扁平化风格的建筑图2020-03-19
-
 Illustrator制作扁平化风格的电视机2020-03-18
-
 Illustrator绘制渐变风格的建筑场景插画2020-03-12
-
 佩奇插画:用AI绘制卡通风格的小猪佩奇2019-02-26
-
 插画设计:AI绘制复古风格的宇航员海报2019-01-24
-
 房屋插画:AI绘制圣诞节主题的房屋插画2019-01-21
-
 圣诞插画:AI绘制简约风格圣诞节插画2019-01-21
-
 灯塔绘制:AI绘制的灯塔插画2019-01-21
-
 时尚船锚:AI绘制鲜花装饰的船锚图标2019-01-18
-
 扁平宝箱图形:AI绘制游戏中常见的宝箱2019-01-18
热门文章
-
 Illustrator制作复古风格的邮票效果2021-03-10
-
 Illustrator绘制扁平化风格的办公室插画
相关文章9502020-03-12
Illustrator绘制扁平化风格的办公室插画
相关文章9502020-03-12
-
Illustrator绘制渐变风格的建筑场景插画
相关文章2072020-03-12
-
 使用七巧板法绘制简约的插画作品
相关文章4032019-08-29
使用七巧板法绘制简约的插画作品
相关文章4032019-08-29
-
 风景插画:用AI制作时尚的描边风景插画
相关文章20422019-03-19
风景插画:用AI制作时尚的描边风景插画
相关文章20422019-03-19
-
 灯塔插画:用AI制作描边风格的灯塔插图
相关文章17792019-03-19
灯塔插画:用AI制作描边风格的灯塔插图
相关文章17792019-03-19
-
 可爱图标:用AI制作细描边风人物教程
相关文章6802019-03-19
可爱图标:用AI制作细描边风人物教程
相关文章6802019-03-19
-
 矢量插画:通过摄影作品学习AI插画绘画
相关文章7422019-03-14
矢量插画:通过摄影作品学习AI插画绘画
相关文章7422019-03-14
-
 扁平化海报:用AI制作线性风格的插画海报
相关文章7252019-03-14
扁平化海报:用AI制作线性风格的插画海报
相关文章7252019-03-14
