Photoshop制作复古风格的老照片效果【英】(3)
文章来源于 站酷,感谢作者 Melody Nieves 给我们带来经精彩的文章!Step 1
Create a New Layer beneath the model 2 layer.
Let's add some dramatic shadow that affects only the background elements.
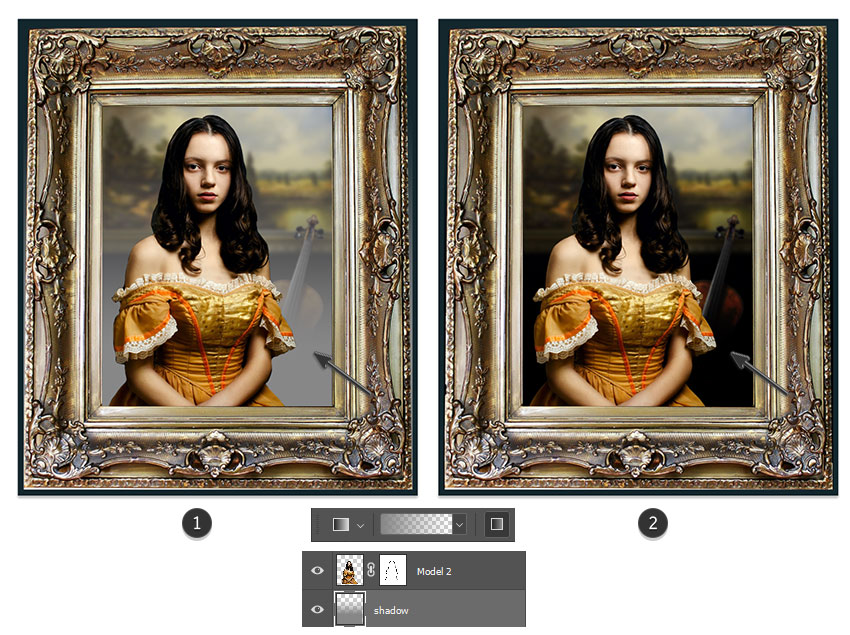
Select the Gradient Tool (G). Set it to Foreground Color to Transparent using a light gray tone as the color (#878787).
Now create a Linear Gradient moving upwards at 100% Opacity. Set the Layer Blend Mode toSubtract for a nice shadow effect.
You may notice the gradient starts to peek out beyond the golden picture frame. Just use the Rectangular Marquee Tool (M) to select these areas and Delete them for a clean finish.
Step 2
Now let's fade and recolor the picture.
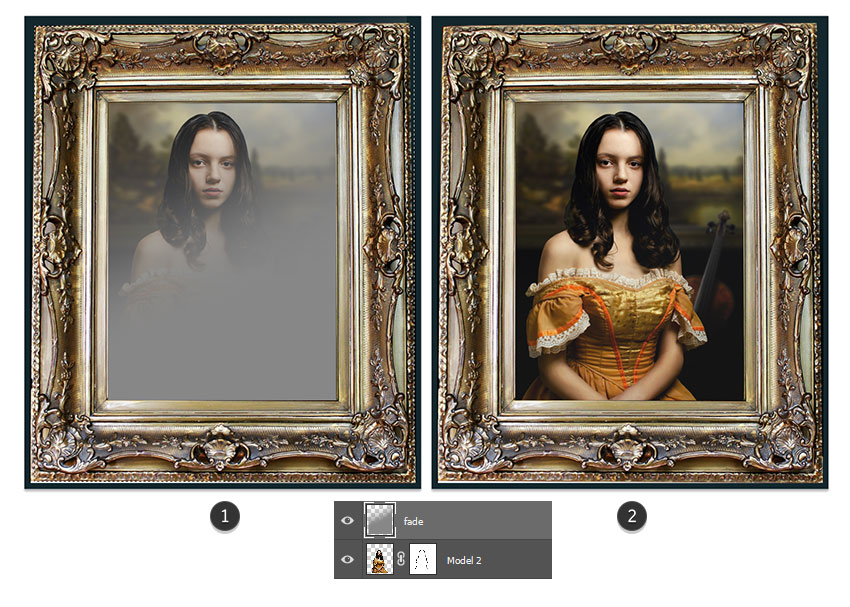
Create a New Layer above the model 2 layer. Use the Rectangular Marquee Tool (M) to create a selection as large as the picture frame.
Fill the selection with another soft Linear Gradient, this time at a slight angle, using the same gray #878787 as before. Set the Layer Blend Mode to Difference and lower the Opacity to 15%. This will help fade the picture.
Step 3
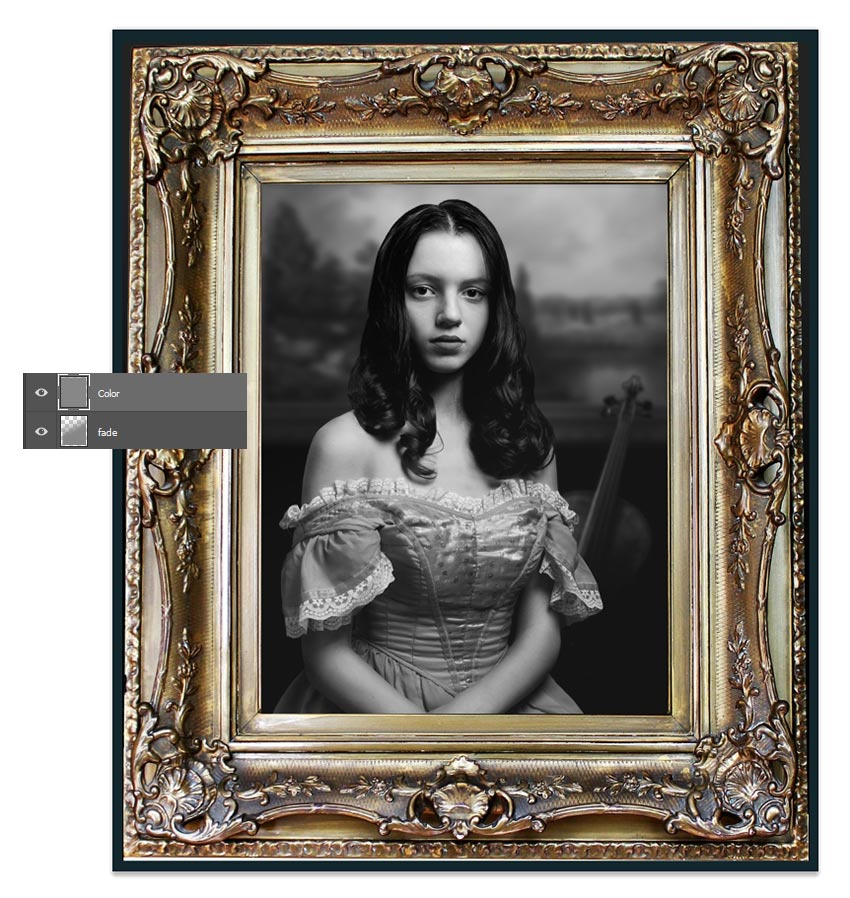
Create another New Layer above the fade.
Again, create a selection as large as the picture frame. Fill it with gray #878787 using the Paint Bucket Tool (G). Then set the Layer Blend Mode to Color for a nice black and white effect.
Step 4
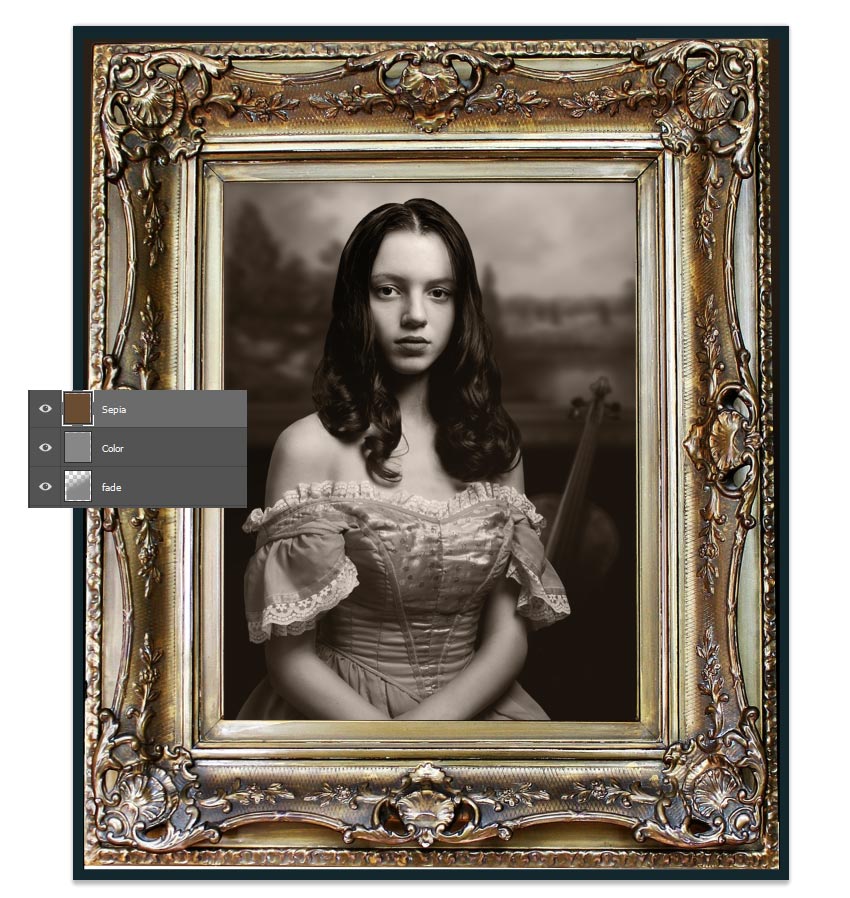
Let's add a nice sepia tone.
Create a New Layer above the solid gray. Follow the same steps as before to Fill a selection with a solid brown color #6a4c31, using the Paint Bucket Tool (G).
Then set the Layer Blend Mode to Color and lower the Opacity to 37%.
3. How to Age the Photo
These next steps will help us create an authentic-looking vintage photo, complete with subtle blurs and blown-out details.
Let's begin with the blur.
Step 1
Select the Model 2 layer and hold Control-J to Duplicate it.
Early camera lenses from the Victorian era always had a way of distorting photos. Sometimes, the photo development process later on also resulted in blurred edges.
We'll recreate this look with just a subtle blur.
Select the model copy and go to Filter > Blur Gallery > Field Blur.
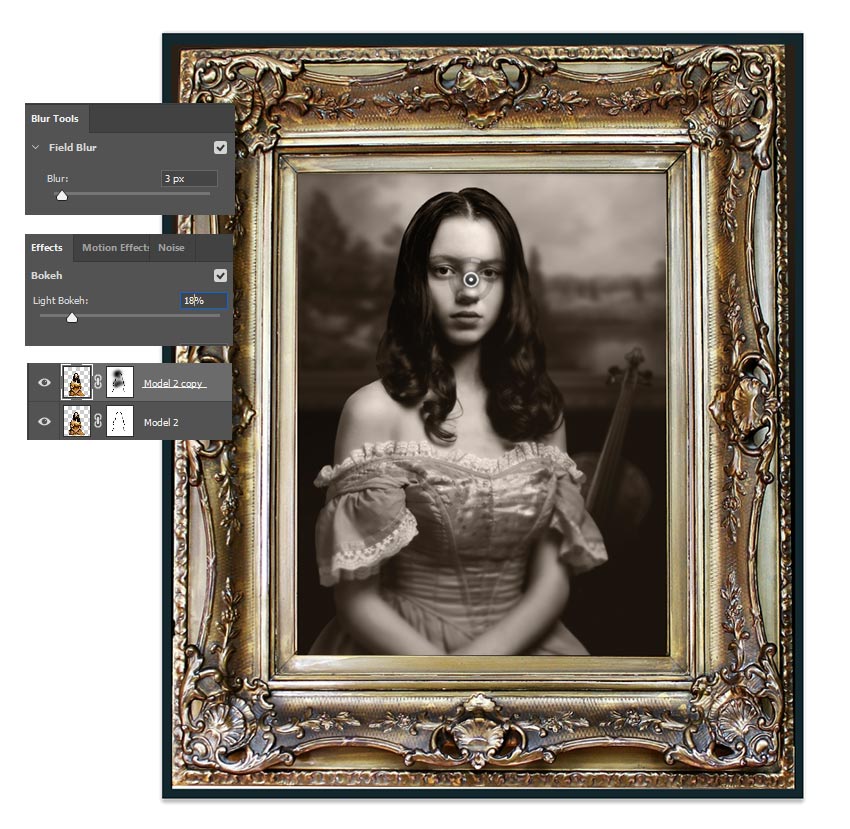
Position the blur towards the model's face. Then set the Field Blur to 3 pixels and the Light Bokeh to 18%. Diffuse any areas you'd like on the face and body using the Layer Mask and a Soft Round Brush (0% Hardness/50-80% Opacity).
Step 2
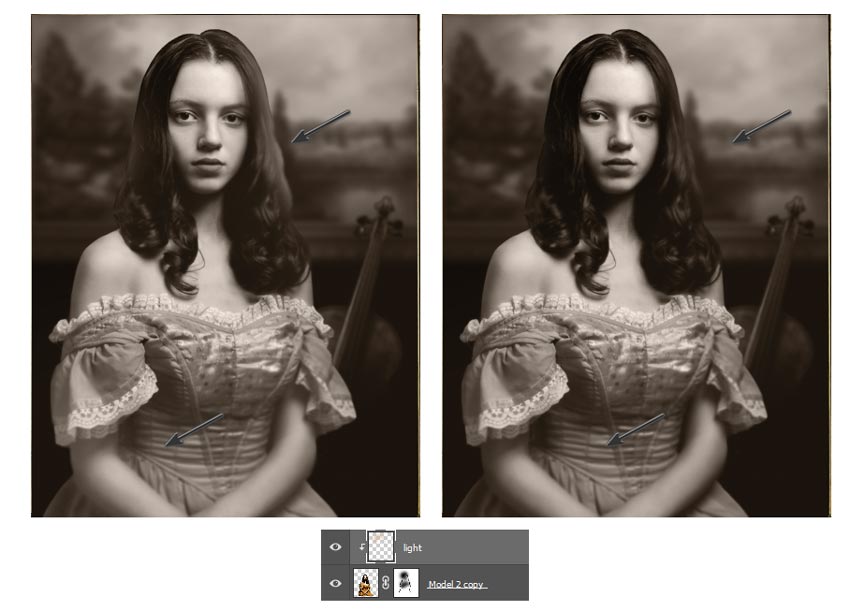
Now add some more light to the photo.
Create a New Layer and set it as a Clipping Mask to the blurred model copy.
Use a Soft Round Brush (10-30% Opacity) to paint tan #d3b899 onto the model's hair to diffuse the edges with light. Then follow up with a little white painted towards the bottom of her arms and dress.
Lower the Opacity of the layer as desired.
Step 3
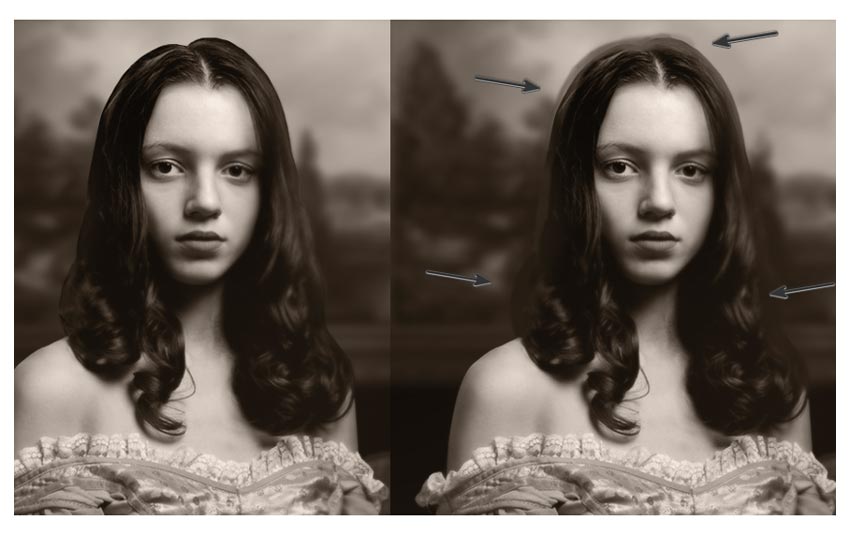
Now create a New Layer above the blurred model copy. Don't clip this layer.
Use a Soft Round Brush and hold the Alt key to pick up the hair color as a Foreground Color #2d2218. Use this color to diffuse the harsh edges of the hair for a more natural look.
Step 4
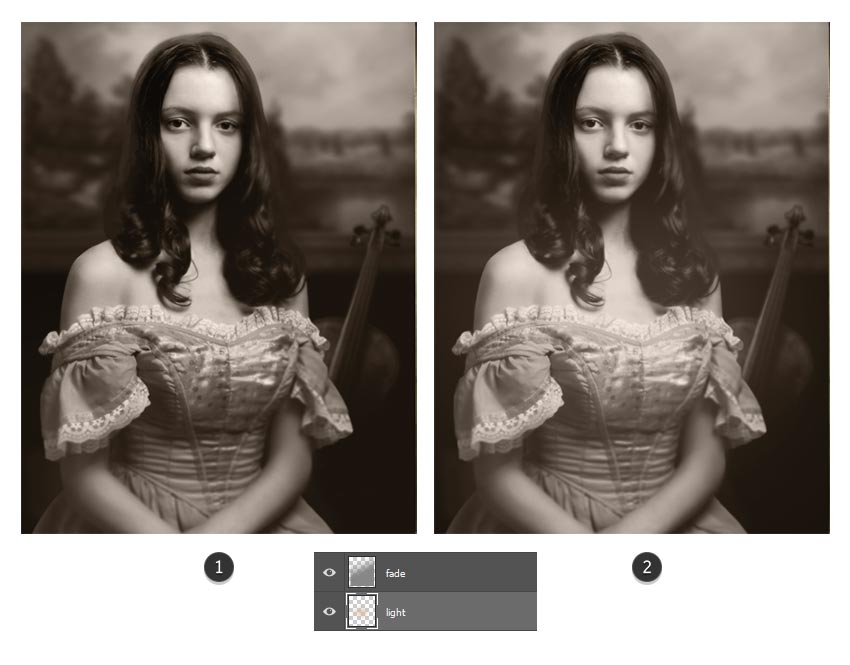
Create a New Layer underneath the fade layer.
Set the Layer Blend Mode to Linear Light and use a Soft Round Brush (0% Hardness/10-30% Opacity) to paint a tan color #c2a686 onto the photo to blow out the center with more light. Adjust the Opacity of the layer as needed.
 情非得已
情非得已
-
 Photoshop制作复古风格的老照片效果【英】2018-04-23
-
 Photoshop合成长着创意大树的长颈鹿【英】2018-04-23
-
 Photoshop合成冰冻特效的金鱼场景【英】2018-02-10
-
 Photoshop合成梦幻风格的森林场景【英】2018-02-10
-
 Photoshop合成正在施法的巫师【英】2018-02-10
-
 Photoshop制作金属质感的3D立体字【英】2018-01-09
-
 Photoshop设计火焰燃烧艺术字教程【英】2018-01-09
-
 Photoshop制作黄金质感立体字【英】
相关文章7422018-02-10
-
 Photoshop制作惊艳大气的3D立体字
相关文章14682018-02-10
-
 Photoshop合成梦幻风格的森林场景【英】
相关文章24492018-02-10
-
 Photoshop制作复古双重曝光字体
相关文章6532018-01-09
-
 Photoshop制作木地板LOGO刻印效果【英】
相关文章19272018-01-09
-
 Photoshop制作金属质感的3D立体字【英】
相关文章4612018-01-09
-
 Photoshop制作复古花朵组成的艺术字【英】
相关文章3802018-01-09
-
 Photoshop制作可爱的糖果饼干字【英】
相关文章6722017-12-25
