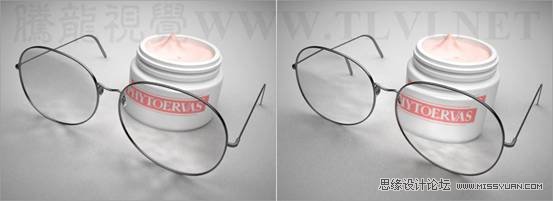
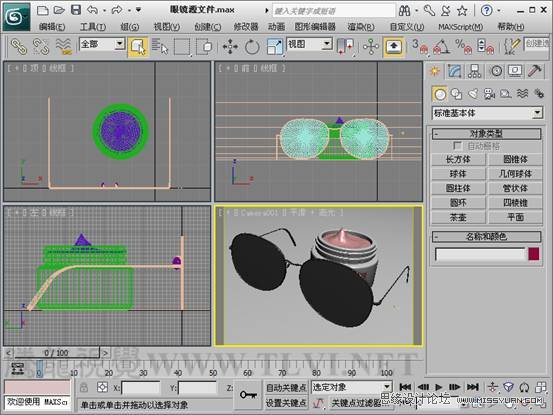
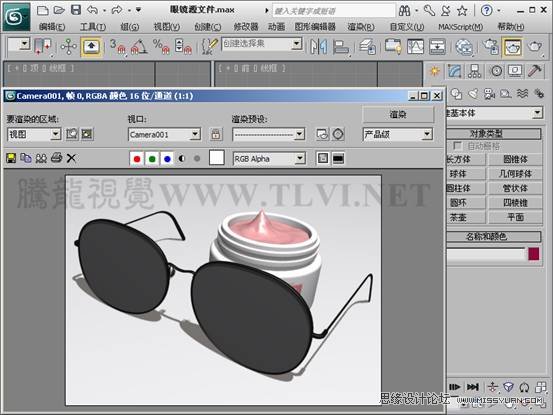
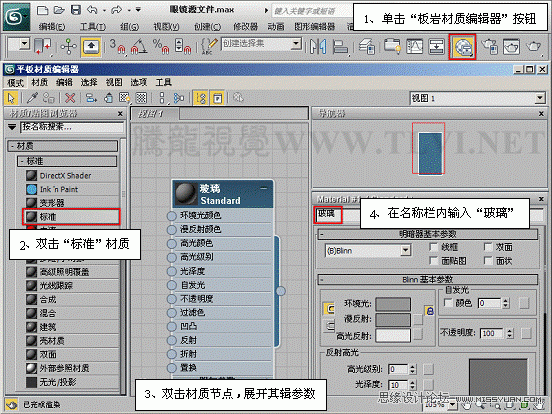
3ds max基础教程:设置薄壁折射效果
文章来源于 腾龙设计,感谢作者 佚名 给我们带来经精彩的文章!设计教程/设计教程/3DMAX教程2011-07-18
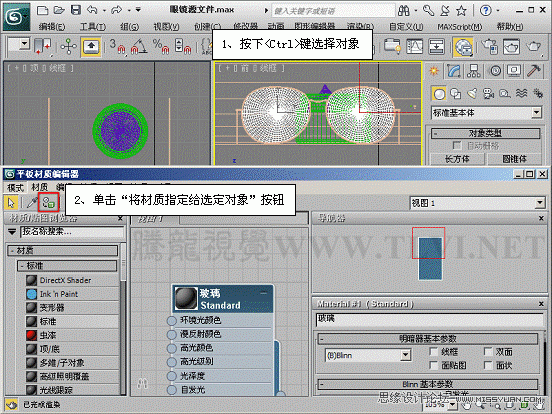
薄壁折射用于模拟玻璃“缓进”或偏移效果,如果查看通过一块玻璃的图像就会看到这种效果。对于为玻璃建模的对象,这种贴图的速度更快,所用内存更少,并且提供的视觉效果也较为真实。
 情非得已
情非得已
推荐文章
-
 3ds Max实例教程:冰爽夏日餐桌场景2011-09-02
-
 室内灯光表现中异型暗藏灯打法2010-11-12
-
 室外教程:室外夜景图制作过程2010-10-28
-
 3DsMAX制作漂亮的高贵首饰流程2010-09-02
-
 3ds MAX实例教程:制作汽车轮胎并给轮胎建模2010-06-27
-
 3D MAX新增Autodesk材质来制作环保概念车2010-06-12
-
 3D MAX使用放样建模方法给步枪建模2010-06-12
-
 3D MAX使用NURBS方法给贪吃虫建模2010-06-12
-
 3D MAX实例教程:制作漂亮的盆景花朵2010-05-27
-
 3D MAX实例教程:制作游戏风格场景2010-05-27
热门文章
-
 3DXMAX制作欧式古典风格的雕花建模
相关文章18652017-09-24
3DXMAX制作欧式古典风格的雕花建模
相关文章18652017-09-24
-
 3DSMAX为VR设备制作立体交互图像效果
相关文章5292017-09-24
3DSMAX为VR设备制作立体交互图像效果
相关文章5292017-09-24
-
 3DSMAX制作精美的雕花圆镜效果
相关文章6562017-09-24
3DSMAX制作精美的雕花圆镜效果
相关文章6562017-09-24
-
 3ds Max实例教程:模型转化浮雕效果
相关文章7112017-09-24
3ds Max实例教程:模型转化浮雕效果
相关文章7112017-09-24
-
 3DS MAX详细解析花瓶布线教程
相关文章10812017-09-24
3DS MAX详细解析花瓶布线教程
相关文章10812017-09-24
-
 3ds Max快速打造网格特效的麋鹿效果
相关文章8752017-09-24
3ds Max快速打造网格特效的麋鹿效果
相关文章8752017-09-24
-
 3ds Max制作简单的爆炸场景效果
相关文章9222017-09-24
3ds Max制作简单的爆炸场景效果
相关文章9222017-09-24
-
 3ds MAX绘制逼真的劳力士手表效果图
相关文章8992017-09-22
3ds MAX绘制逼真的劳力士手表效果图
相关文章8992017-09-22
