Photoshop CS5制作GIF动画的方法精解(3)
文章来源于 腾龙设计,感谢作者 佚名 给我们带来经精彩的文章!设计教程/PS教程/动画教程2010-09-07
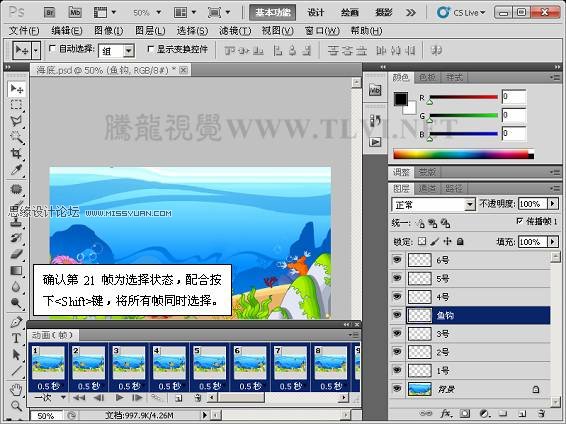
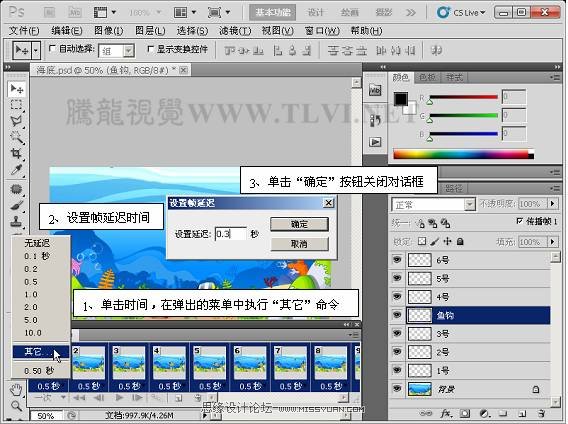
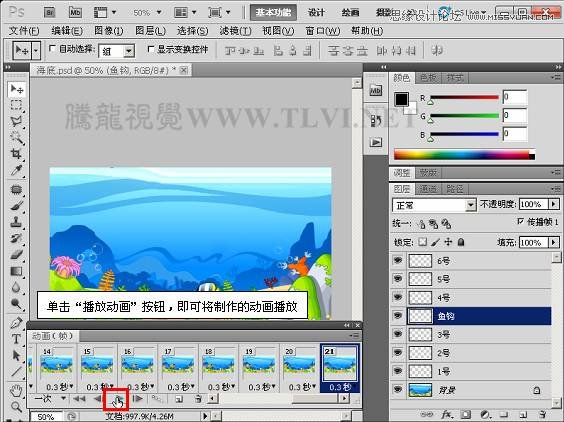
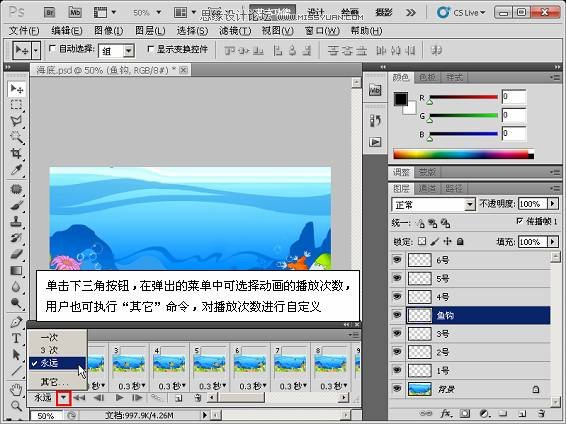
(12)更改帧与帧之间的播放时间。 (13)此时动画已经制作完成, 将其播放查看效果。 (14)更改动画的播放次数。 (15)执行文件存储为Web和设备所用格式命令,打开并设置存储为Web和设备所用格式对话框,如图18-40所示。

 情非得已
情非得已
推荐文章
-
 Photoshop详细解析GIF动画图片的优化技巧2016-12-27
-
 Photoshop详细解析GIF动画中批量处理技巧2015-12-20
-
 Photoshop结合AI制作时尚闪烁霓虹灯动画效果2015-11-26
-
 Photoshop制作超酷的蓝色霓虹灯效果图2015-01-26
-
 Photoshop合成绚丽的山水瀑布动画效果2013-10-05
-
 Photoshop制作林间流动效果的云彩动画2012-06-09
-
 Photoshop制作滑动效果的霓虹字动画教程2012-06-03
-
 Photsohop制作夏日清爽的美女照片滚动动画效果2012-04-24
-
 Photoshop制作流畅的中国风动画签名教程2012-04-15
-
 Photoshop制作相册自动翻页GIF动画教程2012-02-22
热门文章
-
 GIF教程:用PS制作GIF动画表情教程
相关文章19922019-02-21
GIF教程:用PS制作GIF动画表情教程
相关文章19922019-02-21
-
 果冻动画:PS制作果冻跳动GIF动画
相关文章17502019-01-10
果冻动画:PS制作果冻跳动GIF动画
相关文章17502019-01-10
-
 下雨动画:PS制作逼真的下雨GIF动画
相关文章18322018-12-20
下雨动画:PS制作逼真的下雨GIF动画
相关文章18322018-12-20
-
 Photoshop制作信息干扰错位GIF动画效果
相关文章9752018-12-10
Photoshop制作信息干扰错位GIF动画效果
相关文章9752018-12-10
-
 Photoshop制作简洁的网页加载GIF动画
相关文章15602018-08-06
Photoshop制作简洁的网页加载GIF动画
相关文章15602018-08-06
-
 Photoshop把静态照片做成GIF放大动画效果
相关文章14952018-05-07
Photoshop把静态照片做成GIF放大动画效果
相关文章14952018-05-07
-
 Photoshop制作动画特效的微信表情
相关文章11872018-03-19
Photoshop制作动画特效的微信表情
相关文章11872018-03-19
-
 Photoshop制作手机图片循环滚动动画效果
相关文章16002017-12-17
Photoshop制作手机图片循环滚动动画效果
相关文章16002017-12-17
