Photoshop实例教程:创建金属光泽图标(6)
文章来源于 Dalton Tan,感谢作者 viperasi 给我们带来经精彩的文章!Step 11: Creating The Face
第十一步:创建正面
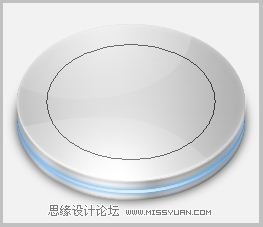
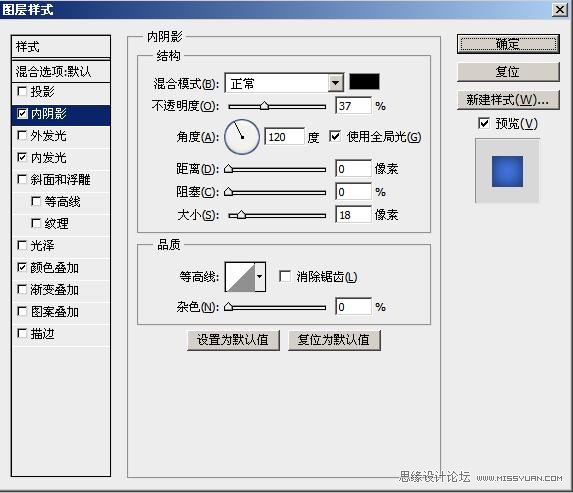
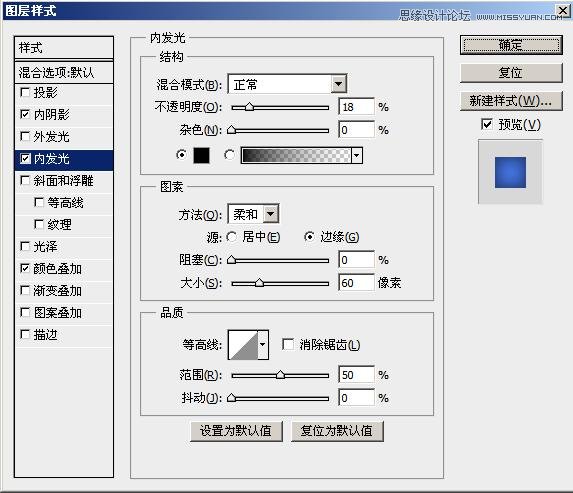
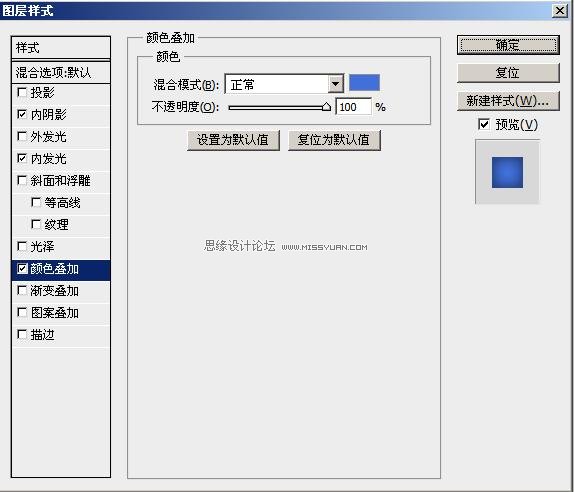
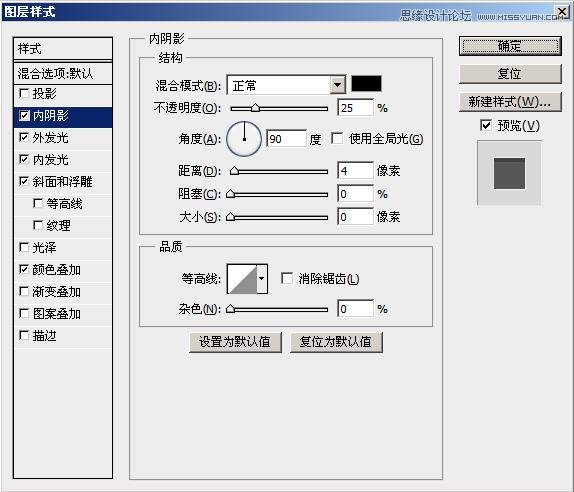
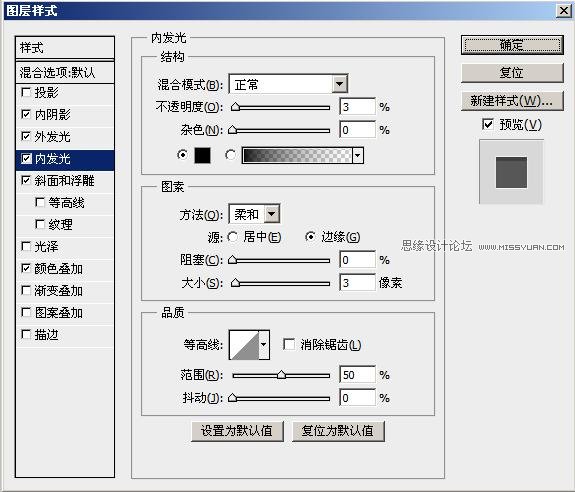
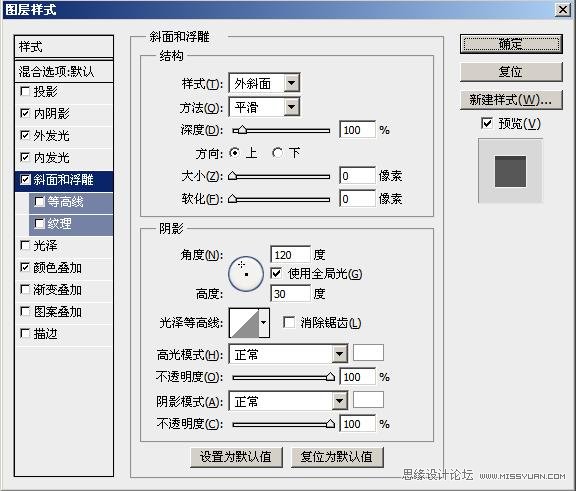
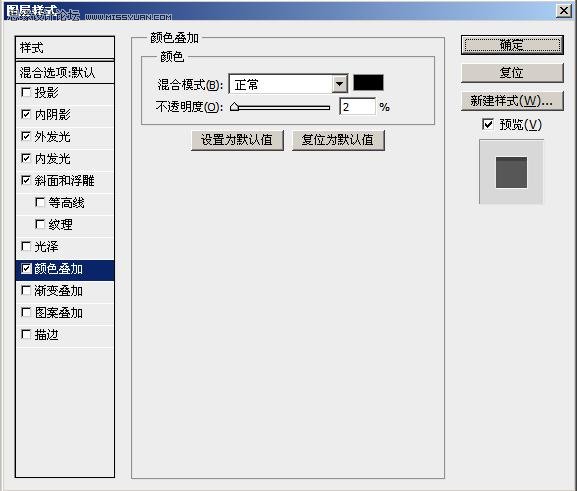
Duplicate (ctrl+J) the “Top” layer, place it right at the top and rename it to “Inner”. Transform (ctrl+T), and while pressing alt+shift, and shrink it as shown below. Then add the following Layer Styles.
复制(Ctrl+J)“Top”层,放到层的最上面并重命名为“Inner”。按着Alt+Shift变换图形(Ctrl+T)使其像下图一样收缩。然后添加如下层样式。
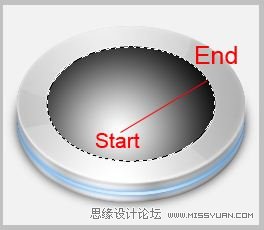
Create a new layer and get the selection of “Inner” layer. Using a White Brush click once at the center, bottom edge of the selection. Set the Opacity to 40%.
新建层,选择“Inner”的内容,用白色画笔点击选区的中心,下边界。设置透明度为40%。
Step 12: Creating Depth & Detail
第十二步:创建深度和细节。
Duplicate the “Inner” layer and place it right at the top. Clear the Layer Style by right-clicking on the layer then “Clear Layer Style”. Apply the following Layer Styles to it.
复制“Inner”层,放到层的地步。右键点击层选择“清除图层样式”命令来清除层样式。应用如下样式。

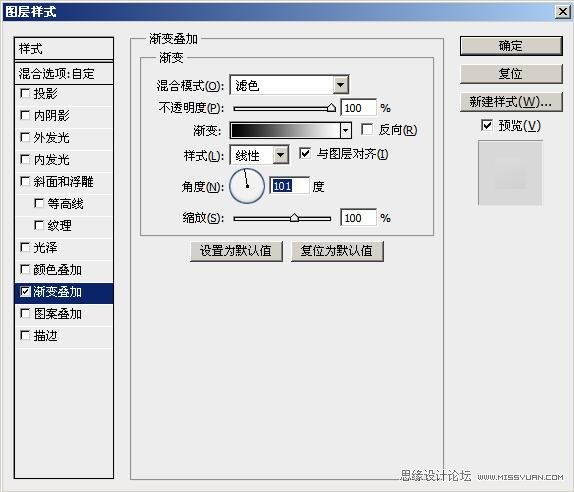
Create a new layer and get the Gradient Tool. You can select this by first selecting the Fill Tool (G)then pressing Shift+G. Set the colours to Default (D). Select the Radial Gradient option. Get the selection of “Inner” layer and Fill it as shown, then set the Opacity to 20% and Blending Mode to Screen.
新建层,选择渐变工具。你可以先选择填充工具(G)然后按Shift+G来选择。设置颜色为默认(D)。选择放射渐变选项。选择“Inner”内容然后如图填充,然后设置透明度为20%,融合模式为滤色。
![]()
Create a new layer. Get the selection of “Inner” and nudge it down and right once each. Fill it withWhite then nudge it back to it’s original position and press Delete. Set the Opacity to 80%.
新建层,选择“Inner”内容,分别向下,向右轻移一次。用白色填充然后轻移回到原来的位置然后删除。设置透明度为80%。
Create a new layer and while using the same selection, nudge it down by 4px. Fill it with White andnudgeit down another 1px then press Delete. Set the Opacity to 30%.
新建层,用相同的选区向下轻移4px。用白色填充再向下轻移1px然后删除。设置透明度为30%。
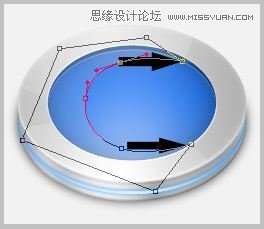
Now create a new layer and and grab the Pen Tool and draw the following shape. Notice the point of contact between the shining areas. Also apply the following Layer Styles with 15% Opacity and 50% Fill.
新建层,用钢笔工具画出如图形状。注意提示区域里的连接点。同样应用如图图层样式并设置透明度15%,填充透明度50%。
Step 13: Adding Alphabets
 情非得已
情非得已
-
 Photoshop设计撕纸特效的人物海报教程2020-10-28
-
 Photoshop制作立体风格的国庆节海报2020-10-10
-
 Photoshop设计撕纸特效的人像海报2020-03-27
-
 图标设计:用PS制作奶油质感手机主题图标2019-11-06
-
 图标设计:用PS制作中国风圆形APP图标2019-11-01
-
 手机图标:用PS设计儿童贴画风格的APP图标2019-08-09
-
 电影海报:用PS制作蜘蛛侠海报效果2019-07-09
-
 创意海报:用PS合成铁轨上的霸王龙2019-07-08
-
 电影海报:用PS设计钢铁侠电影海报2019-07-08
-
 立体海报:用PS制作创意的山川海报2019-05-22
-
 Photoshop设计猕猴桃风格的APP图标2021-03-10
-
 Photoshop制作逼真的毛玻璃质感图标2021-03-09
-
 Photoshop结合AI制作抽象动感的丝带2021-03-16
-
 Photoshop结合AI制作炫酷的手机贴纸2021-03-16
-
Photoshop设计猕猴桃风格的APP图标
相关文章2212021-03-10
-
Photoshop制作逼真的毛玻璃质感图标
相关文章2102021-03-09
-
图标设计:用PS制作奶油质感手机主题图标
相关文章11692019-11-06
-
图标设计:用PS制作中国风圆形APP图标
相关文章8772019-11-01
-
 简约图标:用PS制作荷花形态的APP图标
相关文章11812019-08-15
简约图标:用PS制作荷花形态的APP图标
相关文章11812019-08-15
-
手机图标:用PS设计儿童贴画风格的APP图标
相关文章13392019-08-09
-
 设计图标:用PS设计拟物风格的APP图标
相关文章16132019-08-05
设计图标:用PS设计拟物风格的APP图标
相关文章16132019-08-05
-
 手机图标:用PS制作拟物风格手机APP图标
相关文章15532019-07-12
手机图标:用PS制作拟物风格手机APP图标
相关文章15532019-07-12
