Photoshop解析渐变叠加和图案叠加命令(4)
文章来源于 腾龙设计,感谢作者 佚名 给我们带来经精彩的文章!设计教程/PS教程/其他教程2011-09-11
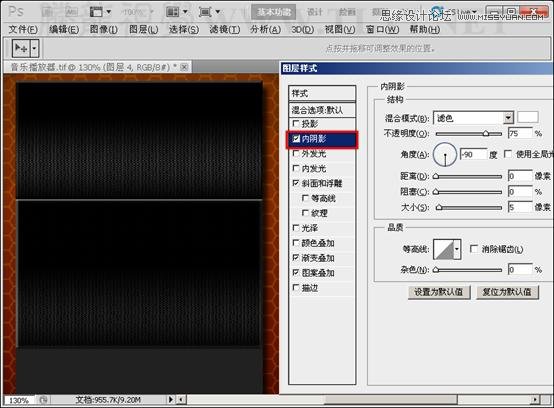
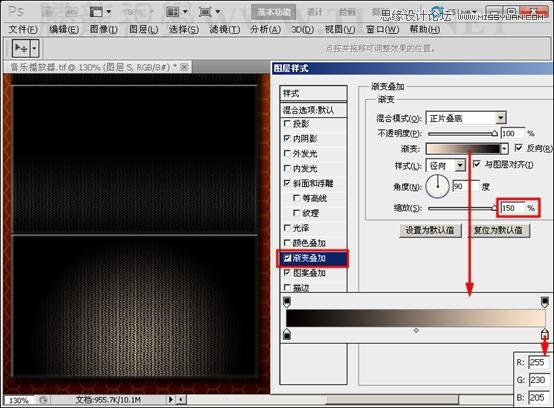
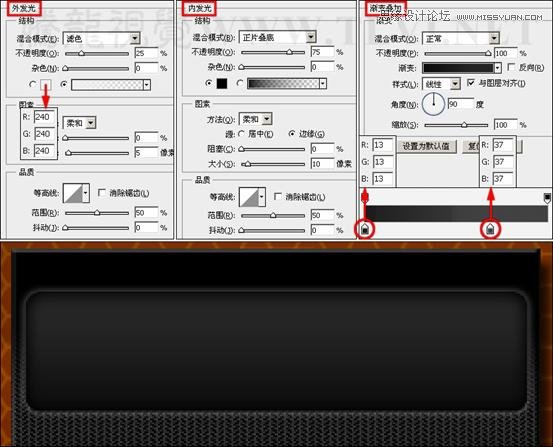
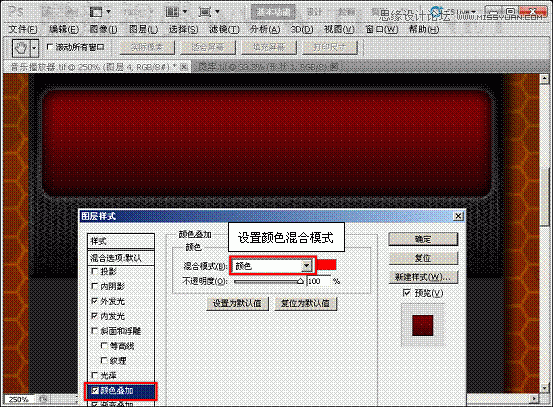
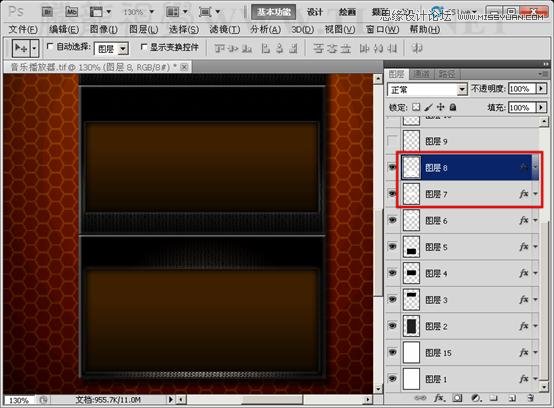
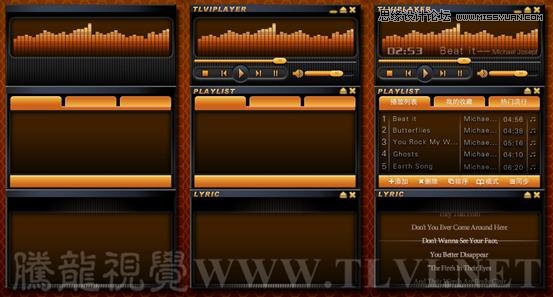
(16)复制图层 3上的图层效果到图层 4,并添加内阴影效果。 (17)复制图层 4上的图层效果到图层 5,并修改参数。 (18)显示图层 6,为其添加图层样式效果。 (19)继续为图像添加颜色叠加样式效果。 (20)复制图层 6中的
 情非得已
情非得已
推荐文章
-
 Photoshop详解商业磨皮中如何提升照片质感2020-03-19
-
 直方图原理:实例解析PS直方图的应用2019-01-17
-
 工具原理:详解PS渐变映射的使用技巧2019-01-10
-
 Photoshop CC 2019 20.0中文版新功能介绍2018-10-24
-
 Photoshop详解ACR渐变滤镜在后期的妙用2018-09-29
-
 Photoshop通过调色实例解析直方图使用技巧2018-09-29
-
 Photoshop详细解析CameraRaw插件使用2018-03-29
-
 Photoshop解析新手必须知道的学习笔记2017-06-05
-
 Photoshop详细解析曲线工具的使用原理2017-02-08
-
 Photoshop详细解析钢笔工具的高级使用技巧2016-12-08
热门文章
-
 水印制作:用PS给照片添加水印效果
相关文章10292019-04-07
-
 基础教程:详细解析PS色彩平衡的原理
相关文章6072018-12-24
-
 去除噪点:PS给照片去噪点的几个技巧
相关文章10712018-12-20
-
 详解PS后期中可选颜色要怎么使用
相关文章7342018-12-17
-
 Photoshop详细解析HSL调色工具的使用技巧
相关文章7382018-12-11
-
 Photoshop巧用动作选出照片中不饱和的选区
相关文章3502018-11-15
-
 Photoshop详细解析调色工具使用方法
相关文章3772018-11-12
-
 详解PS图层混合模式正片叠底的应用方法
相关文章11842018-06-22
