Photoshop六种实用方法给人物照片去水印(4)
文章来源于 站酷,感谢作者 野鹿志 给我们带来经精彩的文章!设计教程/PS教程/其他教程2017-04-14
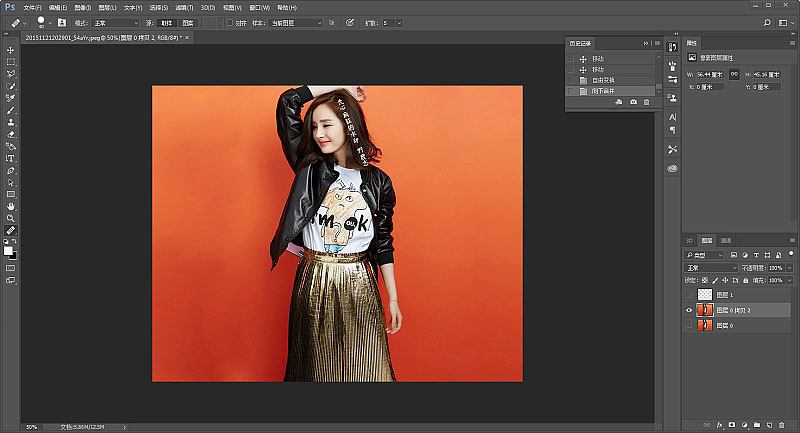
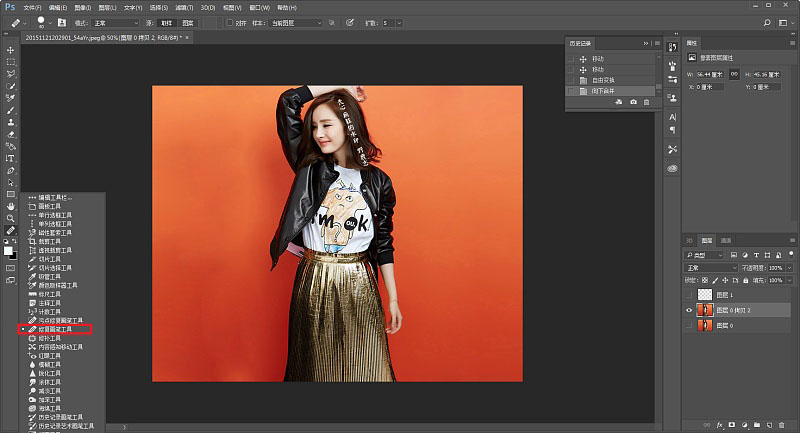
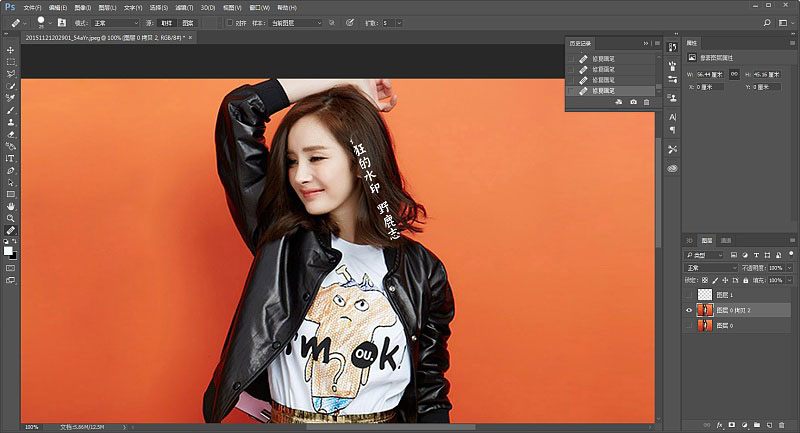
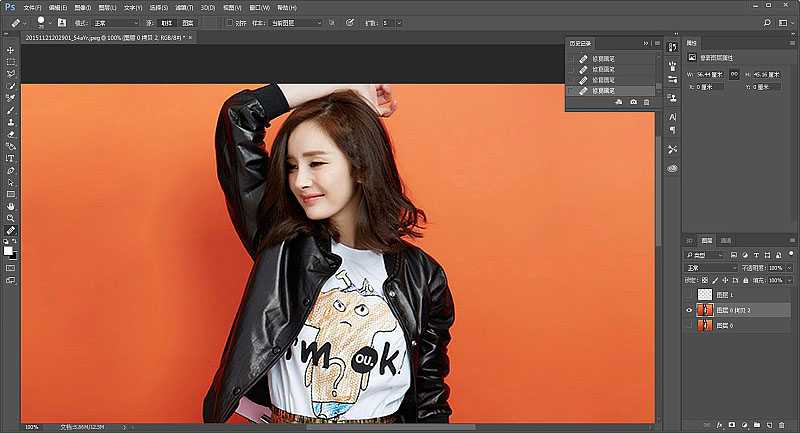
五、修复画笔工具 1、好吧,水印又跑到头发上来。 2、选择右边的修复画笔工具。 3、使用方法和图章工具类似,在水印附近的区域,按住alt键鼠标单击选区一块颜色,然后再去点击水印的位置进行遮盖。 4、不停的重复这
 情非得已
情非得已
推荐文章
-
 Photoshop详解商业磨皮中如何提升照片质感2020-03-19
-
 直方图原理:实例解析PS直方图的应用2019-01-17
-
 工具原理:详解PS渐变映射的使用技巧2019-01-10
-
 Photoshop CC 2019 20.0中文版新功能介绍2018-10-24
-
 Photoshop详解ACR渐变滤镜在后期的妙用2018-09-29
-
 Photoshop通过调色实例解析直方图使用技巧2018-09-29
-
 Photoshop详细解析CameraRaw插件使用2018-03-29
-
 Photoshop解析新手必须知道的学习笔记2017-06-05
-
 Photoshop详细解析曲线工具的使用原理2017-02-08
-
 Photoshop详细解析钢笔工具的高级使用技巧2016-12-08
热门文章
-
 Photoshop详解商业磨皮中如何提升照片质感
相关文章10402020-03-19
-
 Photoshop巧用内容识别工具给人物进行缩放
相关文章5752020-03-04
-
 操作技巧:如果用PS提高照片的清晰度
相关文章7042019-07-24
-
 儿童调色:用PS详解儿童人像的后期技巧
相关文章10062019-07-10
-
 光影技巧:详解PS在人物后期中光影处理
相关文章7342019-04-19
-
 水印制作:用PS给照片添加水印效果
相关文章10292019-04-07
-
 摄影后期:分析后期作品画面和确认思路
相关文章5492019-04-01
-
 修图技巧:十个常见的PS修图错误分析
相关文章12312019-03-08


