Photoshop光影作品的前期拍摄和后期思路(8)
文章来源于 图虫网,感谢作者 韩凯 给我们带来经精彩的文章!设计教程/PS教程/调色教程2018-10-10
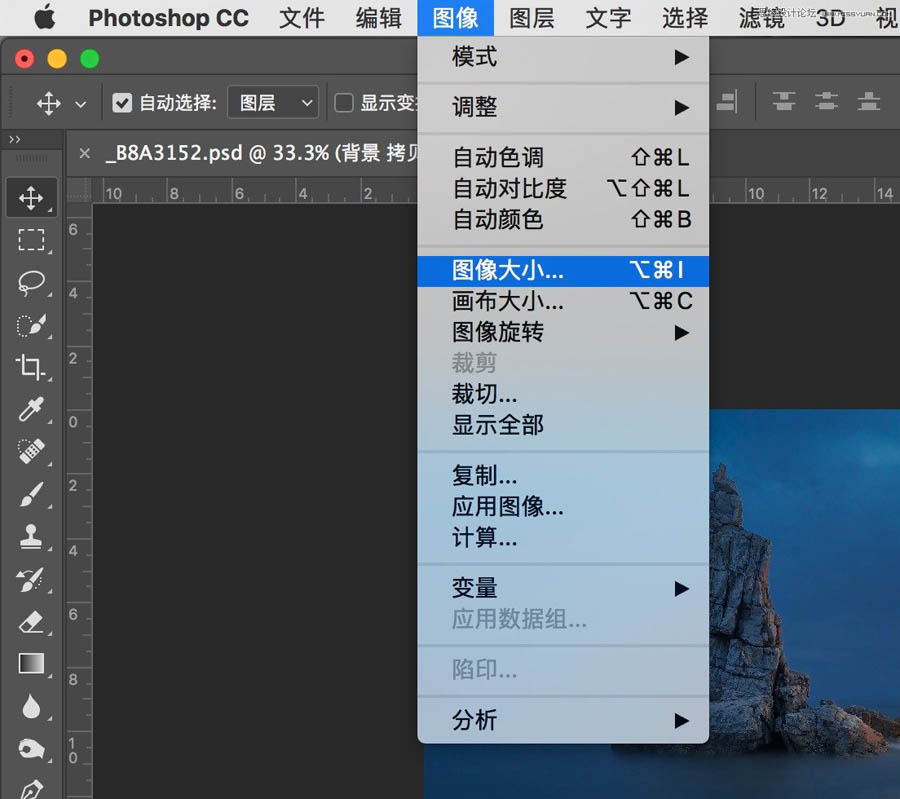
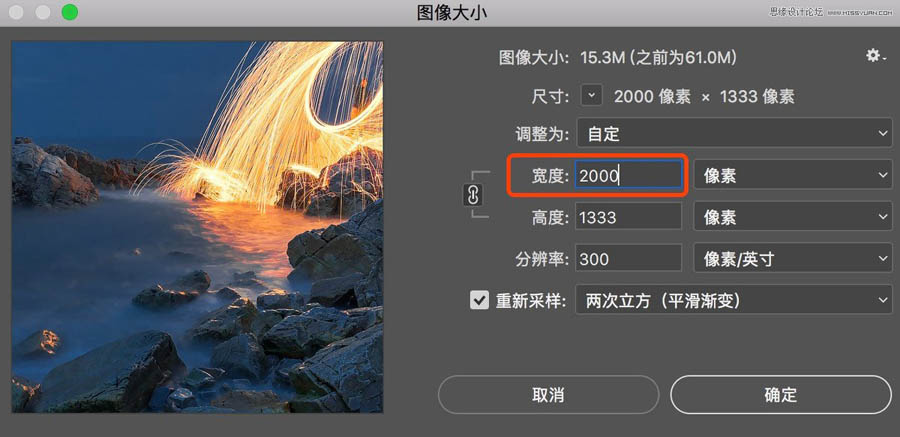
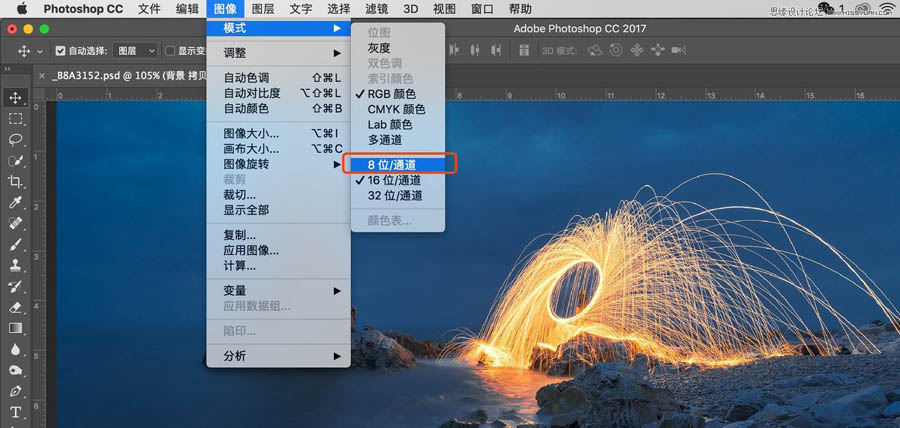
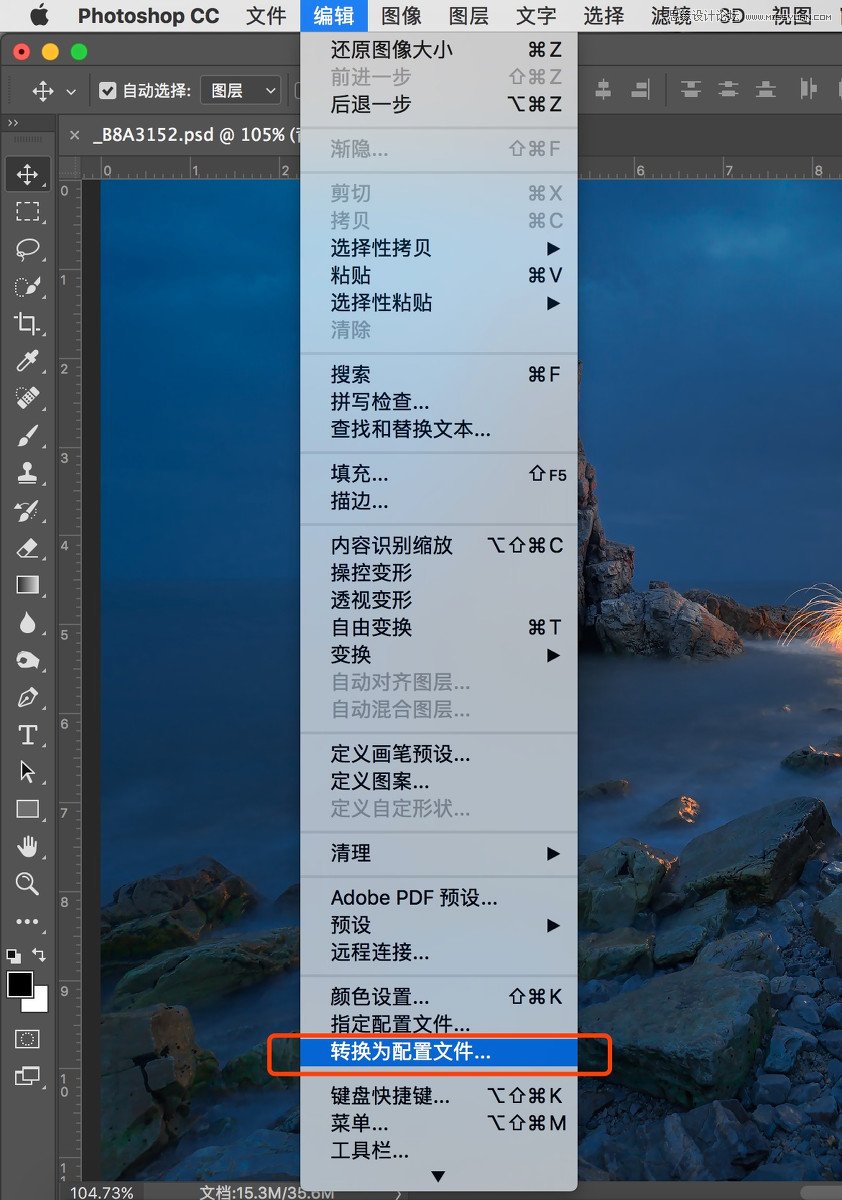
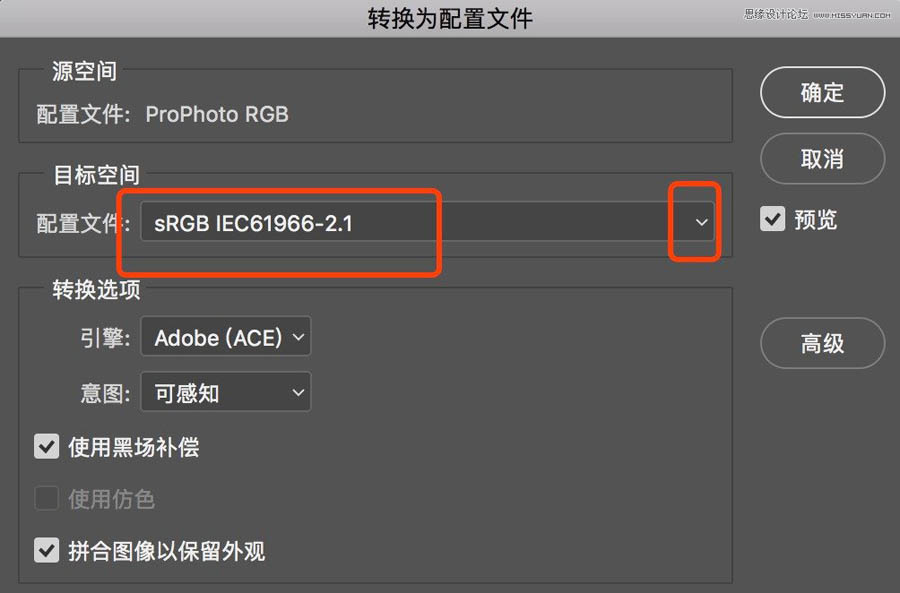
43、这个时候的半径数值设置在0.2左右,接连锐化三次或者四次 44、再次点击图像大小 45、把长边改为我们最终需要的2000像素,接下来保存(关于保存jpg,还需要更改色彩空间和色彩深度,如果不更改,可能会有偏色的情
 情非得已
情非得已
推荐文章
-
 复古效果:用PS调出儿童照片复古电影效果2019-08-02
-
 暖色效果:用PS调出外景人像暖黄色效果2019-07-29
-
 清新人像:用PS调出逆光人像小清新效果2019-04-16
-
 电影色调:用PS减法调出电影胶片效果2019-03-29
-
 复古效果:PS调出人像复古电影艺术效果2019-01-17
-
 Photoshop调出外景人像暖色淡雅效果2018-11-29
-
 Photoshop调出梦幻唯美风格的少女照片2018-10-17
-
 Photoshop详细解析夜景风光如何后期修图2018-09-29
-
 Photoshop调出清晨村庄照片暖色效果2018-09-29
-
 Photoshop调出婚纱外景春夏秋冬四季效果2018-09-20
热门文章
-
 Photoshop结合CR修出通透干净的人像肤色2021-03-04
-
 Photoshopo调出外景人像金黄色皮肤效果2021-03-05
-
复古效果:用PS调出儿童照片复古电影效果
相关文章8782019-08-02
-
 清新效果:用PS调出夏日人像通透效果
相关文章7292019-07-23
清新效果:用PS调出夏日人像通透效果
相关文章7292019-07-23
-
 古风人像:用PS调出清新通透的古典人像
相关文章5562019-07-19
古风人像:用PS调出清新通透的古典人像
相关文章5562019-07-19
-
 清新效果:用PS调出小清新风格的人像
相关文章5912019-07-16
清新效果:用PS调出小清新风格的人像
相关文章5912019-07-16
-
清新人像:用PS调出逆光人像小清新效果
相关文章9542019-04-16
-
 小清新效果:用PS调出小清新风格的人像
相关文章5712019-04-01
小清新效果:用PS调出小清新风格的人像
相关文章5712019-04-01
-
 Photoshop调出外景人像暖黄色艺术效果
相关文章4732018-11-16
Photoshop调出外景人像暖黄色艺术效果
相关文章4732018-11-16
-
 Photoshop详细解析后期调色中如何同一色彩
相关文章5632018-10-17
Photoshop详细解析后期调色中如何同一色彩
相关文章5632018-10-17
