换脸教程:使用PS快速给自己变得漂亮(6)
文章来源于 站酷,感谢作者 牛小波 给我们带来经精彩的文章!设计教程/PS教程/照片处理2019-02-19
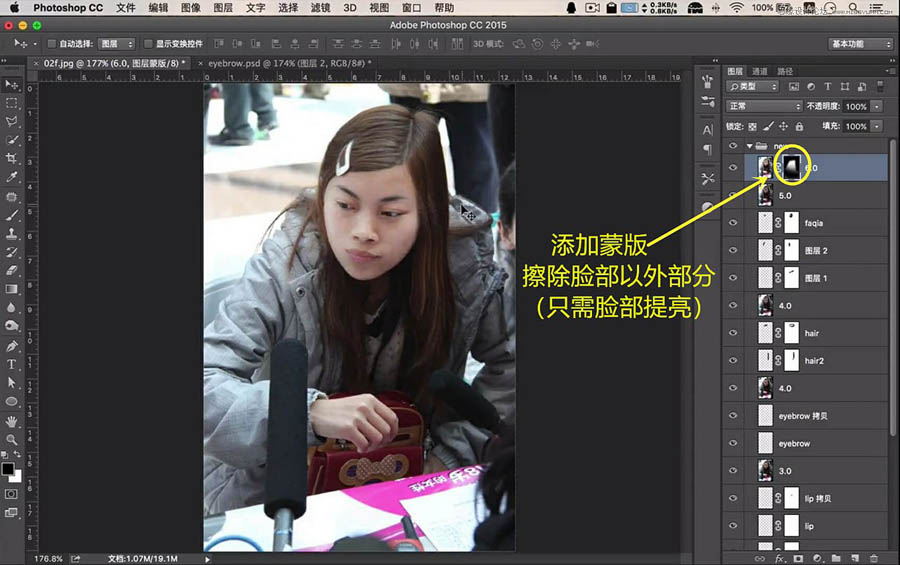
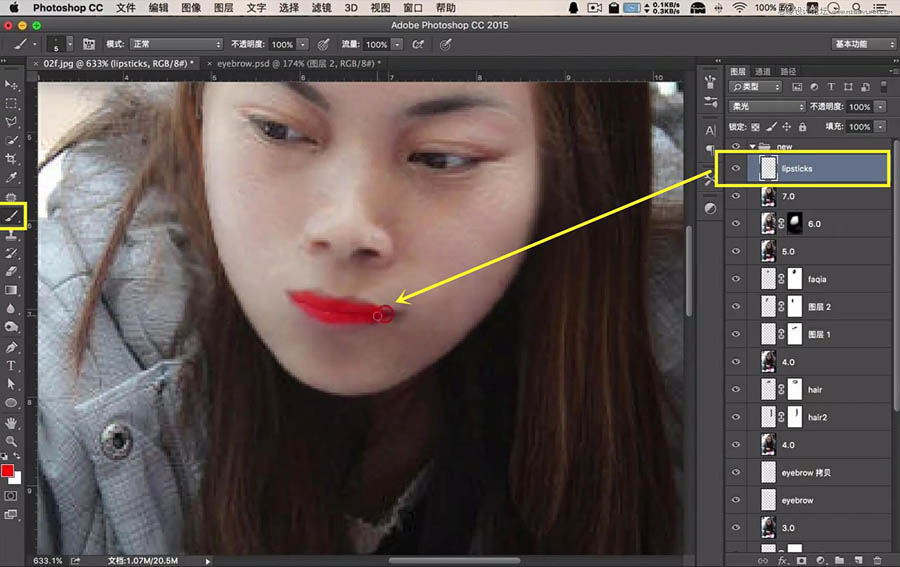
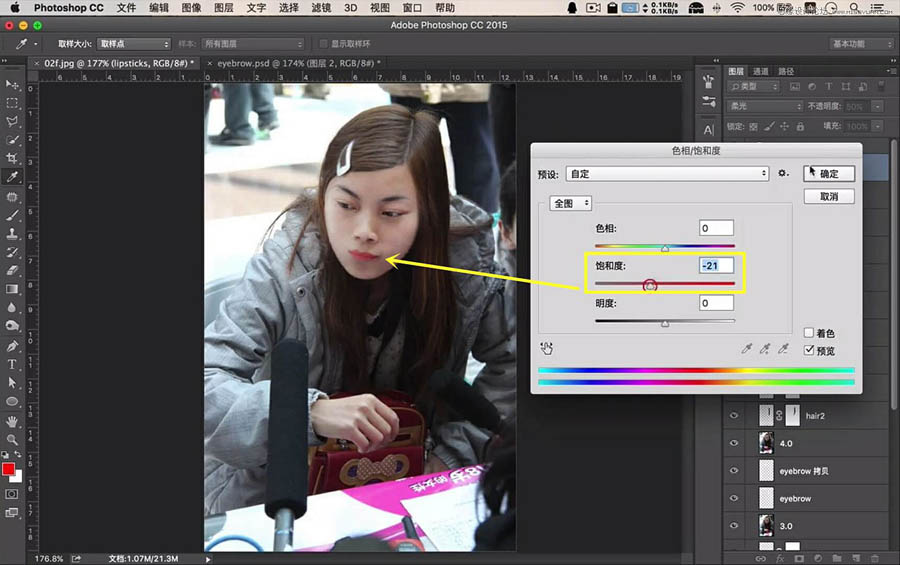
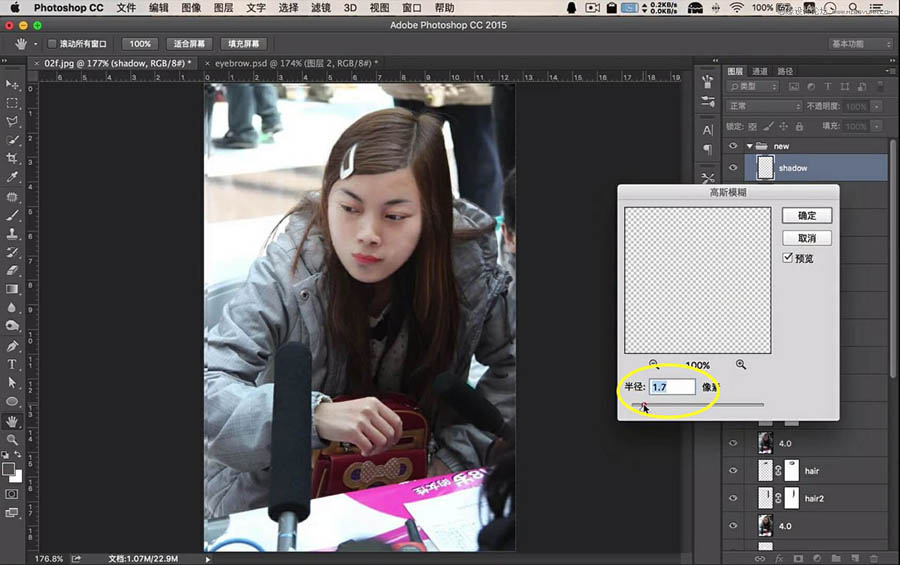
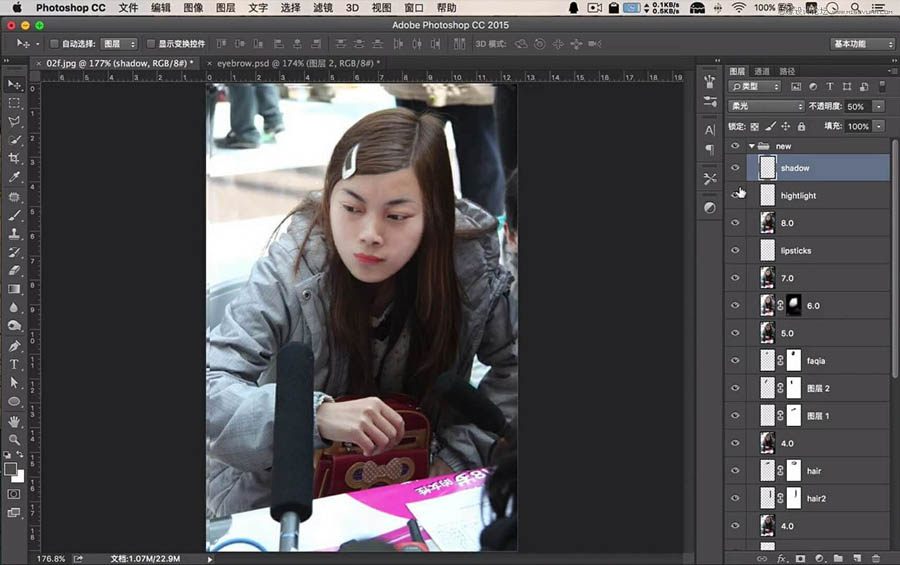
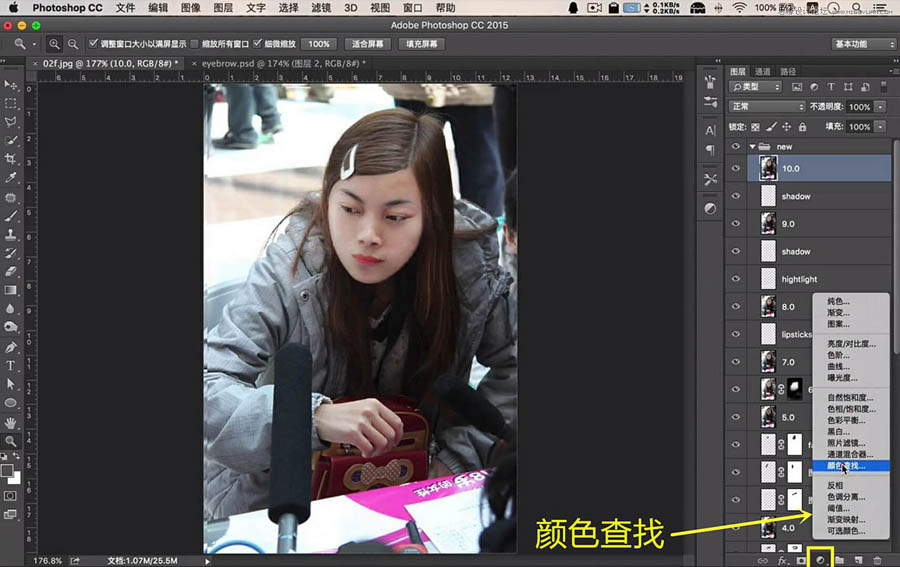
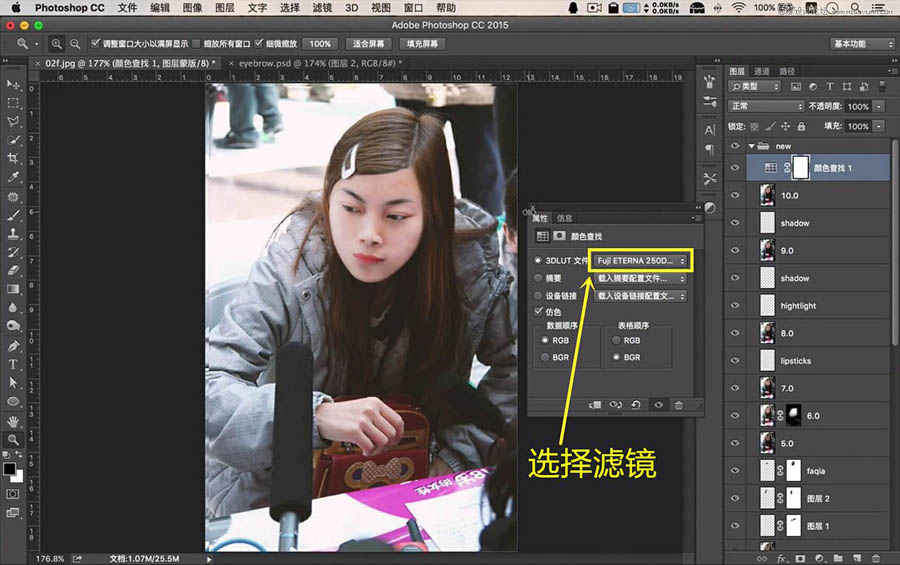
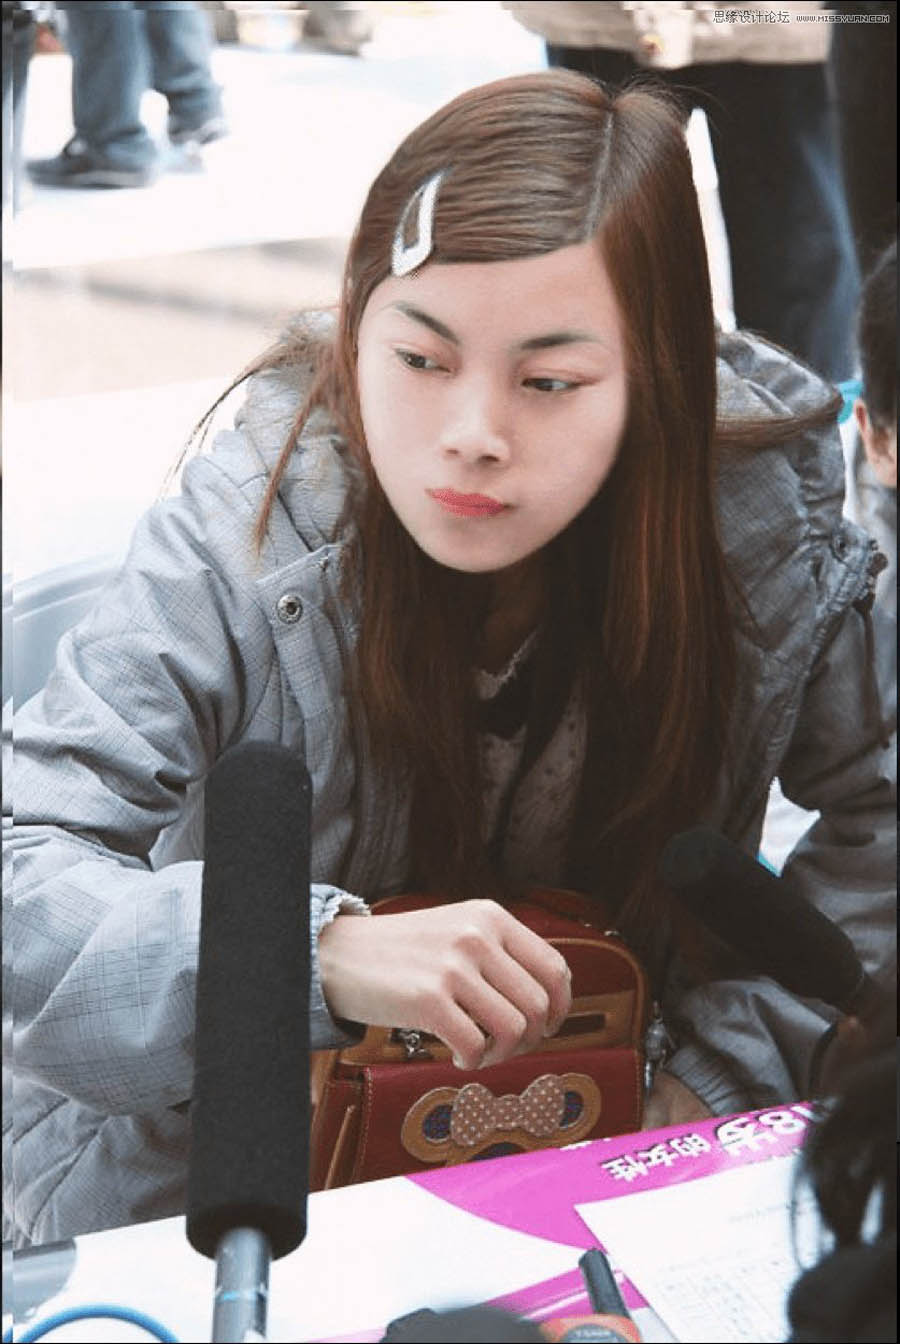
7、只需脸部磨皮处理,添加蒙版,擦除脸部以外的部分。 8、脸部整体虚化后显得气色不佳,新建图层给人物嘴唇上个口红。 9、注意与画面的协调感,调低【饱和度】,不透明度。 10、凸显嘴唇的立体感,还可在嘴唇下方
 情非得已
情非得已
推荐文章
-
 Photoshop制作唯美可爱的女生头像照片2020-03-17
-
 Photoshop快速给人物添加火焰燃烧效果2020-03-12
-
 Photoshop调出人物写真甜美通透艺术效果2020-03-06
-
 Photoshop保留质感修出古铜色人像皮肤2020-03-06
-
 Photoshop制作模特人像柔润的头发效果2020-03-04
-
 古风效果:用PS调出外景人像中国风意境效果2019-11-08
-
 插画效果:用PS把风景照片转插画效果2019-10-21
-
 胶片效果:用PS调出人像复古胶片效果2019-08-02
-
 素描效果:用PS制作人像彩色铅笔画效果2019-07-12
-
 后期精修:用PS给人物皮肤均匀的磨皮2019-05-10
热门文章
-
 Photoshop利用素材制作炫丽的科技背景2021-03-11
-
 Photoshop使用中性灰磨皮法给人像精修2021-02-23
-
 Photoshop制作水彩风格的风景图2021-03-10
-
 Photoshop制作创意的文字排版人像效果2021-03-09
-
 Photoshop制作逼真的投影效果2021-03-11
-
 Photoshop制作故障干扰艺术效果2021-03-09
-
 Photoshop制作被切割的易拉罐效果图2021-03-10
-
 Photoshop制作人物支离破碎的打散效果2021-03-10
-
 怀旧效果:用PS调出人像港式电影胶片效果
相关文章5382019-07-23
-
 黑白效果:用PS调出质感的人像黑白效果
相关文章4342019-07-19
-
 Photoshop调出外景人像照片暗色艺术效果
相关文章3692018-11-03
-
 Photoshop制作抽象主题风格的烟雾效果图
相关文章5532017-05-15
-
 Photoshop简单的制作绚丽的星空头像教程
相关文章35502017-04-19
-
 Photoshop快速制作单色复古艺术效果
相关文章5062017-03-09
-
 Photoshop用创造性光线提升人像作品的质感
相关文章3222016-09-27
-
 Photoshop调出背着花楼的女孩清新通透肤色
相关文章7342016-07-27
