Photoshop合成正在施法的巫师【英】(4)
文章来源于 photoshoptutorials.ws,感谢作者 MARIA SEMELEVICH 给我们带来经精彩的文章!Step 55
Our brush loaded! Now in window Brush Presets, select the brush smoke what you like. I use this.
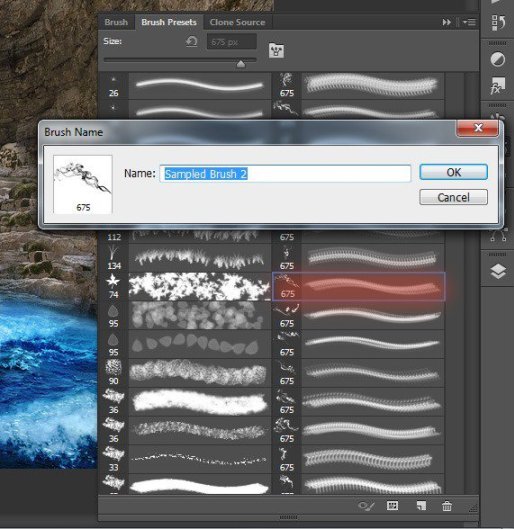
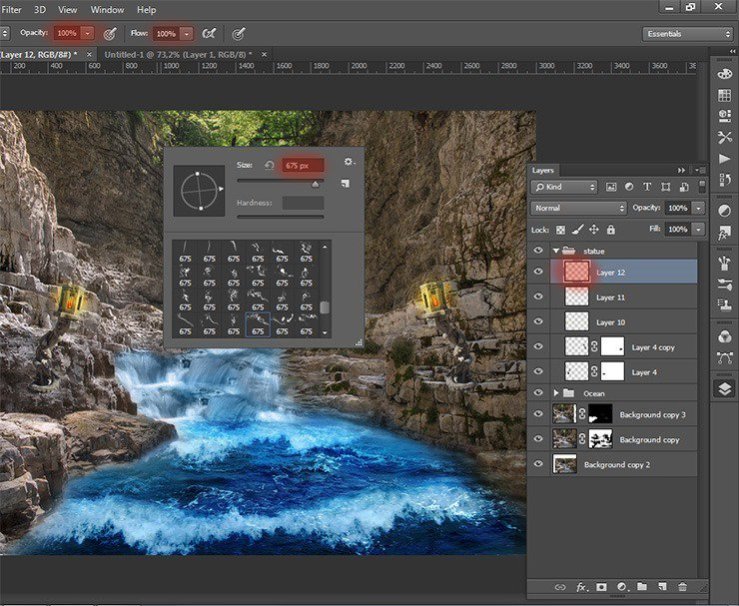
Brush settings: Size: 675px, Hardness: 0% Opacity: 100%, Flow: 100%, color: #dfdfdf, angle: 11° I deliberately did not choose white, because gray will look slightly more realistic than white.
Step 56
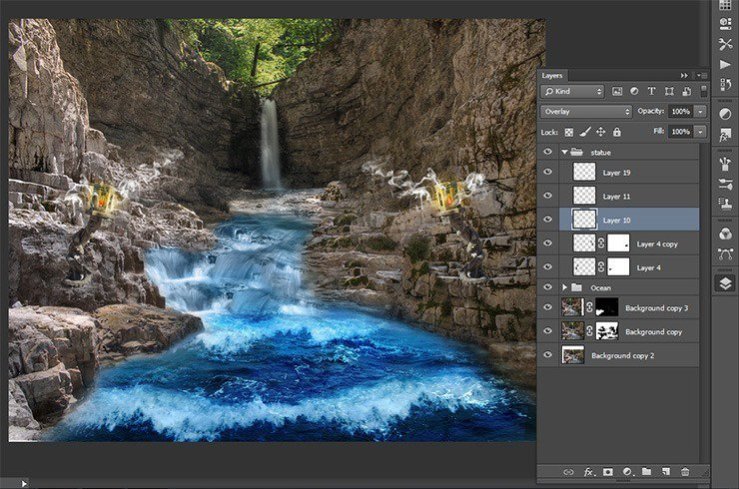
I added more smoke another smoke brush. Tinctures remain the same brush. Here is the result.
Step 57
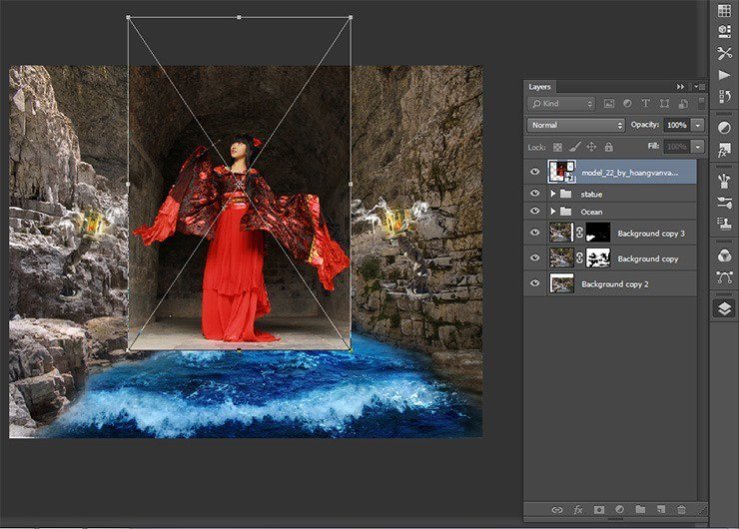
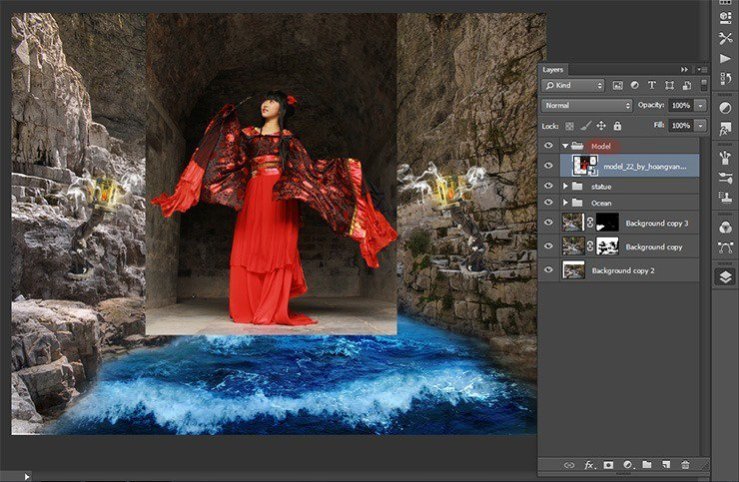
Now proceed to the very delicate and important parts of the image – creating a model. Go to File > Place and select the image of model. Now reduce the size put it at the source of the waterfall.
Step 58
Add a layer with the model in a group. Name it “Model”.
Step 59
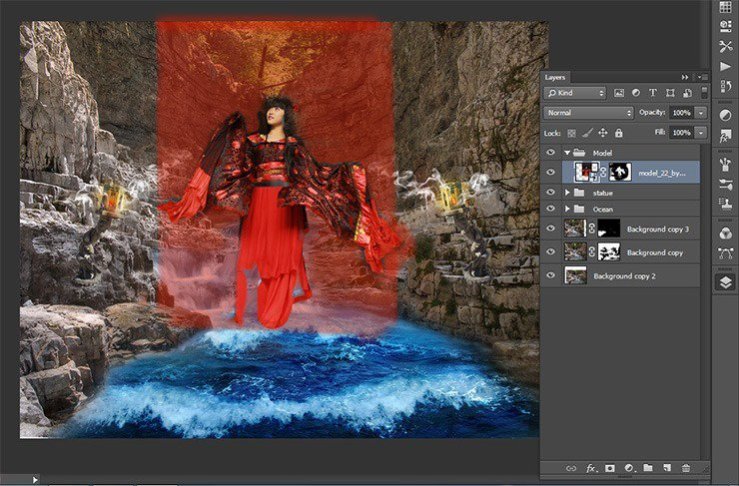
Add a layer mask to a layer with the model. Select Brush Tool (B) with settings: Size: 150px, Hardness: 25% Opacity: 100%, Flow: 100%. Thoroughly clean background. Try not to remove parts of the costume.
Step 60
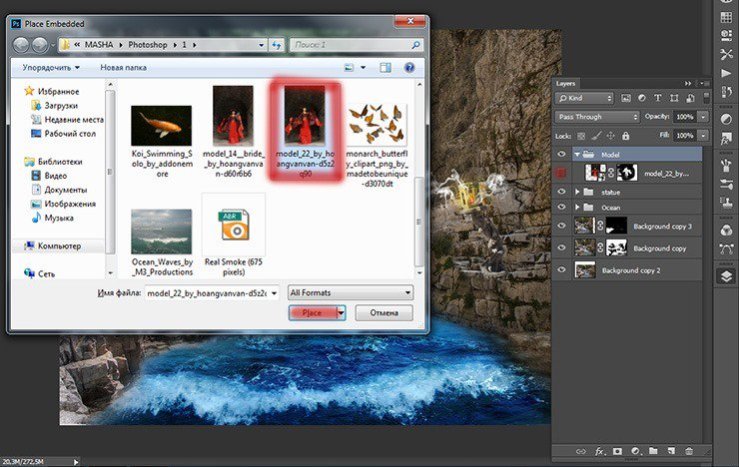
Add the following picture with the model Go to File > Place and select the image of model. Very important to follow the sequence of overlay models differently nothing will turn.
Step 61
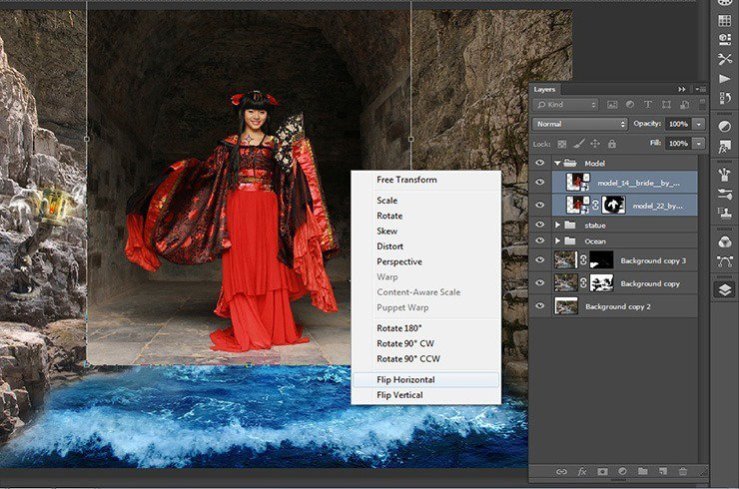
Resize to the size of our model and reflect both models horizontally. Clamp the Shift and click the short key Ctrl+ T, Right click in any field pattern and in drop-down list, select Flip Horizontal.
Step 62
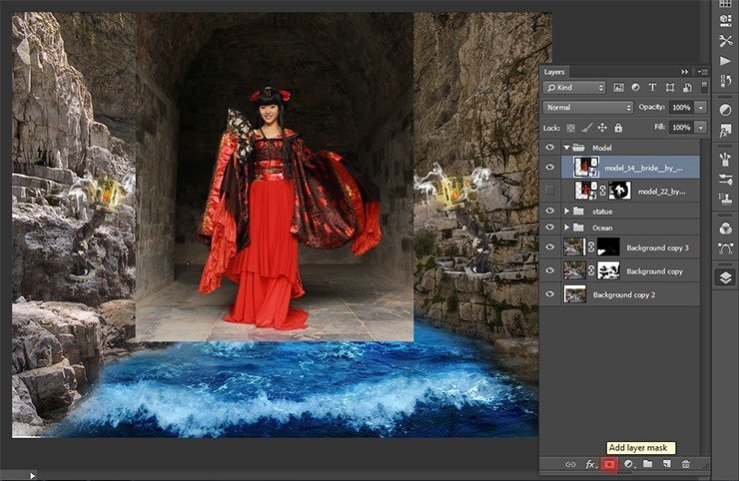
add a mask to layer with second model.
Step 63
Then remove the background with brush in these settings: Size: 150px, Hardness: 0% -100% Opacity: 100%, Flow: 100%. Blue boxes it that you want to remove.
Step 64
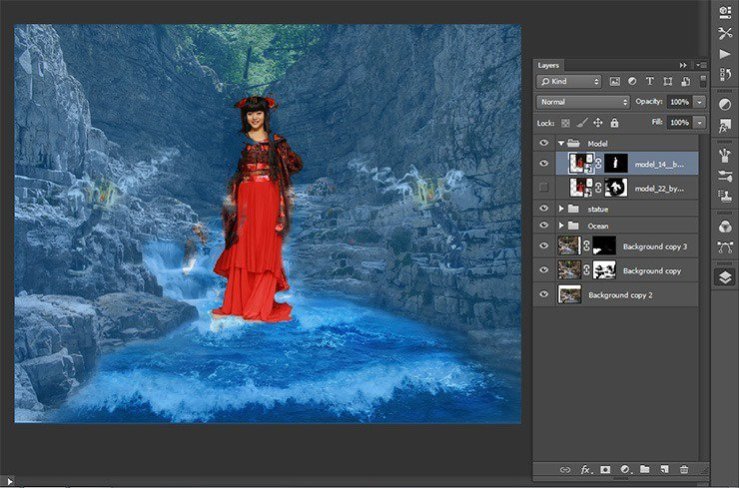
Try to fit the size of the models that they were identical. To do this, transform it, if needed. Remove the background near the dress very carefully! Change the settings hardness brush. Around the model should not be a glow, so remove unnecessary only a very hard brush. This selection of the second model.
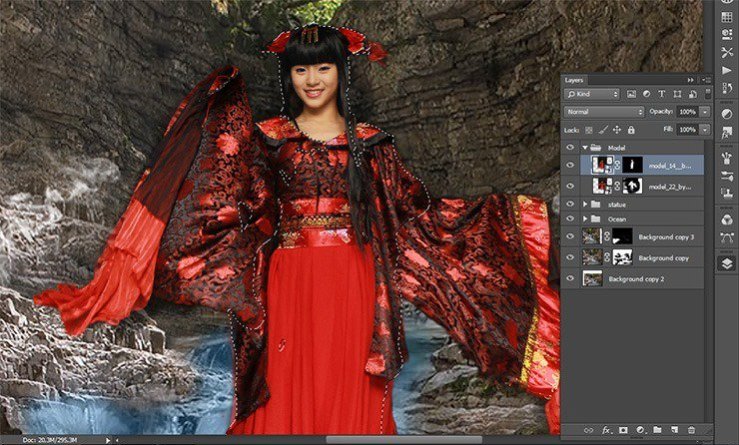
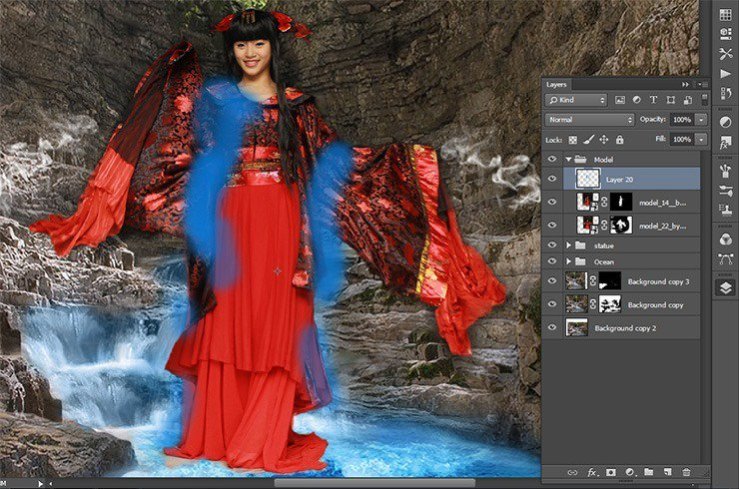
Blue shows where you have to remove the second part of the model to create the figure of what we need. Experiment! Combine hard and soft brush. Remove superfluous.
Step 65
I do not like the expression on her face, so I found a more suitable option. Open girl – angel image, pressing Ctrl+ O or File> Open.
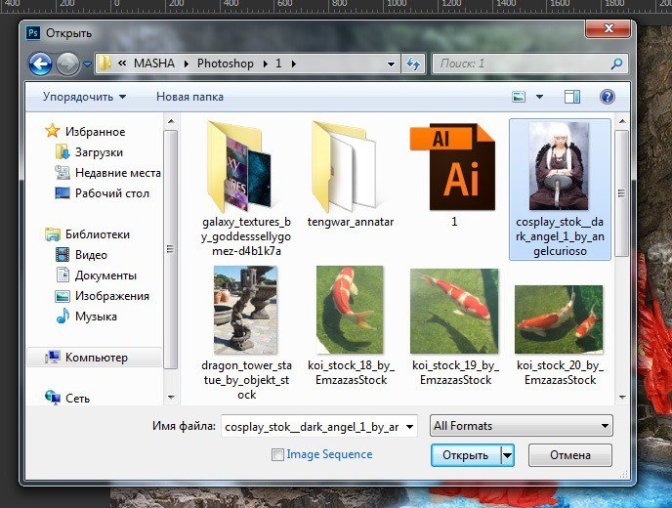
Step 66
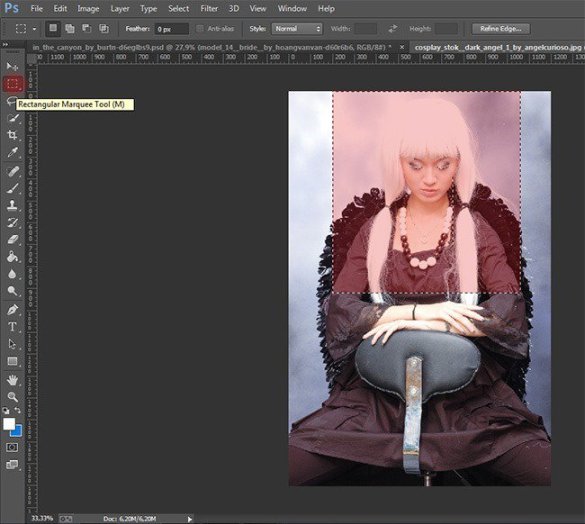
Select the Rectangular Marquee Tool (M) and select the part of the portrait. After selection, click on the Move Tool (V). Grab the selection and drag it to our work.
Step 67
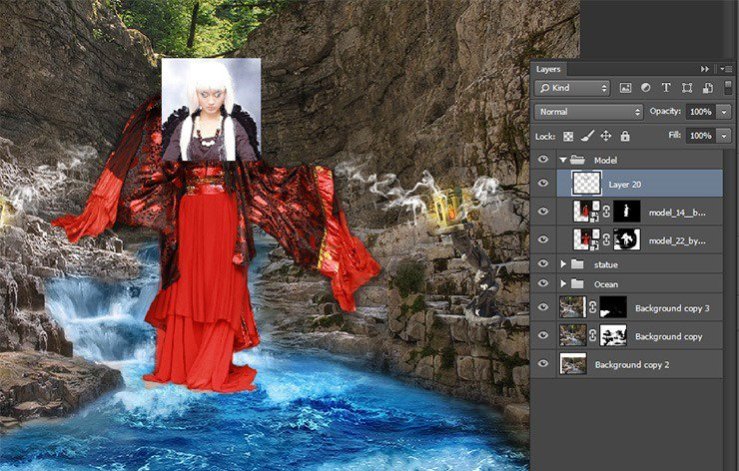
Transform it to the desired size the short key Ctrl+ T. Right click in any field pattern and in drop-down list, select Flip Horizontal.
Step 68
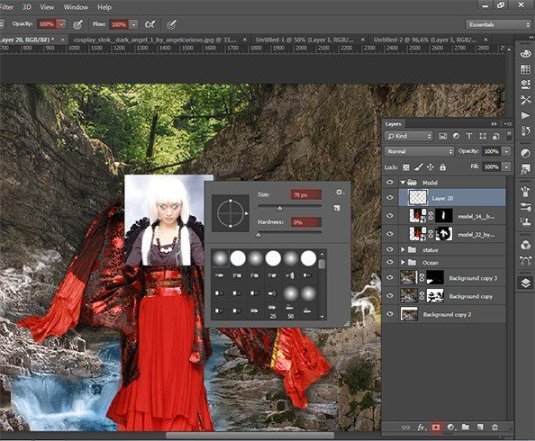
Add a layer mask. Select the Brush Tool (B) and set the following settings: Size: 70px, Hardness: 0% – 100% Opacity: 100%, Flow: 100%.
Step 69
Carefully remove any excess. Remove some of the cheeks using a Brush Tool (B): Size: 50px, Hardness: 0% Opacity: 100% Flow: 70%.
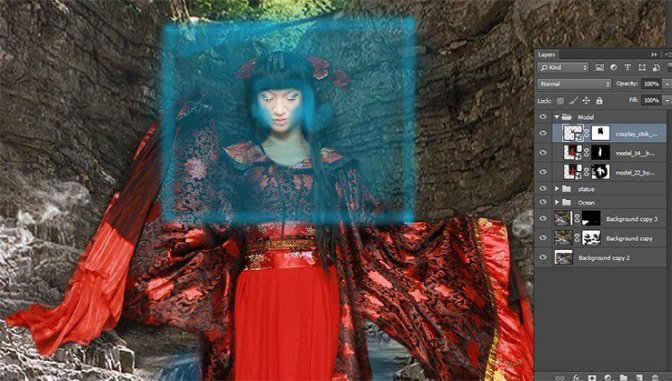
Step 70
The model is almost ready! Go to the layer the first model. Select the Rectangular Marquee Tool (M). Circle the hairpin and copy the short key Ctrl+ C. Paste it the short key Ctrl+ V and Flip Horizontal. Put it symmetrically second.
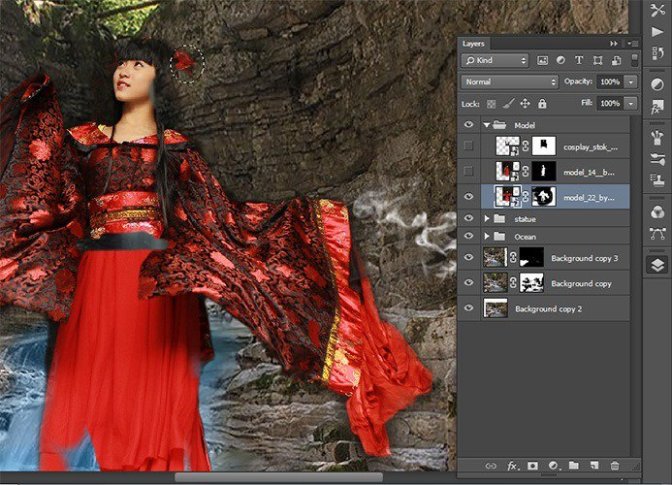
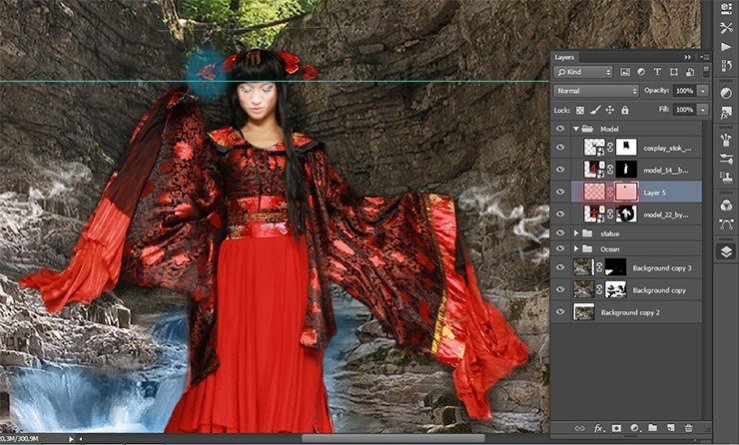
Step 71
Finally, I made a model. Here is the finished result.
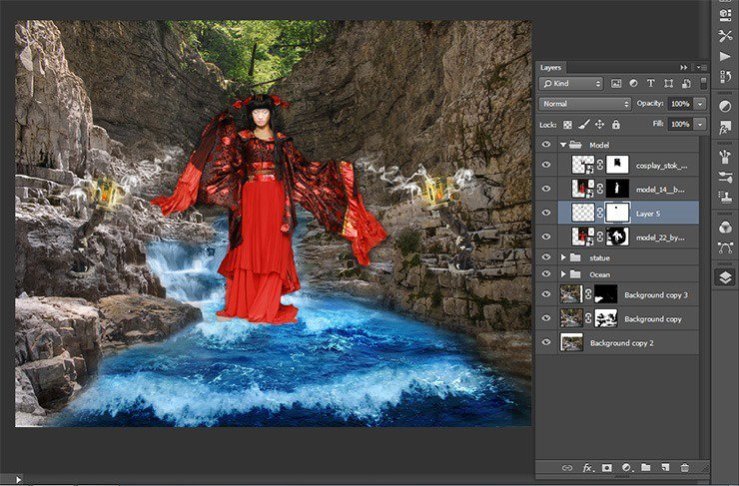
Step 72
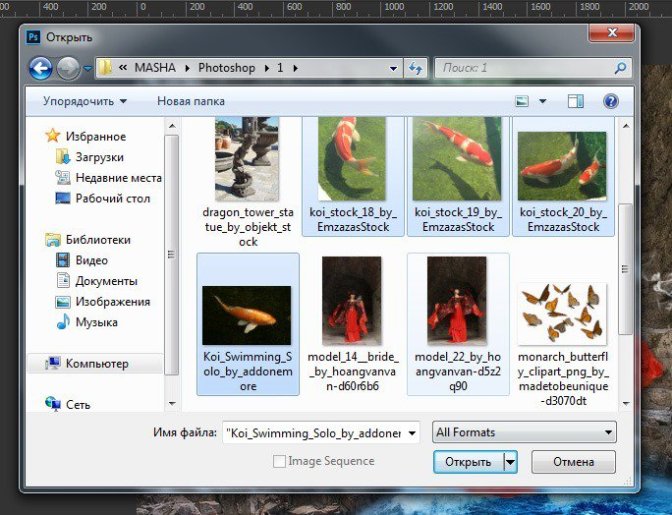
Now add the fish in the picture, because it will be very difficult to work with small objects. I believe that the fish give a dynamic picture. Let’s get started! Open fish image, pressing Ctrl+ O or File> Open. To open multiple images at once, hold down the Shift.
Step 73
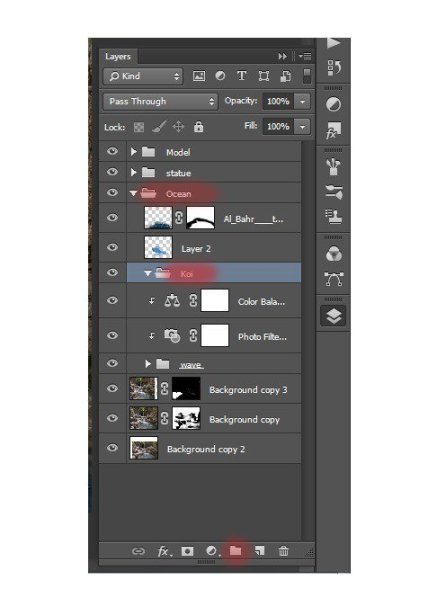
So back to the group “Ocean”. Create a group there. Call it “Koi”. So, it will be easier to work with layers.
 情非得已
情非得已
-
 Photoshop制作复古风格的老照片效果【英】2018-04-23
-
 Photoshop合成长着创意大树的长颈鹿【英】2018-04-23
-
 Photoshop合成冰冻特效的金鱼场景【英】2018-02-10
-
 Photoshop合成梦幻风格的森林场景【英】2018-02-10
-
 Photoshop合成正在施法的巫师【英】2018-02-10
-
 Photoshop制作金属质感的3D立体字【英】2018-01-09
-
 Photoshop设计火焰燃烧艺术字教程【英】2018-01-09
-
 Photoshop制作复古风格的老照片效果【英】
相关文章11882018-04-23
-
 Photoshop合成长着创意大树的长颈鹿【英】
相关文章13832018-04-23
-
 Photoshop合成冰冻特效的金鱼场景【英】
相关文章34052018-02-10
-
 Photoshop制作黄金质感立体字【英】
相关文章7422018-02-10
-
 Photoshop制作惊艳大气的3D立体字
相关文章14682018-02-10
-
 Photoshop合成梦幻风格的森林场景【英】
相关文章24492018-02-10
-
 Photoshop制作复古双重曝光字体
相关文章6532018-01-09
-
 Photoshop制作木地板LOGO刻印效果【英】
相关文章19272018-01-09
