PS设计教程网欢迎你!

Photoshop设计Wordpress博客模版以及切片(3)

文章来源于 ximumu.cn,感谢作者 情非得已 给我们带来经精彩的文章!
设计教程/PS教程/其他教程2009-11-05
Step7--内容和定位 新建一个CSS文件,首先要给每一个容器(DIV)做定位,这可能是一个比较难的工作,其实认真做就会感觉也很简单,你只要确定它们的高度;宽度和浮动. 现在要给每一个容器定义CSS属性,首先要明确类名和ID名

Step7--内容和定位

新建一个CSS文件,首先要给每一个容器(DIV)做定位,这可能是一个比较难的工作,其实认真做就会感觉也很简单,你只要确定它们的高度;宽度和浮动.

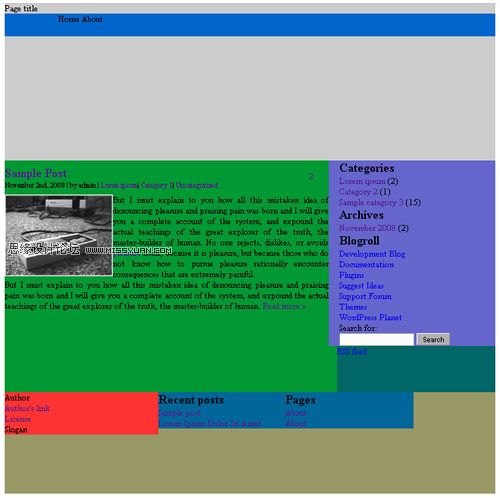
现在要给每一个容器定义CSS属性,首先要明确类名和ID名,还要把相同的属性的字符都找出来.请认真的检查第五步里的HTML文件中的类名.别外说一点,在这里可以用明亮的背景颜色来显示出每个容器的空间.(等到最后一步,可以把这些背景删掉)而背景的图片的尺寸可以从第四步中量出.

body
   {
   margin: 0px;
   padding: 0px;
   text-align: center;
   }

h1, h2, h3, ul, li, p, form
   {
   margin: 0px;
   padding: 0px
   }

hr
   {
   display: none;
   }

a{
   text-decoration:none;
   }

a:hover{
   text-decoration:underline;
   }

.space
   {
   clear: both;
   }

#page
   {
   margin: 0px auto;
   padding: 0;
   width: 960px;
   }

#header
   {
   background:#CCCCCC;
 height: 308px;
   width: 960px;
   text-align: center;
   }

#headerimg
   {
   margin: 0px;
   text-align: left;
   }

#top_nav
   {
   background-color:#0066CC;
   height: 45px;
   padding-left: 105px;
   text-align: left;
   }

 #top_nav ul
   {
   list-style: none;
   }

   #top_nav li
   {
   display: inline;
   }

   #top_nav li a:hover
   {
   }

#content
   {
   background: #009933;
   float: left;
   text-align: left;
   }

.blogcontent
   {
   float: left;
   padding: 10px 0px;
   width: 635px;
   }

.post
   {
   text-align: left;
   }

 .post h2
   {
   padding: 0px;
   }

 .post .post_title
   {
   float: left;
   width: 90%;
   }

   .post_title h2, a
   {
   padding: 0px;
   margin: 0px;
   }

   .post_title a
   {
   text-decoration: none;
   }

   .post_title a:hover
   {
   }

   .post_title small
   {
   }

   .post_title small a
   {
   padding: 0px;
   margin: 0px;
   }

   .post .postmetadata
   {
   float: right;
   height: 34px;
   padding: 12px 5px;
   width: 35px;
   }

   .postmetadata a
   {
   text-decoration: none;
   }

   .postmetadata span
   {
   padding-left:5px;
   }

.entry
   {
   }

 .entry a
   {
   padding: 0px;
   margin: 0px;
   }

   .entry a:hover
   {
   }

   .entry blockquote
   {
   border: 2px dashed #042748;
   }

   .entry img
   {
   float: left;
   }

   .entry ul
   {
   }

   .entry li
   {

   }

   .entry ol li
   {
   list-style: decimal;
   }

   .entry p
   {
   text-align: justify;
   padding: 0px;
   }

   .entry span
   {
   }

#sidebar
   {
   background-color:#6666CC;
   float: left;
   padding: 0px 20px;
   text-align: left;
   width: 285px;
   }

 #sidebar ul
   {
   list-style: none;
   margin: 0px;
   }

   #sidebar li
   {
   margin: 0px;
   }

   #sidebar li h2
   {
   margin: 0px;
   }

 #sidebar ul ul
   {
   list-style: none;
   margin: 0px;
   }

   #sidebar ul ul li
   {
   margin: 0px;
   }

   #sidebar ul ul li a
   {
   }

   #sidebar ul ul li a:hover
   {
   }

.bottom_sidebar
   {
   background-color:#006666;
   float: right;
   height: 90px;
   width: 310px;
   }

#search
   {  }

 #search input
   {

 }

#search #searchsubmit
   {
   background: #b1b1b1;
}

#footer
   {
   background:#999966;
   height: 200px;
   text-align: left;
   width: 960px;/*909*/
   }

 #footer .column1
   {
   background:#FF3333;
   float: left;
 width: 300px;
   }

   .column1 .bottom
   {

}

   .column1 a
   {
   text-decoration: none;
   }

   #footer .column2
   {
   background-color:#006699;
   float: left;
   width: 250px;
   }

   .column2 h2
   {
   }

   .column2 ul
   {
   list-style: none;
   }

   .column2 a
   {
   text-decoration: none;
   }

编好代码后在你的浏览器中测试效果,在此之前加上必要的图片,最终效果如下:

Photoshop设计Wordpress博客模版以及切片

Step8--添加背景

好,现在开始添加背景图像了,这时我们就用到前面那些切割出的的图片了,因为城市背景是固定的,但是我们想要类似浮动的效果,该要怎么做呢,还记得第四步吗?让我们动手来做吧.

body
   {
 background: #000000 url('./images/jpgs/bg-image.jpg') fixed no-repeat bottom center;
 margin: 0px;
 padding: 0px;
 text-align: center;
 }

 #header
   {
   background: url('./images/pngs/header-960x308.png') no-repeat top left;
   height: 308px;
   width: 960px;
   text-align: center;
   }

#content
   {
   background: url('./images/pngs/bg-635x1.png') repeat-y top left;
   float: left;
   text-align: left;
   }

#sidebar
   {
   background: url('./images/pngs/bg-325x1.png') repeat-y top left;
   float: left;
   padding: 0px 20px;
   text-align: left;
   width: 285px;
   }

.bottom_sidebar
   {
   background: url('./images/pngs/bottom-325x90.png') no-repeat bottom center;
   float: right;
   padding: 0px 0px 0px 15px;
   height: 90px;
   text-align: left;
   width: 310px;
   }

#footer
   {
   background: url('./images/pngs/footer-960x200.png') no-repeat top left;
   height: 200px;
   text-align: left;
   width: 960px;
   }

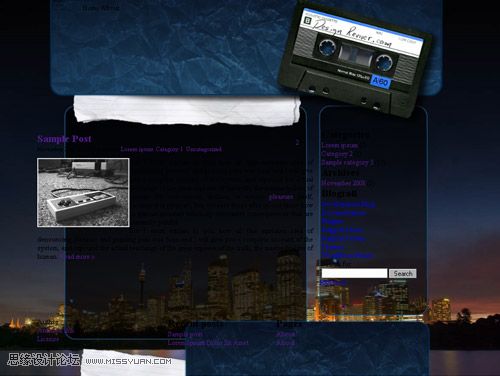
最终在浏览器效果如下:

Photoshop设计Wordpress博客模版以及切片

Step9--添加前景图片

添加LOGO,导航链接,评论背景,RSS图标,等等.
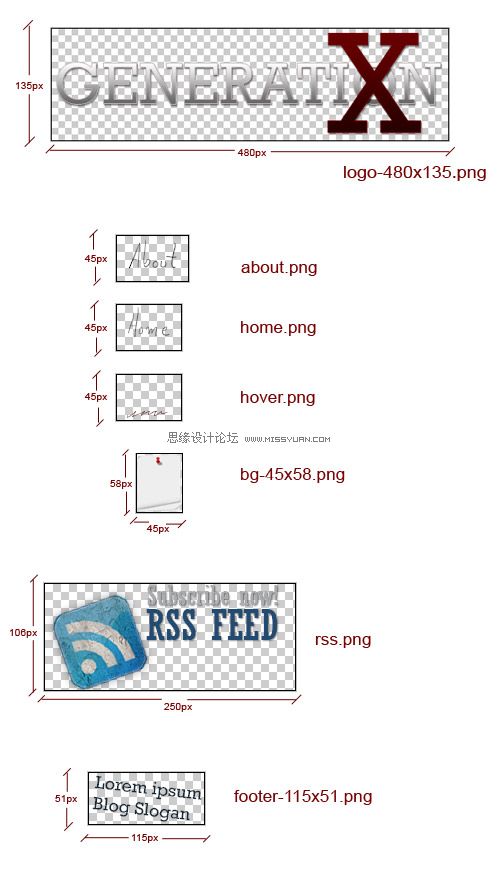
Photoshop设计Wordpress博客模版以及切片

<div id="header">
  <div id="headerimg">
   <a href="#"><img

  </div>
  <div id="top_nav">
   <ul>
    <li><a href="#"><img     <li><a href="#"><img

   </ul>
  </div>
 </div>
 <div class="bottom_sidebar">   <a href="#"><img <div class="bottom">   <img

为每个图像添加应有的CSS属性

#headerimg
{
  height: 185px;
  margin: 0px;
  padding: 55px 0px 0px 45px;
  text-align: left;
 }

#top_nav
{
  height: 45px;
  padding-left: 105px;
  text-align: left;
}

#top_nav li a:hover
{
   background: url('./images/pngs/hover.png') no-repeat bottom center;
}

.bottom_sidebar
{
  background: url('./images/pngs/bottom-325x90.png') no-repeat bottom center;
  float: right;
  padding: 0px 0px 0px 15px;
  height: 90px;
  text-align: left;
  width: 310px;
 }

.post .postmetadata{ background: url('./images/pngs/bg-45x58.png') no-repeat top left; float: right; height: 34px; padding: 12px 10px; width: 25px;}

 #footer .column1
 {
 float: left;
 font: normal 10px Arial;
 padding: 0px 0px 0px 80px;
 width: 300px;
 }

 .column1 .bottom
 {
  padding: 50px 0px 0px 40px;
 }

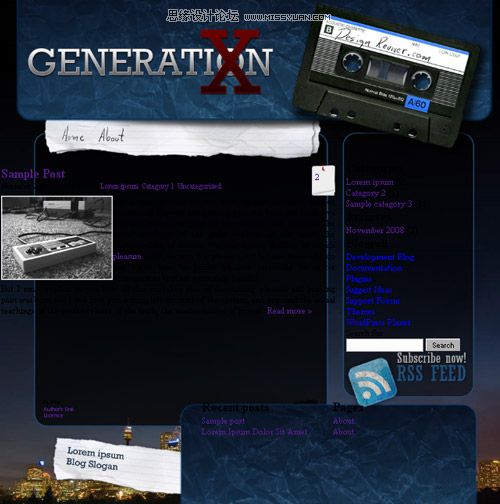
在浏览器中的效果:

Photoshop设计Wordpress博客模版以及切片

版权所有PS设计教程网公安备案:苏公网安备 32058302001023号工信部备案:沪ICP备09005587号
aaa