Photoshop鼠绘教程:绘制矢量效果的红灯笼(4)
文章来源于 ximumu.cn,感谢作者 夕木木 给我们带来经精彩的文章!设计教程/PS教程/鼠绘教程2010-01-03
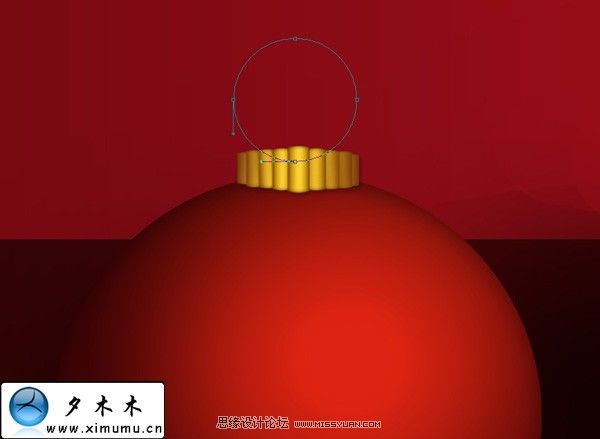
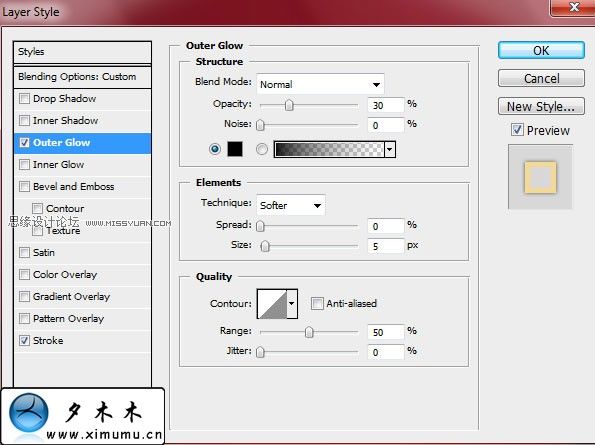
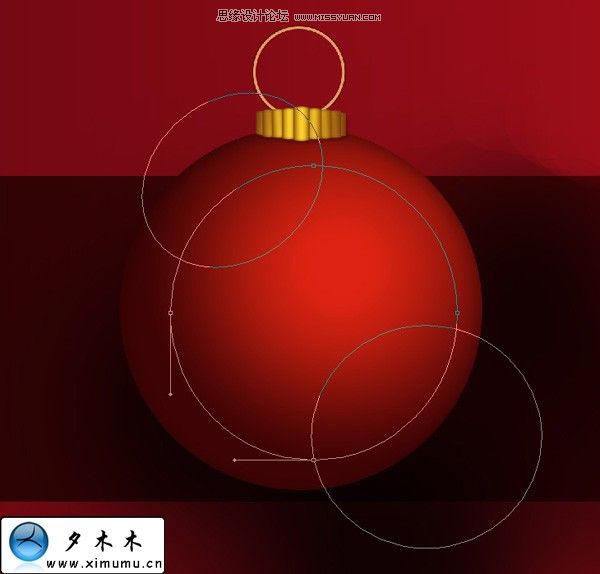
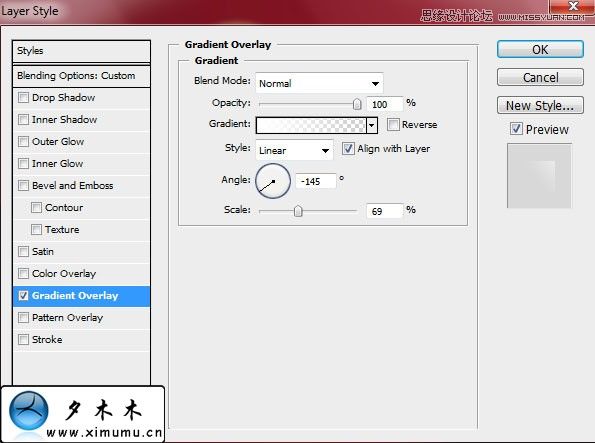
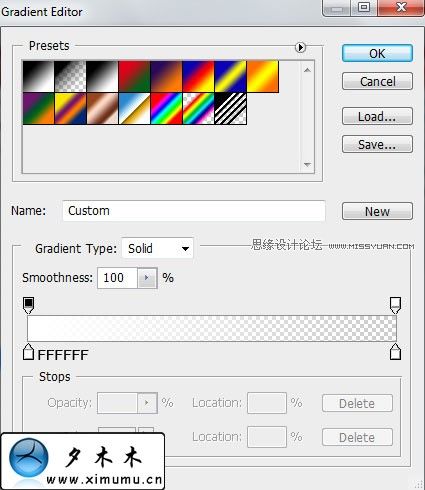
11.新建一个图层,我们来给灯笼做一个圆环.使用矢量椭圆工具画出一个小正圆. 给这个小圆添加一个外发光和描边. 12.现在给这个灯笼添加一个高光.使用矢量椭圆工具,画三个圆.并设置如下: 13.减去不要的部分,然后添加一
 情非得已
情非得已
推荐文章
-
 Photoshop绘制磨砂风格的插画作品2021-03-16
-
 Photoshop结合AI制作扁平化滑轮少女插画2021-03-11
-
 Photoshop结合AI绘制扁平化风格的少女插画2020-03-13
-
 Photoshop结合AI绘制春字主题插画作品2020-03-13
-
 Photoshop绘制时尚大气的手机APP图标2020-03-12
-
 Photoshop绘制立体感十足的手机图标2020-03-12
-
 玻璃瓶绘画:PS绘制玻璃质感的魔法瓶2020-03-11
-
 像素工厂:用PS设计等距像素的工厂图标2019-03-20
-
 圣诞老人:使用PS绘制圣诞老人插画2019-02-21
-
 Lumix相机:PS绘制粉色的照相机教程2019-01-18
热门文章
-
 Photoshop结合AI制作扁平化滑轮少女插画2021-03-11
-
 Photoshop绘制磨砂风格的插画作品2021-03-16
-
 Photoshop结合AI制作扁平化滑轮少女插画
相关文章2032021-03-11
-
 Photoshop结合AI绘制春字主题插画作品
相关文章4762020-03-13
-
 玻璃瓶绘画:PS绘制玻璃质感的魔法瓶
相关文章5282020-03-11
-
 建筑插画:PS结合AE制作摩天轮插画
相关文章5722019-01-17
-
 蝴蝶结绘画:PS绘制逼真的蝴蝶结图标
相关文章7222019-01-07
-
 商业插画:PS绘制逼真的DC海王插画
相关文章8962018-12-20
-
 Photoshop绘制毛茸茸的猫咪效果图
相关文章8252018-11-08
-
 Photoshop绘制绚丽的荷花效果图
相关文章15152018-09-26
