Photoshop绘制时尚立体效果的音箱造型图标(2)
文章来源于 站酷,感谢作者 xinyi_2009 给我们带来经精彩的文章!设计教程/PS教程/鼠绘教程2016-04-13
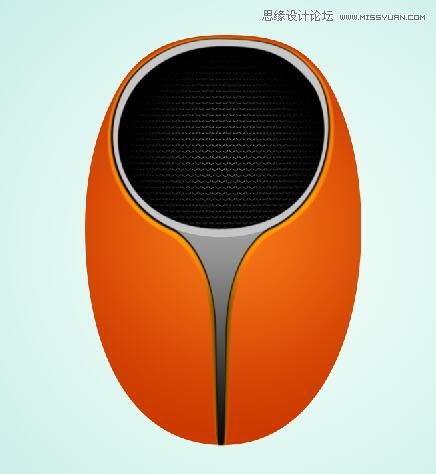
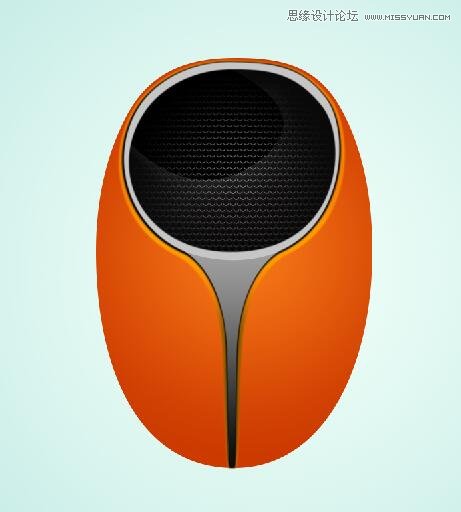
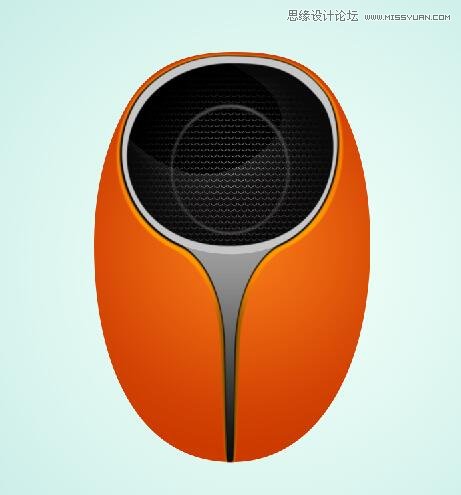
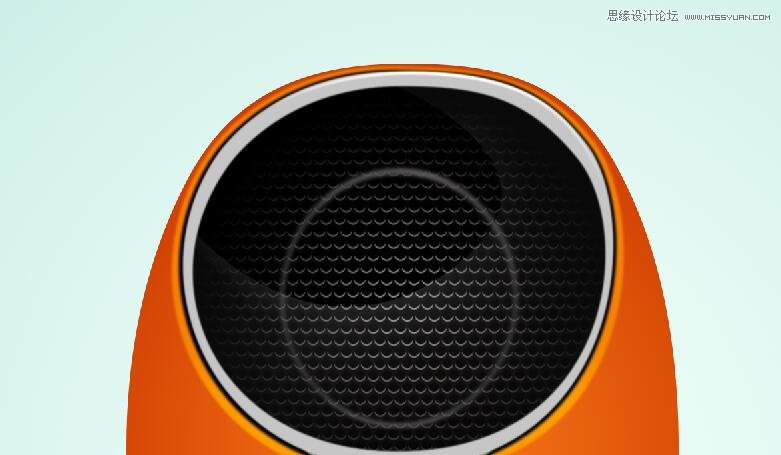
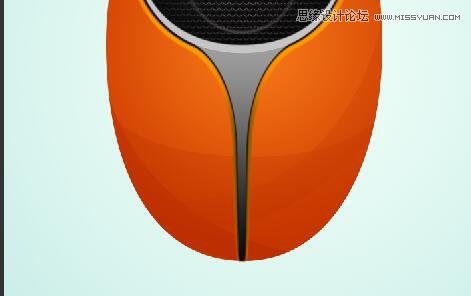
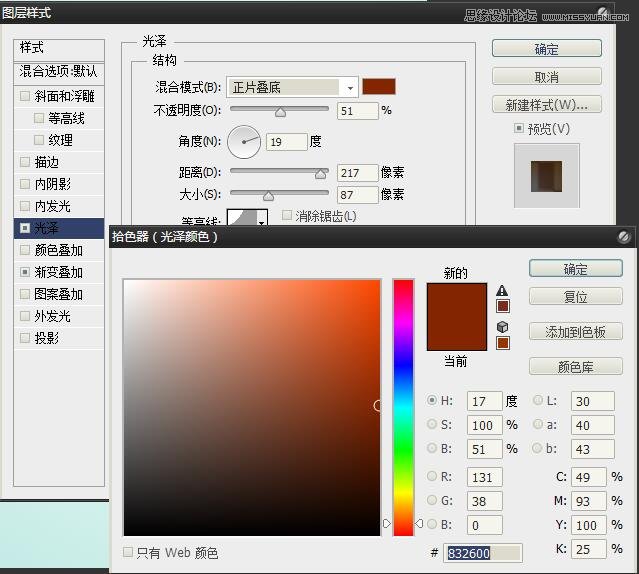
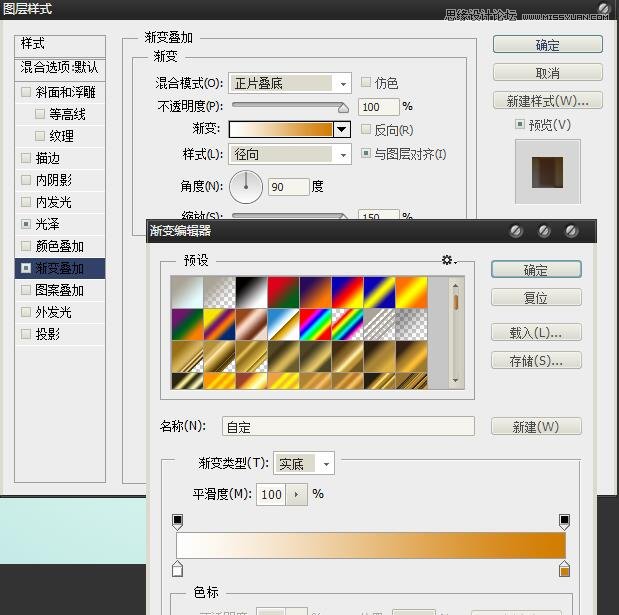
7、继续按照同样的方法绘制音箱造型的其他区域,并分别调整其颜色等形态,增强音箱造型的效果。 8、新建一个图层,在音箱的顶端流线处绘制一条路径,完成后设置较小的画笔并应用描边路径命令,应用模拟压力描边效果

 情非得已
情非得已
推荐文章
-
 Photoshop绘制磨砂风格的插画作品2021-03-16
-
 Photoshop结合AI制作扁平化滑轮少女插画2021-03-11
-
 Photoshop结合AI绘制扁平化风格的少女插画2020-03-13
-
 Photoshop结合AI绘制春字主题插画作品2020-03-13
-
 Photoshop绘制时尚大气的手机APP图标2020-03-12
-
 Photoshop绘制立体感十足的手机图标2020-03-12
-
 玻璃瓶绘画:PS绘制玻璃质感的魔法瓶2020-03-11
-
 像素工厂:用PS设计等距像素的工厂图标2019-03-20
-
 圣诞老人:使用PS绘制圣诞老人插画2019-02-21
-
 Lumix相机:PS绘制粉色的照相机教程2019-01-18
热门文章
-
Photoshop结合AI制作扁平化滑轮少女插画2021-03-11
-
Photoshop绘制磨砂风格的插画作品2021-03-16
-
 Photoshop绘制立体风格的序章图标
相关文章8612020-04-01
Photoshop绘制立体风格的序章图标
相关文章8612020-04-01
-
Photoshop绘制时尚大气的手机APP图标
相关文章19852020-03-12
-
Photoshop绘制立体感十足的手机图标
相关文章6362020-03-12
-
像素工厂:用PS设计等距像素的工厂图标
相关文章12942019-03-20
-
 MBE插画:PS绘制简约的书本图标教程
相关文章4842019-01-18
MBE插画:PS绘制简约的书本图标教程
相关文章4842019-01-18
-
 小黄人图标:PS绘制小黄人拟物图标
相关文章17502019-01-14
小黄人图标:PS绘制小黄人拟物图标
相关文章17502019-01-14
-
 蝴蝶结绘画:PS绘制逼真的蝴蝶结图标
相关文章7222019-01-07
蝴蝶结绘画:PS绘制逼真的蝴蝶结图标
相关文章7222019-01-07
-
 火箭绘画:PS绘制简笔画风格的火箭图标
相关文章6352018-12-23
火箭绘画:PS绘制简笔画风格的火箭图标
相关文章6352018-12-23
