Photoshop绘制逼真的油漆毛刷
文章来源于 ICONFANS,感谢作者 LDL 给我们带来经精彩的文章!先看看效果图
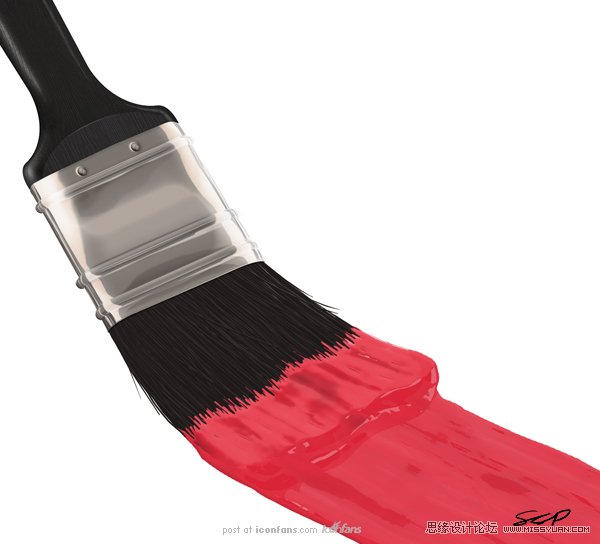
Creating still-life objects inPhotoshop is often great practice for learning how to create other objects. Intoday’s tutorial we will demonstrate how to create a realistic-looking paintbrush using layer styles, clipping masks, andthe not-so-commonly-used blend if sliders. Let’s get started!
使用photoshop创建静态物体往往是学习制作其他对象的很好的实践练习。在今天的教程中,我们将演示如何使用图层样式,剪切蒙板以及不常用的混合颜色带,制作一个写实漆刷,让我们开始吧!
Step 1
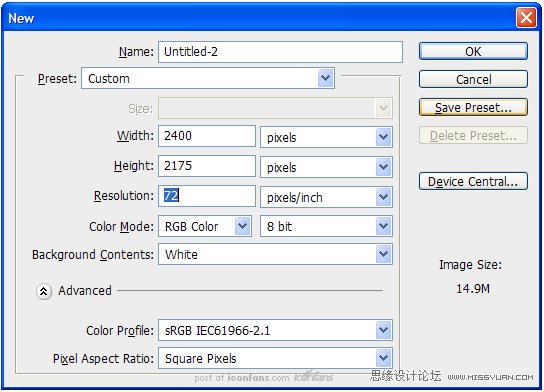
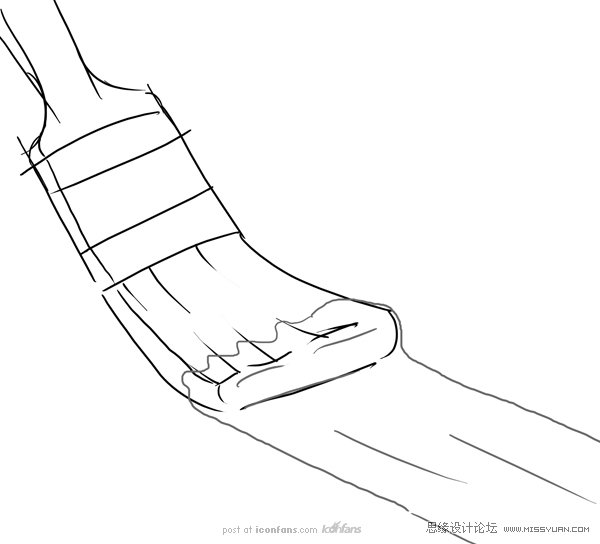
Create a new document (2400px x2175 px). Sketch out a scene of a paintbrush.
(创建一个新的文档(2400px x 2175px),勾画一个漆刷的场景。)
Step 2
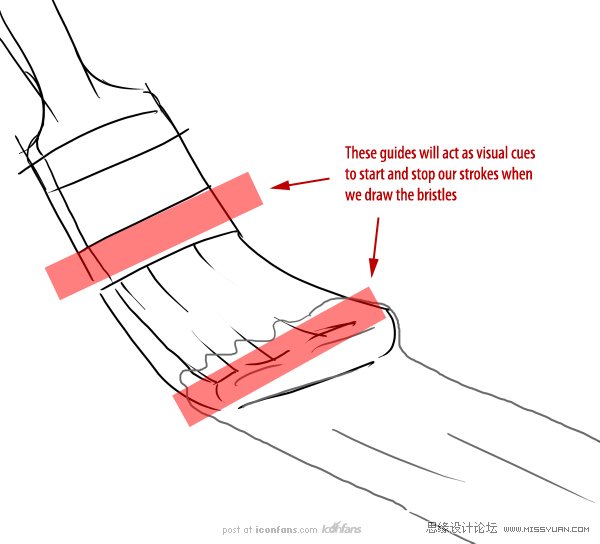
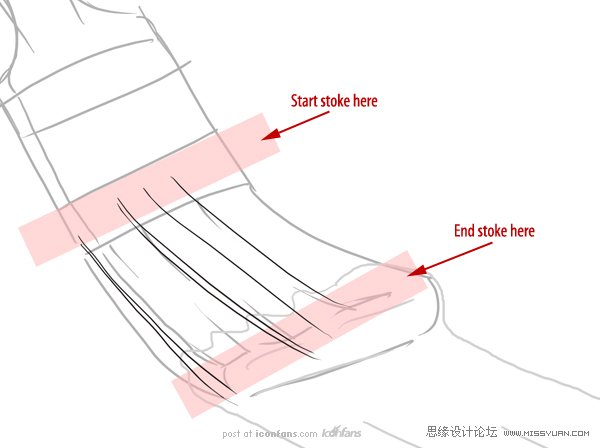
This step is optional, but I’veadded some additional visual guides to help me draw the bristles.
(这一步是可选择的,但是我已经增加了一写额外的视觉指示来帮助我画刷毛。)这些指示将会形象的表现出画刷毛的起始端和结束端。
Step 3
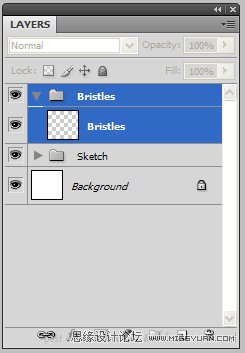
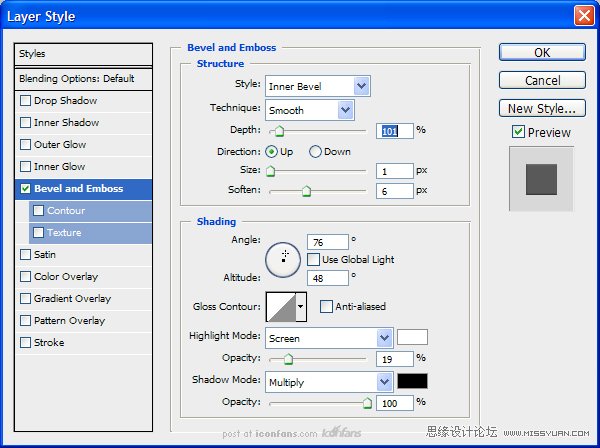
Before we start drawingbristles, create a New Group called “Bristles.” Inside this group, create alayer called “Bristles” and add the following Layer Style.
(在我们开始绘制刷毛前,先创建一个新组命名为“Bristles” 。在这个组里,创建一个名为“Bristles”的图层,并添加下面的图层样式。)
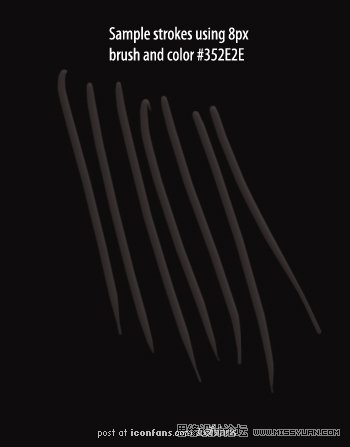
用8px的刷子,颜色#352E2E
Step 4
Duplicate the empty layer 5times. Since we are making a lot of bristles, we are going to be drawing themon five separate layers. If we tried to draw them all on one layer, the strokeswould blend together and ruin the layer style that’s applied. Select thebottom-most layer in the “Bristles” group and, with a small brush, startdrawing lines using the guides and sketch as references.
(复制空白图层5次。我们要画制很多刷毛,所以我们要在5个分开的图层上画。如果我试图仅在一个图层上画所有的刷毛,那当图层被应用时,这些笔画将混在一起,破坏了图层效果。在“Bristles”组里选择一个最底端的图层,用小号刷子,以指示和草图作为参考,开始画制线条。)
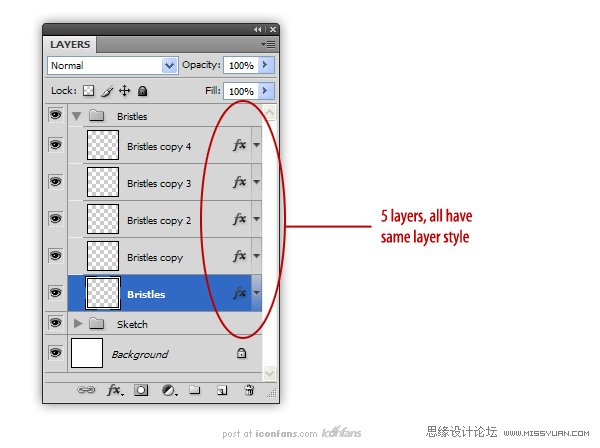
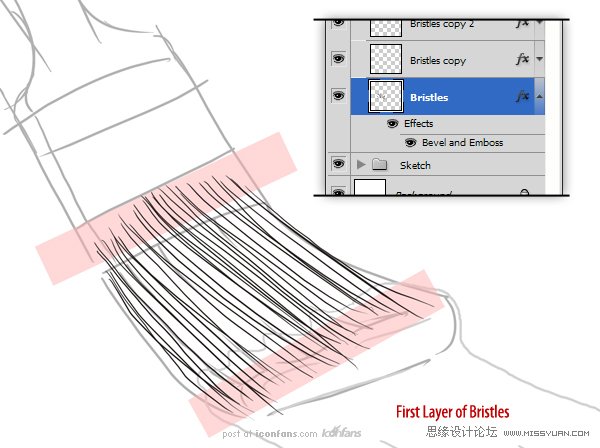
(5个图层,全部使用相同的图层样式)
Step 5
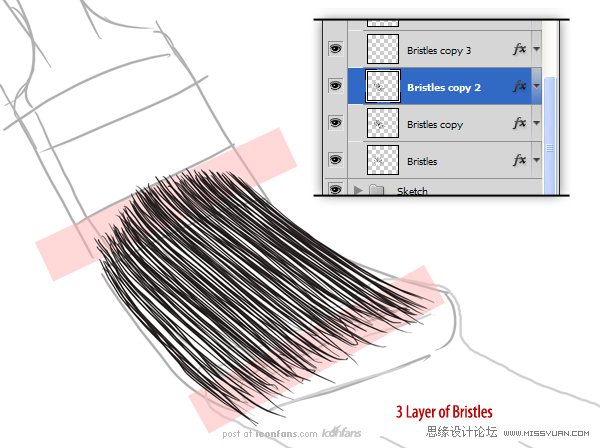
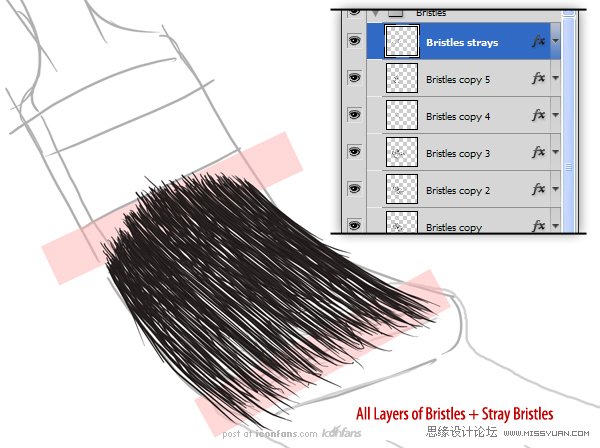
Continue drawing bristles onthe remaining four layers, adding some variation and stray bristles as you go.Feel free to add more layers as you see necessary.
(在四个图层上保持一样地继续绘制刷毛,添加一些变化和波浪刷毛。你觉得必要的话,可以随意添加一些图层。)
 情非得已
情非得已
-
 Photoshop绘制磨砂风格的插画作品2021-03-16
-
 Photoshop结合AI制作扁平化滑轮少女插画2021-03-11
-
 Photoshop结合AI绘制扁平化风格的少女插画2020-03-13
-
 Photoshop结合AI绘制春字主题插画作品2020-03-13
-
 Photoshop绘制时尚大气的手机APP图标2020-03-12
-
 Photoshop绘制立体感十足的手机图标2020-03-12
-
 玻璃瓶绘画:PS绘制玻璃质感的魔法瓶2020-03-11
-
 像素工厂:用PS设计等距像素的工厂图标2019-03-20
-
 圣诞老人:使用PS绘制圣诞老人插画2019-02-21
-
 Lumix相机:PS绘制粉色的照相机教程2019-01-18
-
 Photoshop结合AI制作扁平化滑轮少女插画2021-03-11
-
 Photoshop绘制磨砂风格的插画作品2021-03-16
-
 蝴蝶结绘画:PS绘制逼真的蝴蝶结图标
相关文章7222019-01-07
-
 商业插画:PS绘制逼真的DC海王插画
相关文章8962018-12-20
-
 Photoshop绘制立体逼真的拟物仪表盘图标
相关文章19312018-11-03
-
 Photoshop绘制逼真的超凡蜘蛛侠教程
相关文章11872018-09-17
-
 Photoshop绘制逼真的游戏宝箱图标
相关文章4902018-09-12
-
 Photoshop鼠绘逼真的音响图标教程
相关文章8722018-09-03
-
 Photoshop绘制逼真的美国队长盾牌教程
相关文章14742018-08-23
-
 Photoshop绘制逼真的汽车仪表盘教程
相关文章12252018-08-16
